Lets get a few things out of the way, before the pictures become a little misleading – as of now, Big Jenny the Shuttle Bus Tiny Home is living a stationary life in Upstate New York. While she technically is road ready, I’m weary of bringing the chassis that fell victim to the rust typical of vehicles in Upstate New York. I originally had aspirations of taking her on long road trips, but instead am saving up to get a van thats either new or from the south – and rust free. Below, I’ve broken down the process and costs of converting the shuttle bus –
Table of Contents
- Purchase and Delivery
- Gutting the Interior
- Subfloor and Insulation
- Installing the Wood Floor
- Batteries, Electric and Safety
- Choosing a Layout
- Kitchen and Plumbing
- Building the Bed
- Rear Wall and Headboard
- Living Area
- Lighting
- Bathroom (or lack thereof)
- Finishing Touches

The mostly finished product is a tiny home that is perfect for a simple living space for part of the year, or a way to save big on rent if you have somewhere with facilities that you can park monthly for a low cost. Please do not base a purchase or a build just because of this article, as there could be more suitable ways to do some things – but use it for all the inspiration and brainstorming you’d like!
The tables that provide cost breakdowns contain some estimates for things that I already owned or was given for free, but for the most part, all costs are pretty accurately represented. There are some hyperlinks to the exact products that I used, which I earn a very small commission on if you happen to click the link and buy – this helps to fund both this website and future van additions!
Step 1: Purchase and Delivery
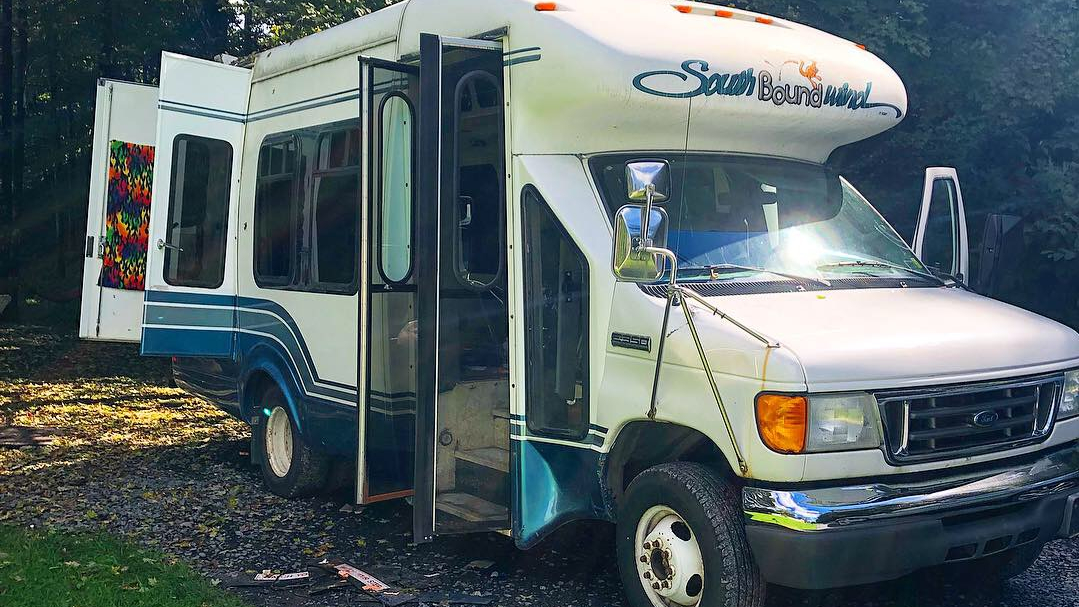
I was initially browsing craiglist for a tent last September, and by the magic of the mixed up categorization algorithms, came across the van pictured above. Or rather – shuttle bus – as it initially served as the mode of transportation for elderly folk (and their personal transportation devices) between the retirement home and doctors appointments, matinee shows, grocery stores and bingo competitions. When I first started thinking of doing a project like this, I wasn’t sure what type of vehicle I wanted to go with – but I knew that I wanted to be able to stand inside. And this van definitely let me do that!
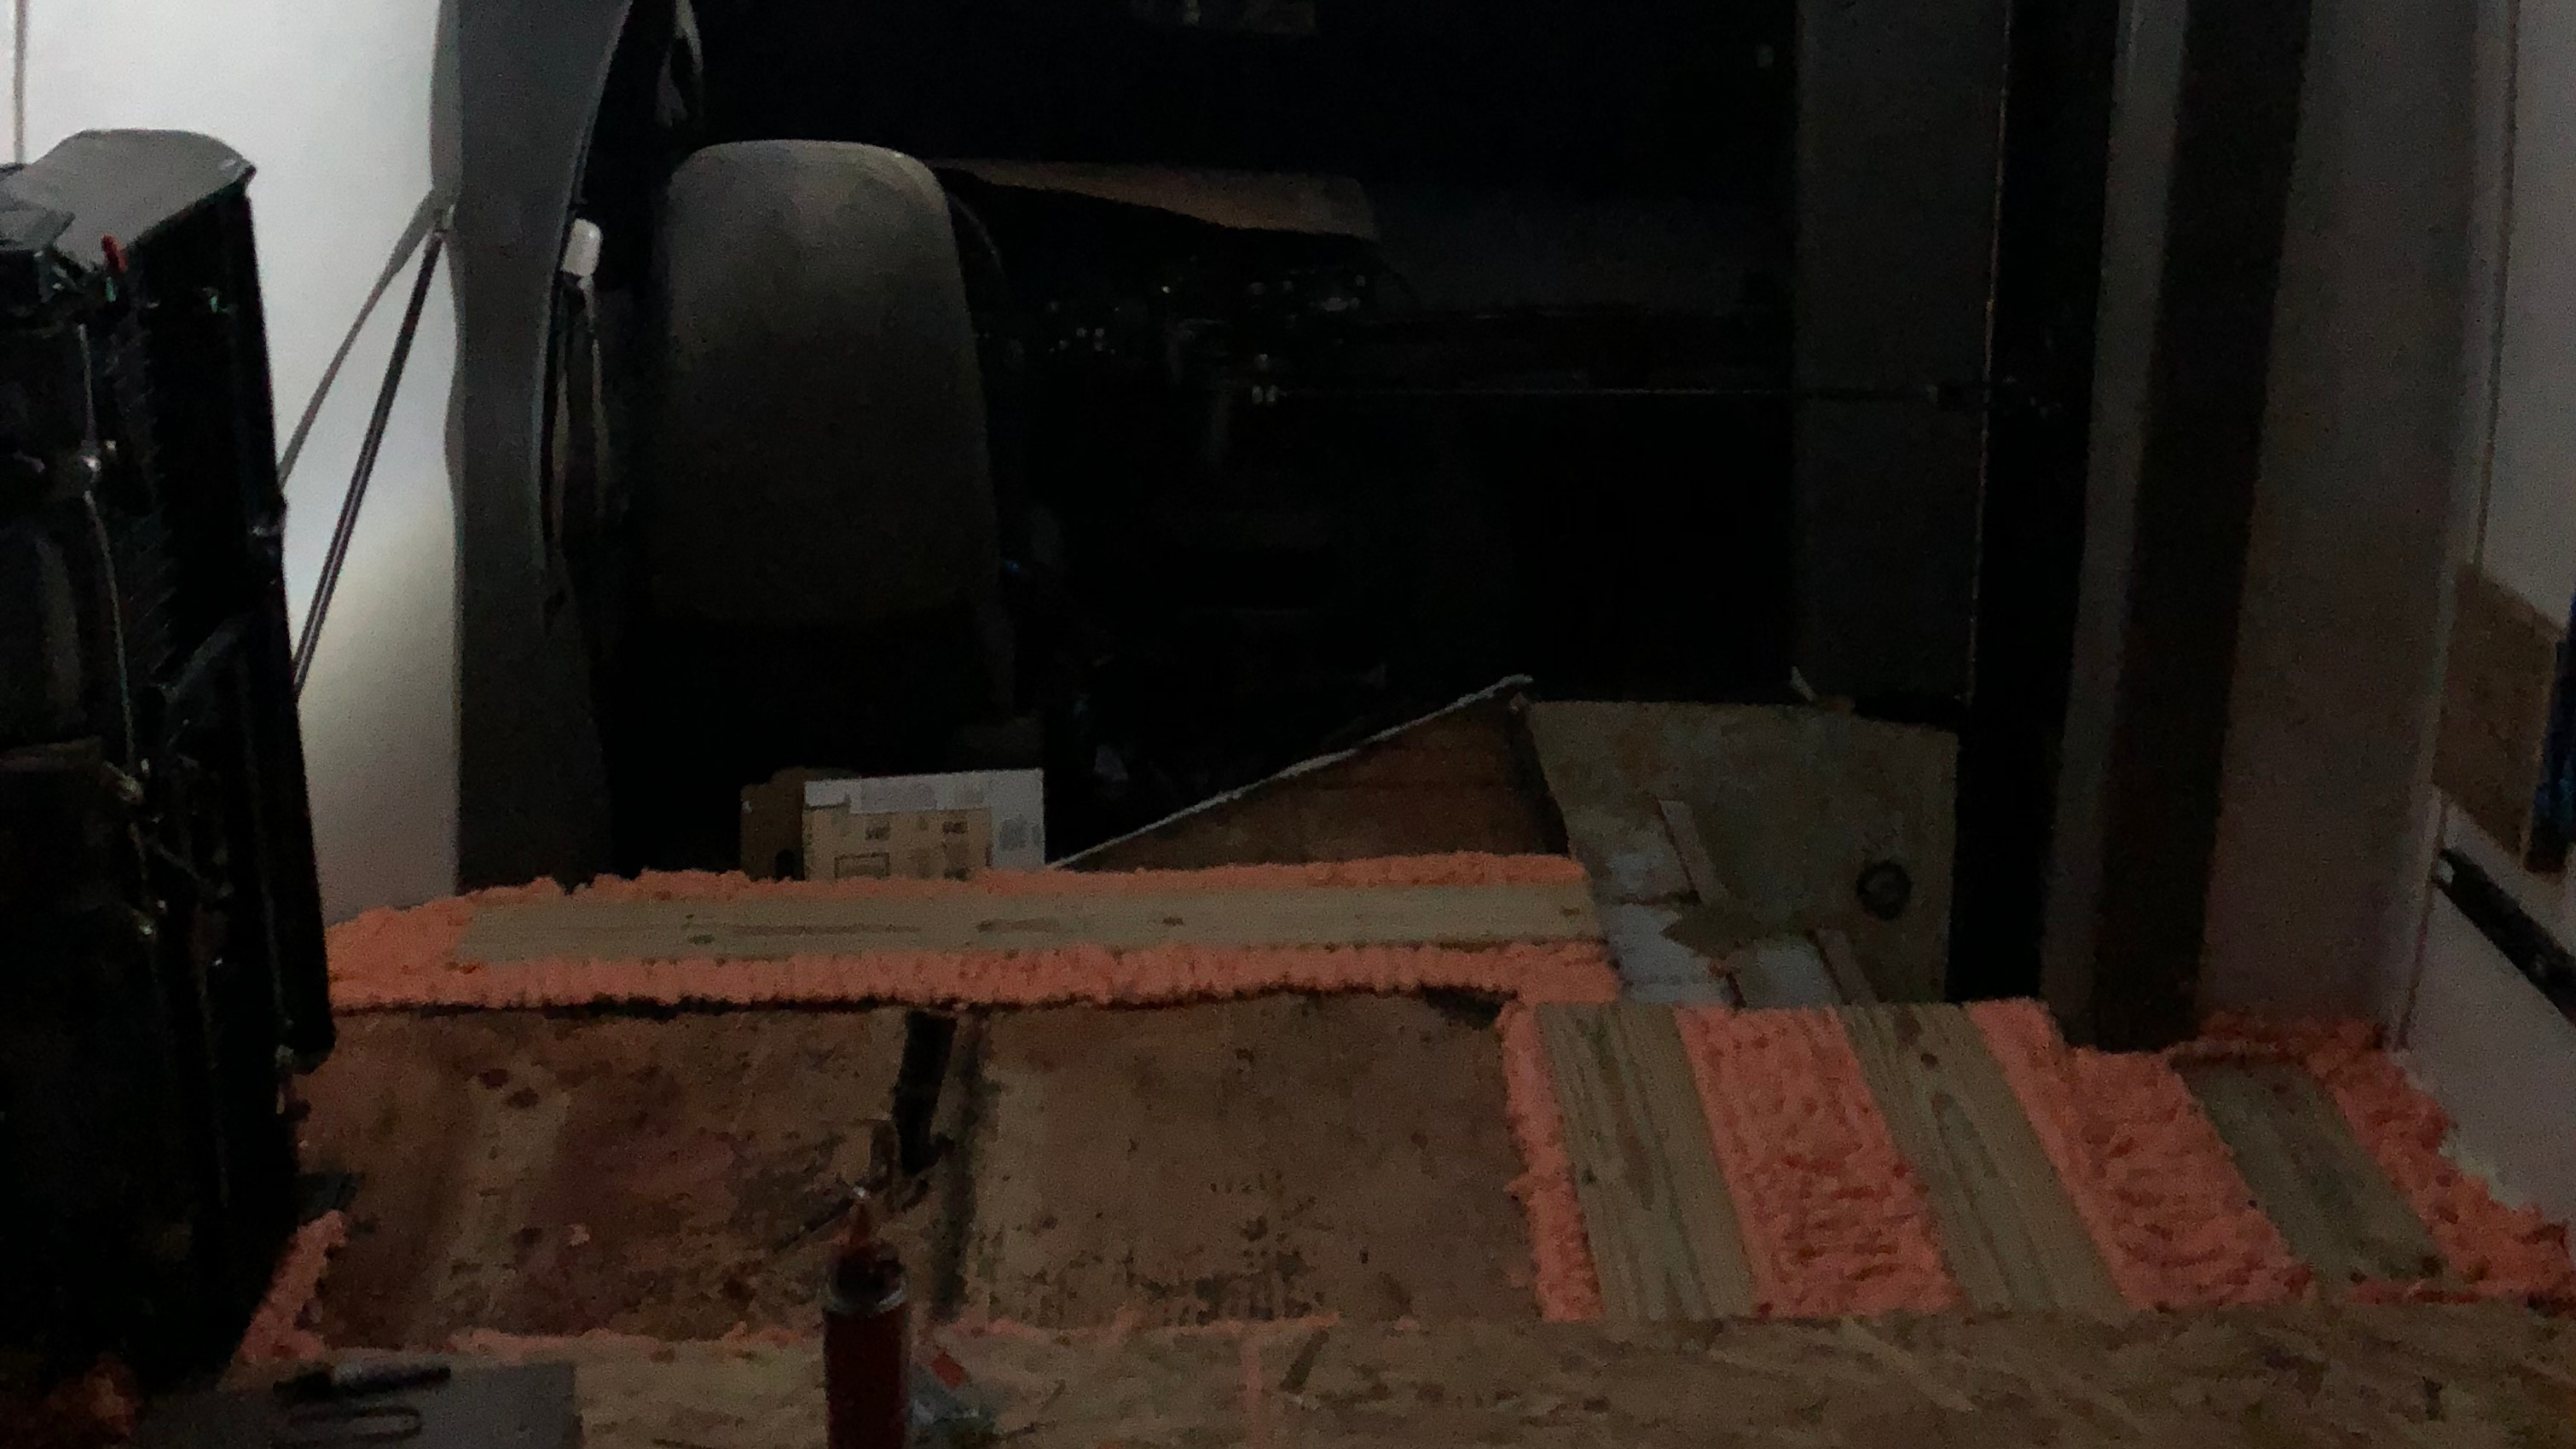
When I came across it, it had already been mostly gutted, with a simple bed constructed over some blue shag carpet. The previous owner had done a very simple build-out, and used for a few camping trips over the years. Unfortunately, I was so excited to get started with my project that I didn’t take a true ‘before’ picture other than the one below. Wasn’t a huge fan of the fleece flame curtains in the rear, or the particularly ‘clean’ blue carpet.
I was able to negotiate with the previous owner, and arranged for him to drive the bus the 100 miles to my house (I watched him drive it up, so I can validate that it did in fact run and drive quite well) for the total sum of $4,100. With only 67,000 miles on the engine, it still purs nicely when I give it a start to charge up the batteries, and has no issue starting up (after one of the build costs of a new battery, detailed below).
| Item | Cost |
| Bus | $4,100 |
| Inspection | $10 |
| Estimated Tax | $327 |
| New Starter Battery | $129 |
| Total | $4,566 |
Step 2: Gutting the Interior

I quickly began to gut the interior of the bus, removing the old carpet, rubber floor, and minivan seat, small desk and bed-frame. I salvaged any wood that was still usable, as well as some of the carpeting for cleanup/mess containment during the floor insulation process. I left the folding bench seat behind the drivers seat in place, as it functions quite well in the build serving as a little sitting area. It also looked like a total pain in the arse to get that thing out.

It started out as kind of fun, but after a while it did become quite tiresome. Even with using a crowbar, my back and hands were aching after working to remove the rubber subfloor. It had dry-rotted a bit over the years, and so everytime I thought I was about to efficiently remove another large piece, it would rip and I would have to start working up another corner again. Not my favorite part of the build – if you’ve got friends with nothing to do, you might be able to entice their help with a 6 pack (maybe even a 12 pack).
Step 3: Subfloor and Insulation

After getting the floor stripped down to the base plywood layers, I began reinforcing and raising it to prepare for the insulation. Below are the materials used for this step in the process:
| Item | # | Total Cost |
| 1×8 Pressure Treated Pine floor risers | 10 pieces | $75 |
| #10 1 3/4 Inch Wood Screws | 100 | $12 |
| 1/2″ 4×8 Pine Plywood | 8 sheets | $80 |
| Great Stuff Foam Insulation | 8 cans | $65 |
| Great Stuff Foam Applicator Gun | 1 | $45 |
| Wood Sealant, roller, paint tray | 1 gallon | $15 |
| Tools (drill, jigsaw, circular saw) | 1 each | $75 |
| Sub-Floor and Insulation Total Cost | $367 |
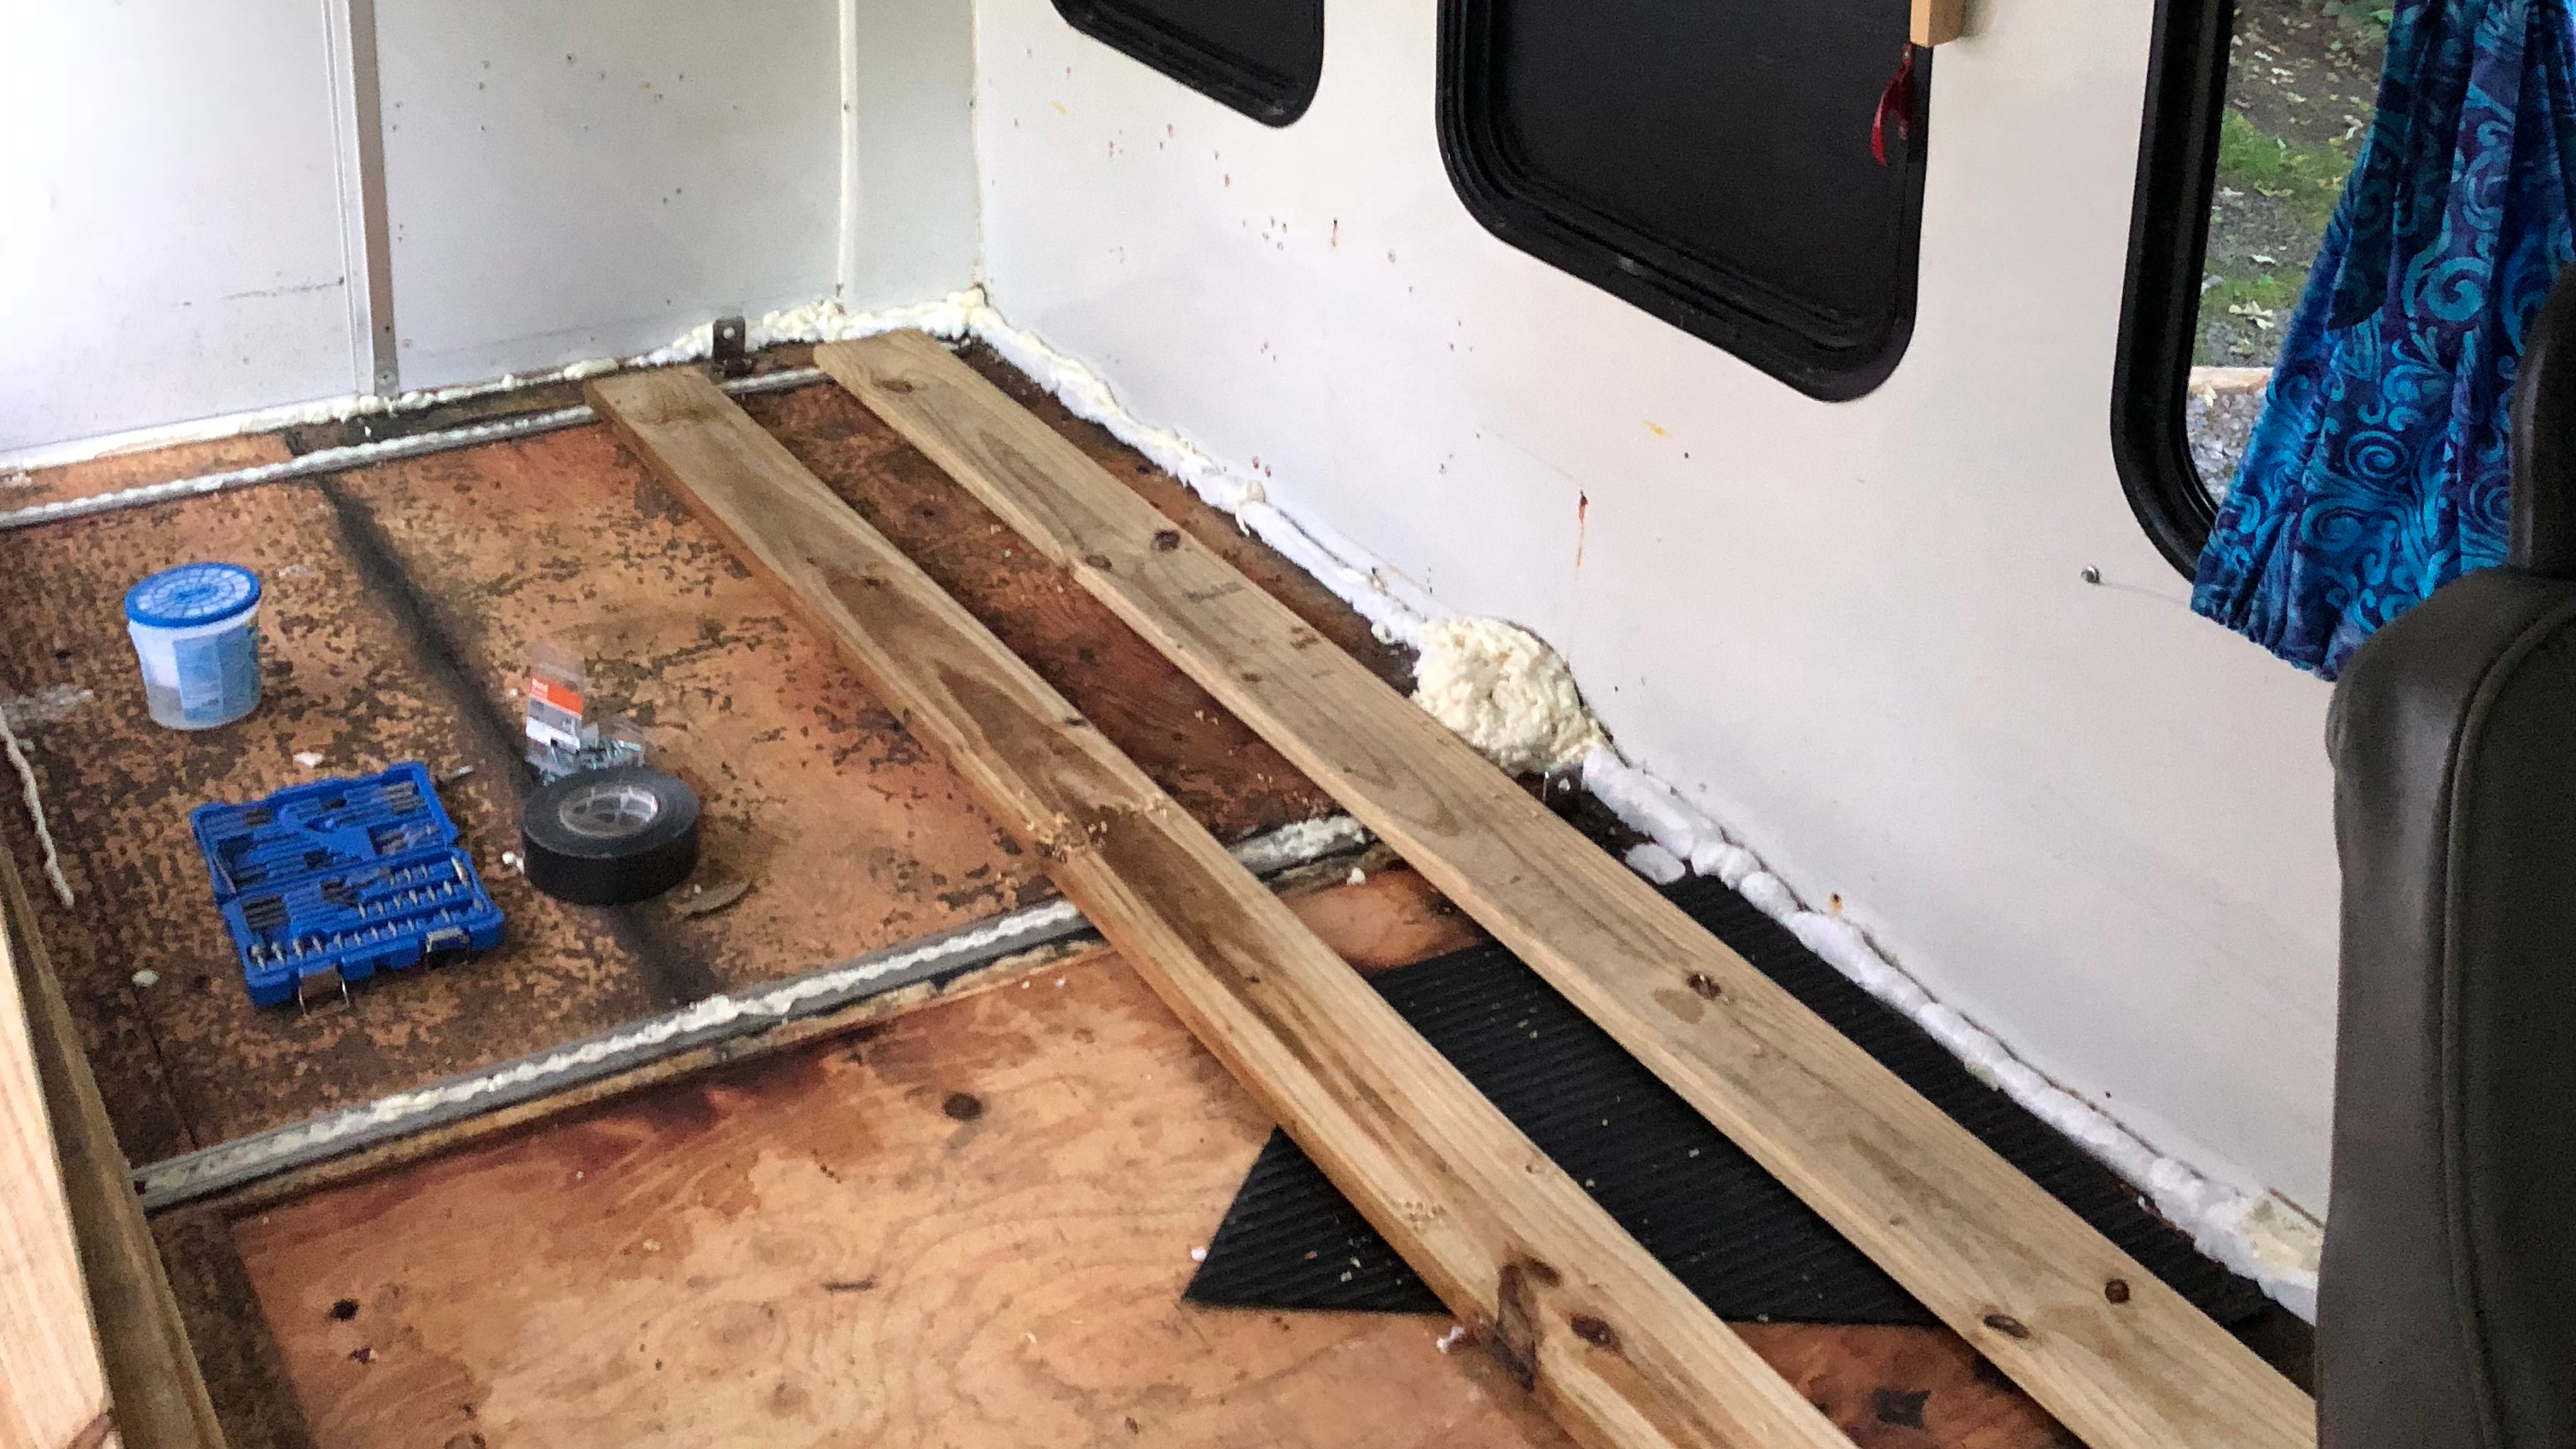
Using the 1×8 lengths of wood, I essentially raised the floor an inch to allow space for the insulation between the beams. I separated them by 6 inches, and attached with 6 screws per piece of wood. In hindsight, I should have fully insulated a layer on top of the plywood part, but thats something you learn as you go along, and it wasn’t worth ripping up the floor again to fix. Below, you can see the spacing between the beams, with the Great Stuff foam insulation between each section. This is also another recommendation for anyone else – you’ll save a lot of time (and forearm strength) by going with solid pieces of foam insulation rather than the spray method I used.
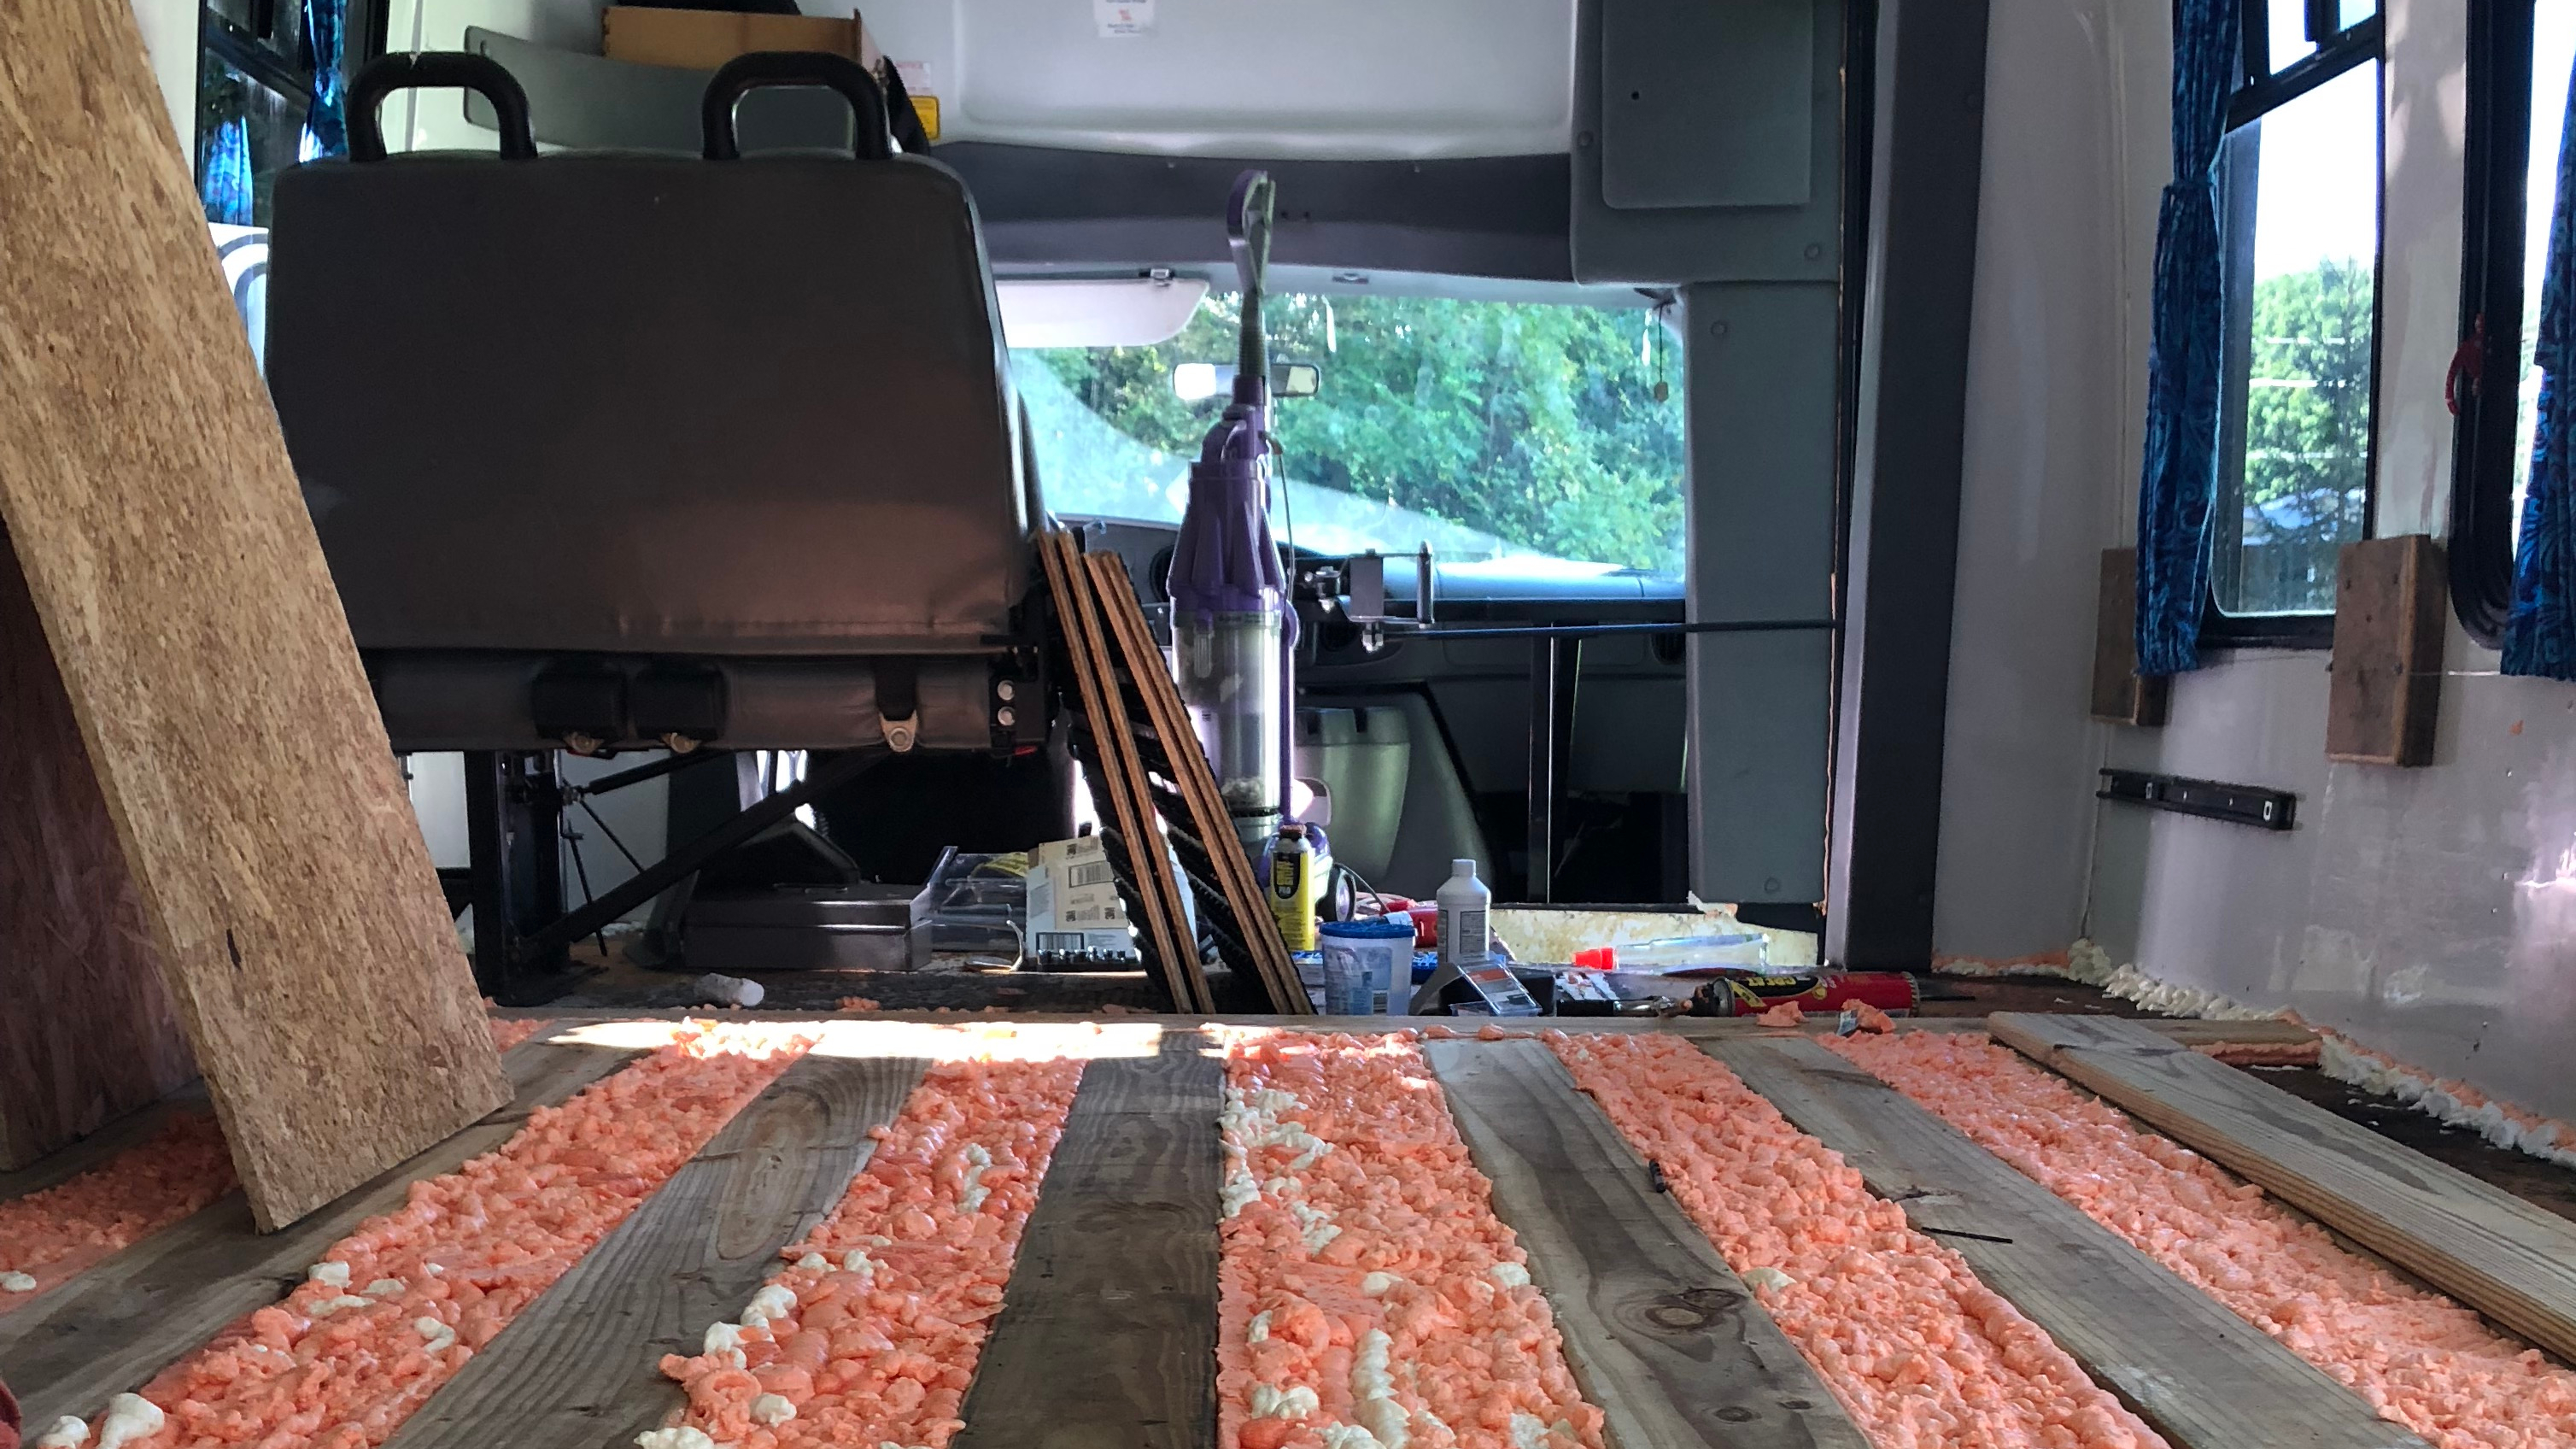
The next step was getting the plywood subfloor cut and attached to the crossbeams pictured above. Again, in hindsight, I later learned that I should have added a vapor barrier layer between the subfloor. This would help to seal out any moisture coming in from the bottom of the bus, and to prevent any spills from inside the bus seeping into the subfloor. You’ll want to consider adding this step to your build.

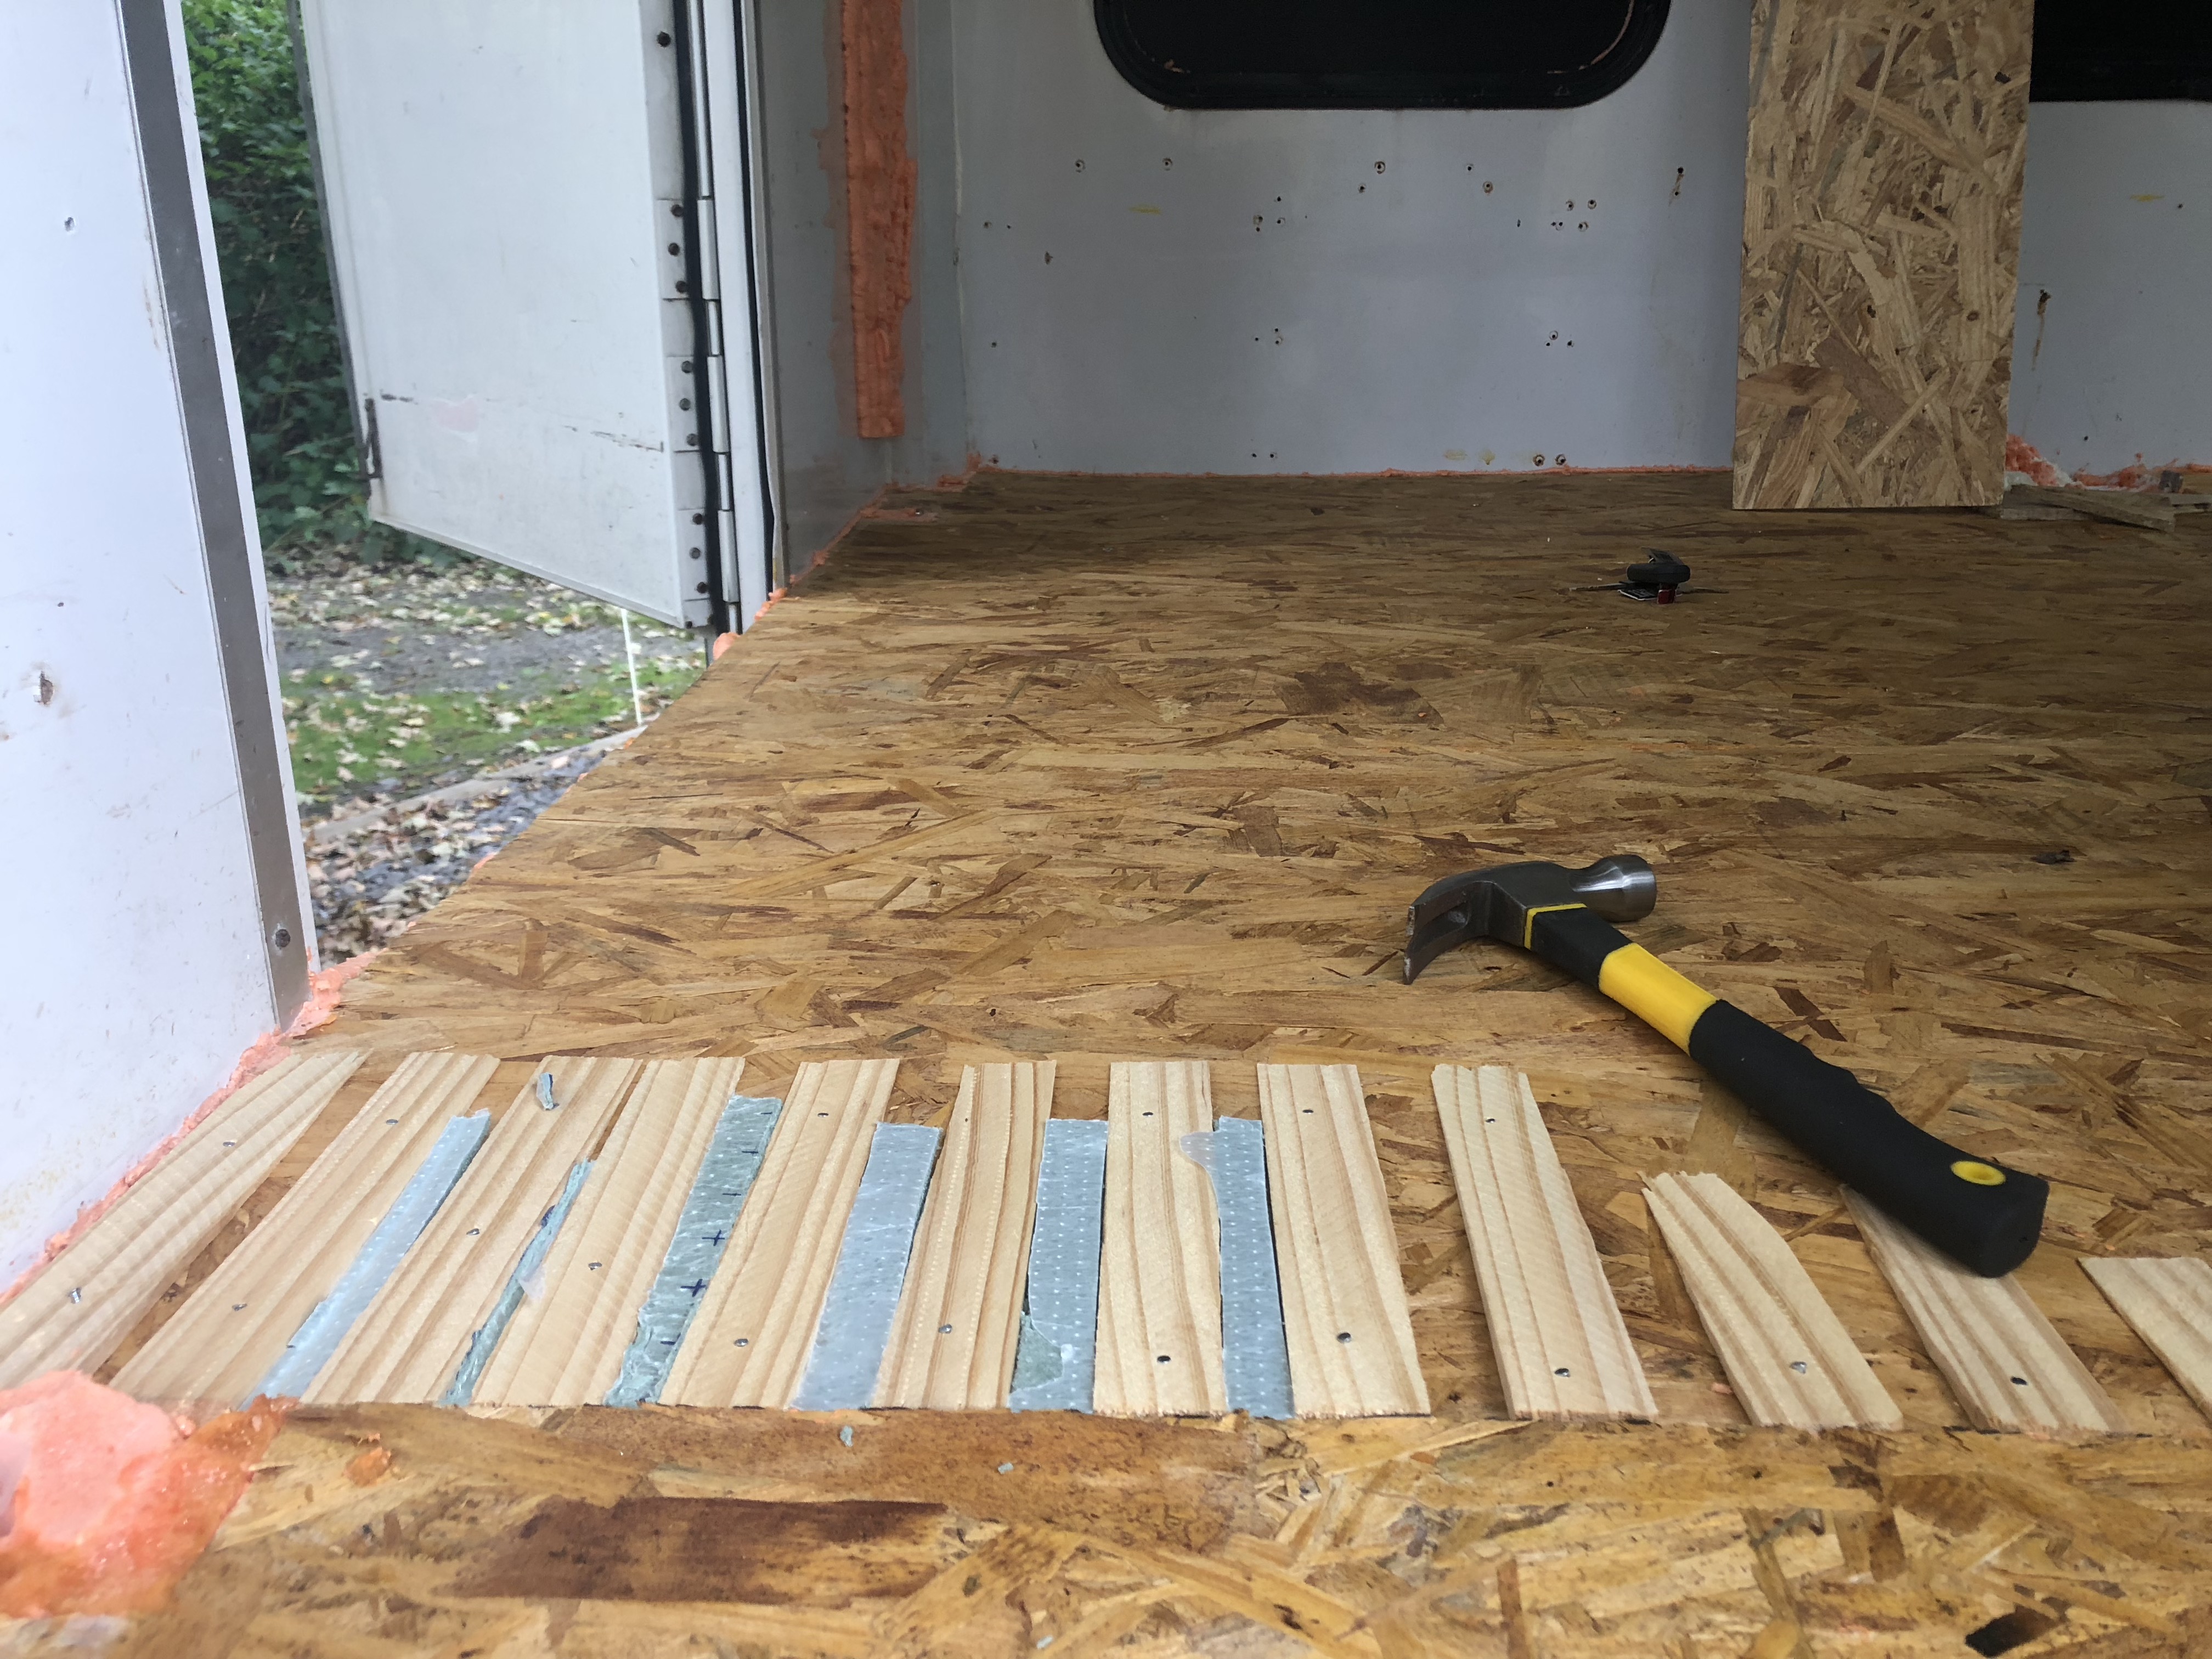
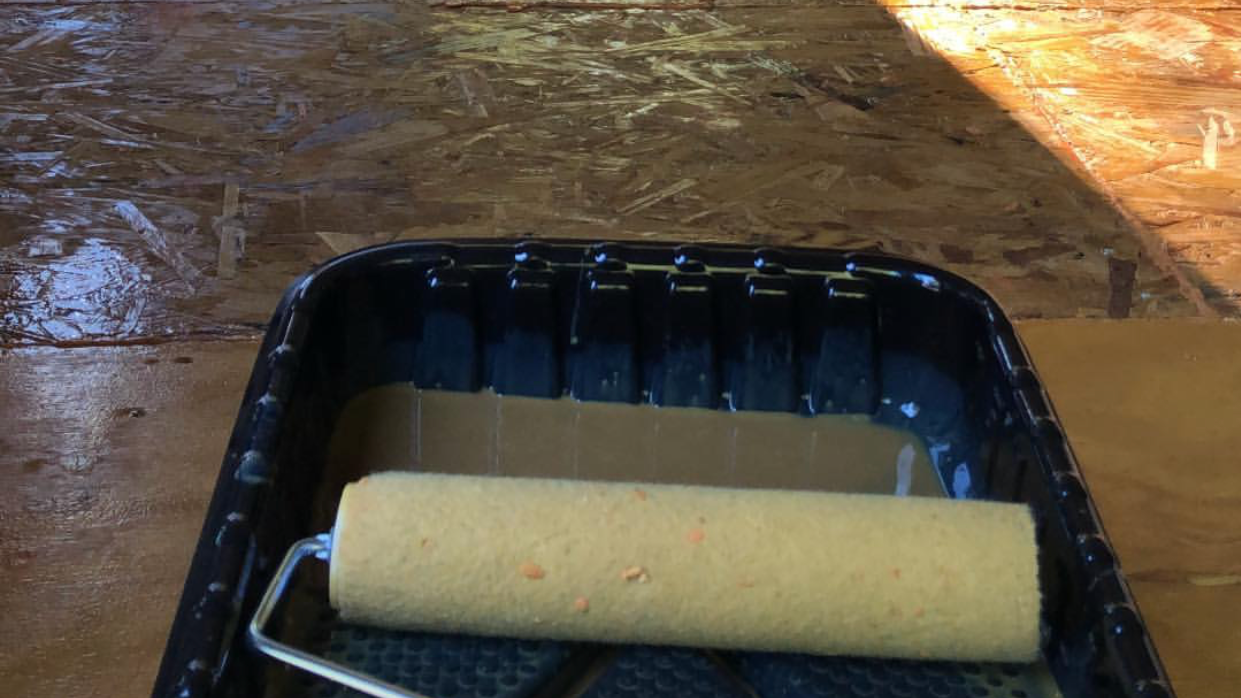
After laying and securing the subfloor, I added a layer of wood sealant, rolled on with a standard paint roller. While I’m not sure if this really helped anything at all, it seemed like a logical thing to add for some further protection for the wood. In hindsight, I could have completely coated each individual piece prior to securing, and thus would have been able to coat the bottoms as well.
Step 4: Installing the Wood Floor
After the above subflooring was complete, the next step was choosing a finish for the flooring. After browsing instagram and pinterest for a while (and a few outlet stores in town), I decided to go with a synthetic composite flooring in a grey ash finish. I was able to find these for about $30 per box of 8 pieces, and was able to complete the bus with 8 boxes (a few extra were used due to botched cuts). Underneath the floor, I went with a thin layer of foam underlayer from Lowes.
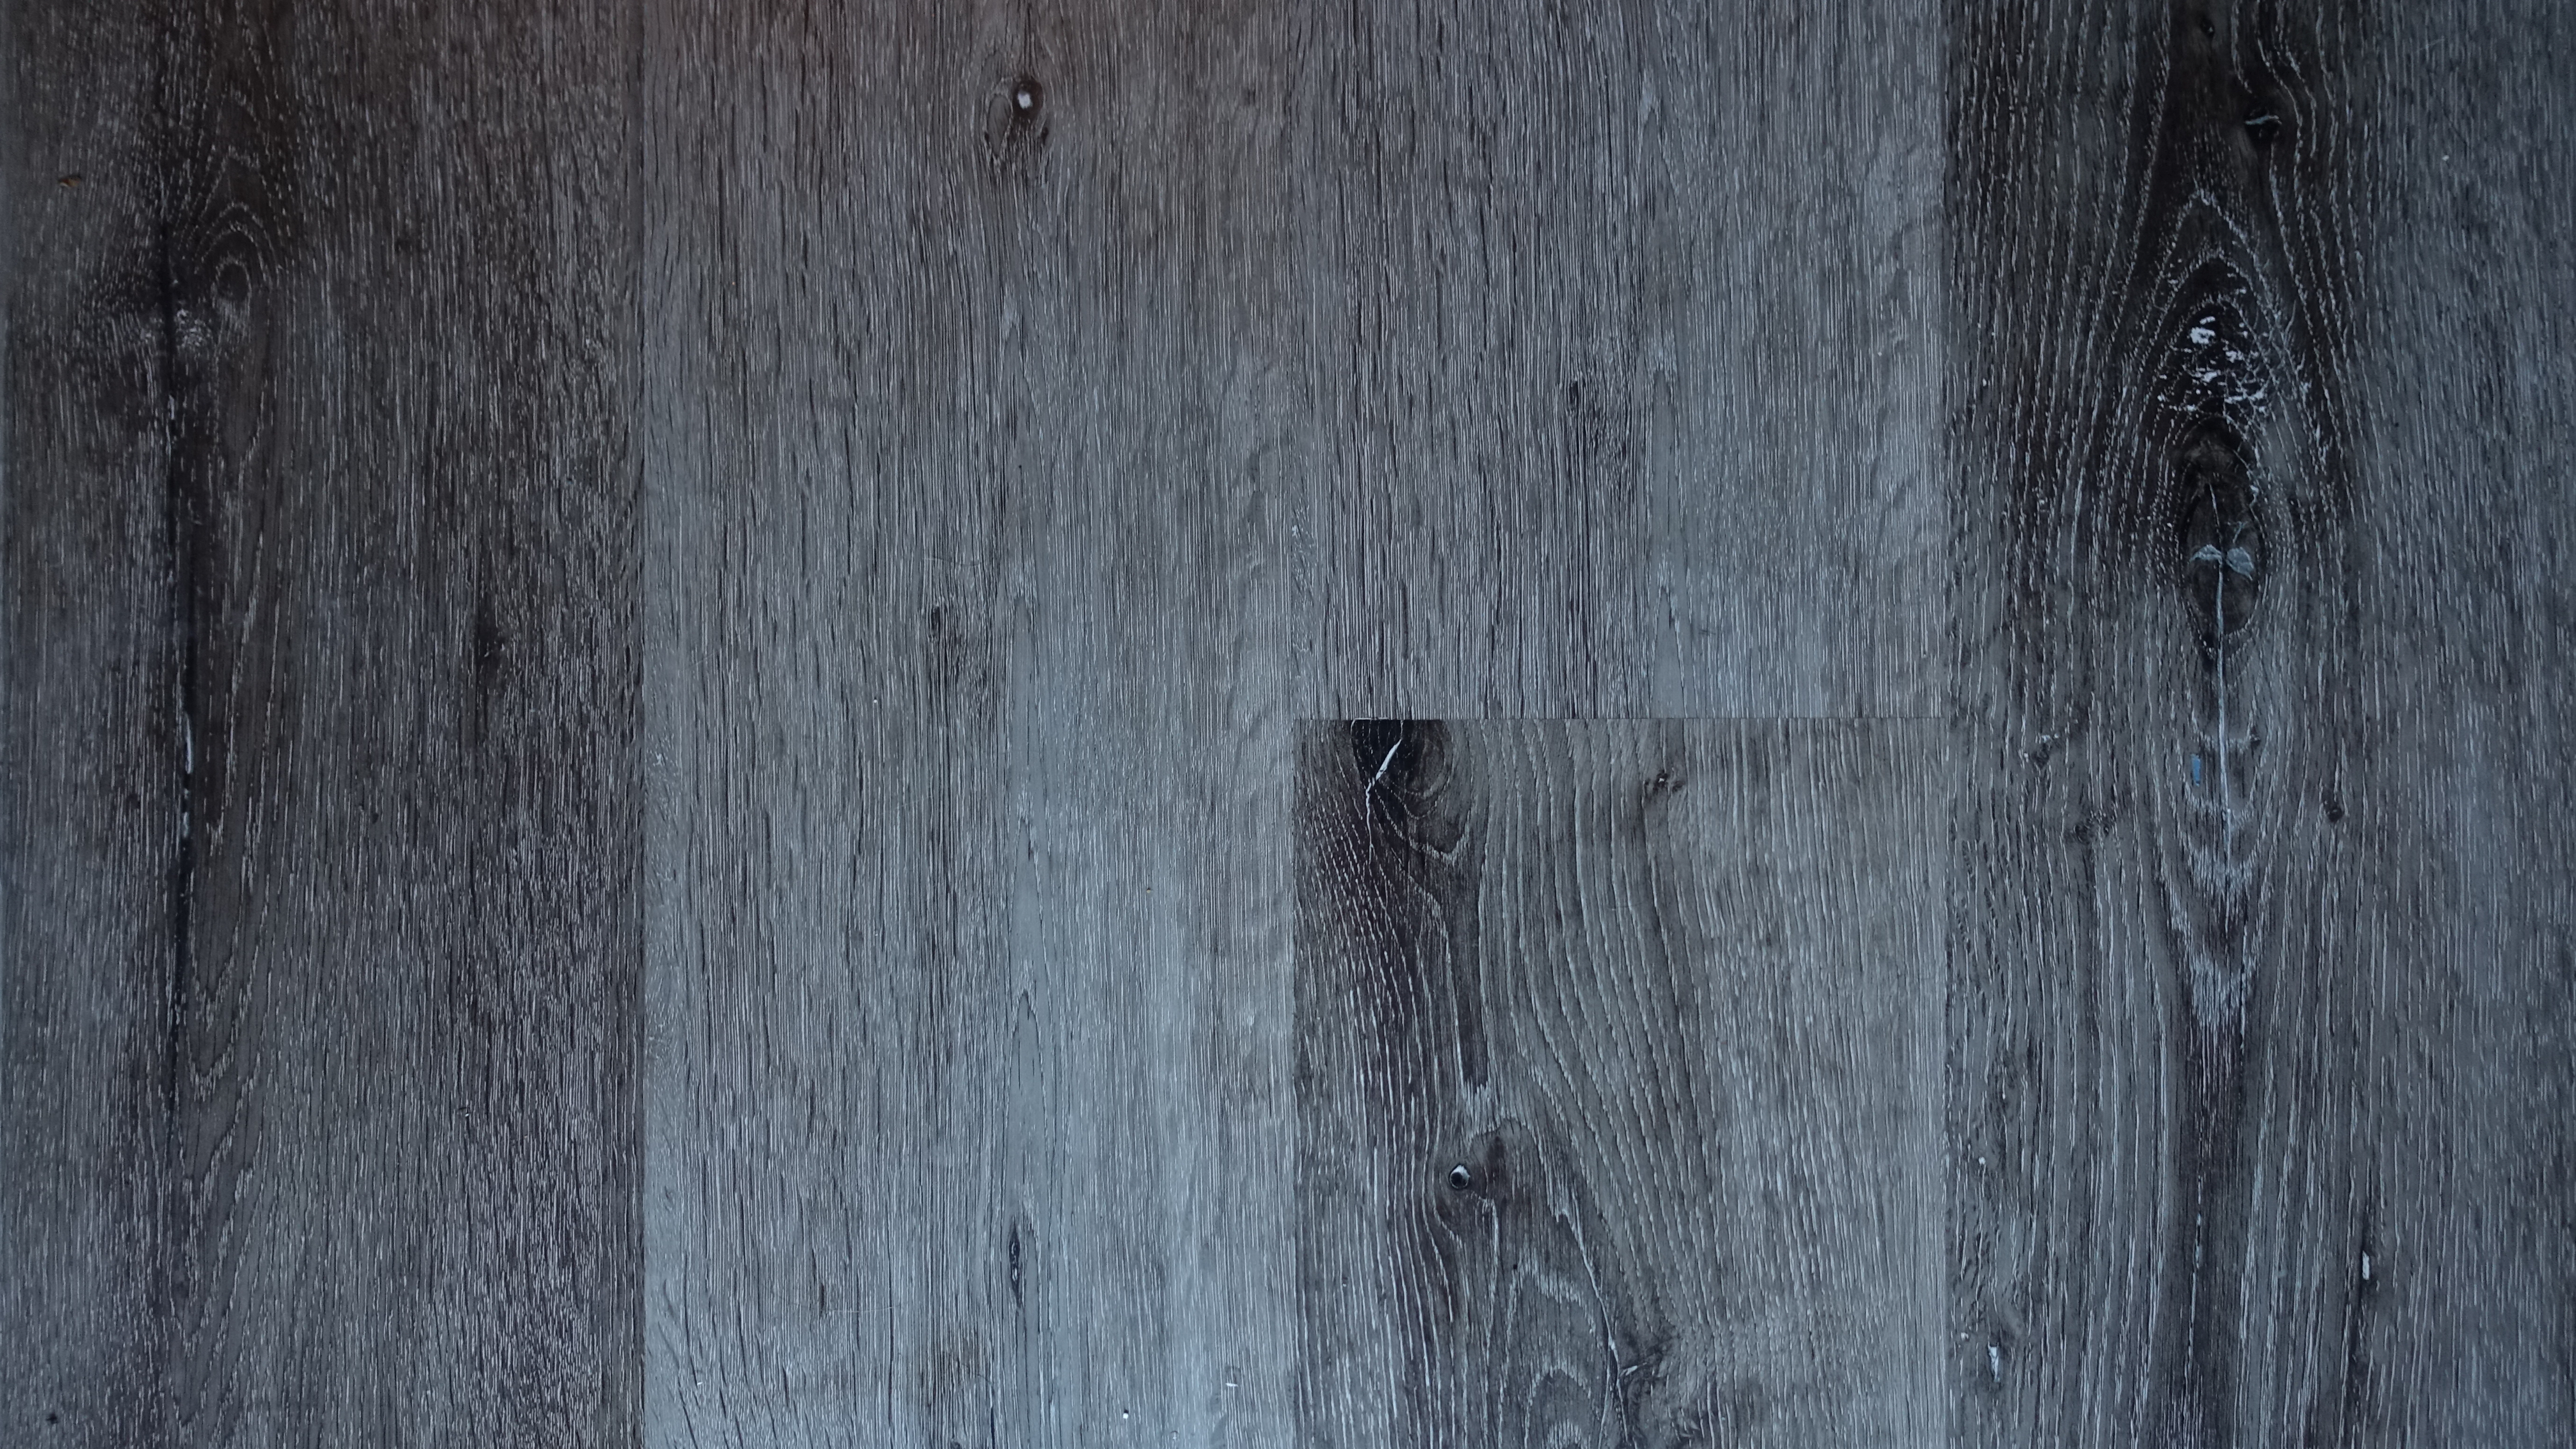
I had never put in wood flooring before (conveniently had a football game when my dad and brother installed my rooms wood floor during childhood, sorry dad), and so this was a learning experience – I later realized that I should have spent a bit more time tapping the pieces into place, as there are some sections with a slightly noticeable gap between pieces. Overall, I was pretty impressed with my work though, and love the contrast of the grey wood with the white interior of the van.
| Item | # | Total Cost |
| Grey Ash Composite Synthetic Flooring | 8 boxes | $240 |
| Foam underlayment | 100 square feet | $30 |
| Total | $270 |
Step 5: Batteries, Electric and Safety
Here’s where a key difference in your build will differ, if you intend to boondock (live ‘off the grid’) with your build – my build has the benefit of having access to a 110V outlet as well as an indoor spot to recharge the spare battery pack provided by Jackery. The box also features a detachable solar panel (non-waterproof, so you must bring inside), which can recharge the box fully in 10-12 hours of direct sunlight. If you are planning to take your build out on the road, consider searching the web for some information about other tiny builds featuring a dedicated electrical system.
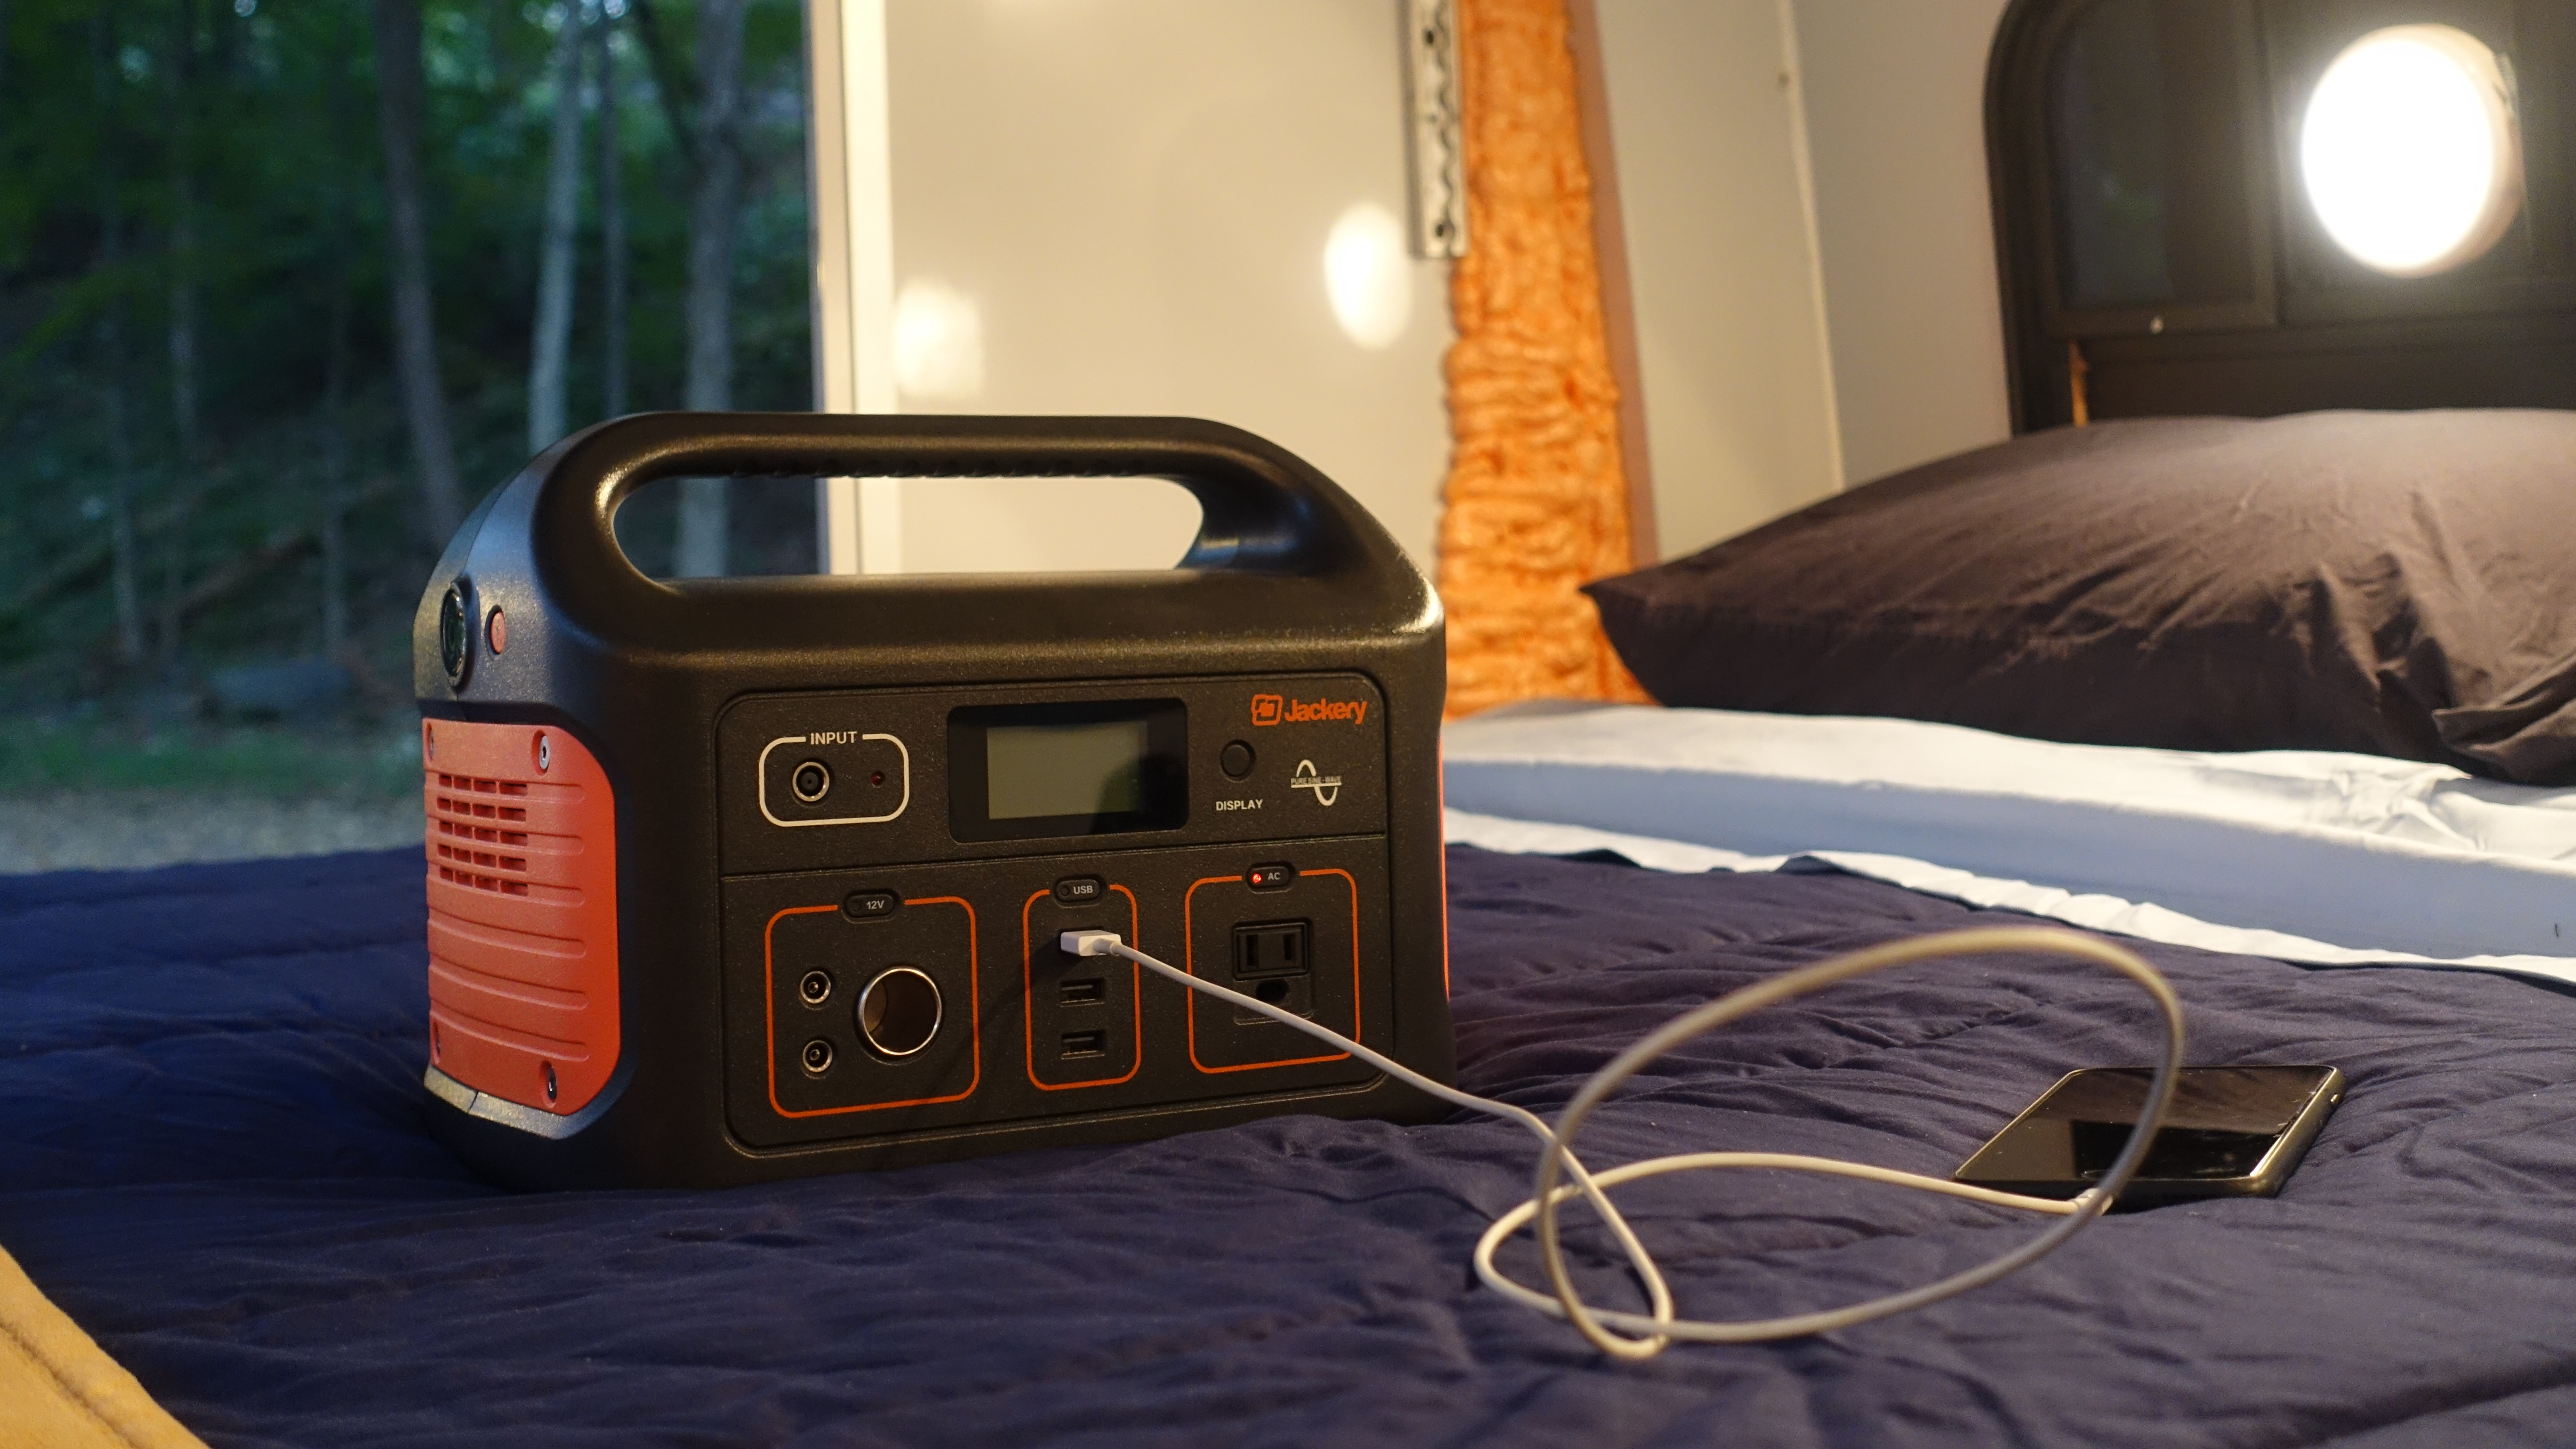
To run the mini-fridge in summer, and the space heater/lighting in winter, I have a 110V outlet in the van through an insulated extension cord ran from the house. There is also a surge protector on it, and all connections stay dry through various weather. While ideally I would like to have a 110V RV style hookup installed, this method has worked perfectly for the budget build so far.
| Item | Cost |
| 50 Foot Heavy Duty Extension Cord | $40 |
| Jackery Explorer 440 Portable Battery | $400 |
| Jackery Solar Panel | $300 |
| Surge Protector | $15 |
| Carbon Monoxide Detector | $20 |
| Smoke Detector | $20 |
| Fire Extinguisher | $30 |
| Waterproof Conduit | $10 |
| Total | $835 |
Step 6: Choosing a Layout
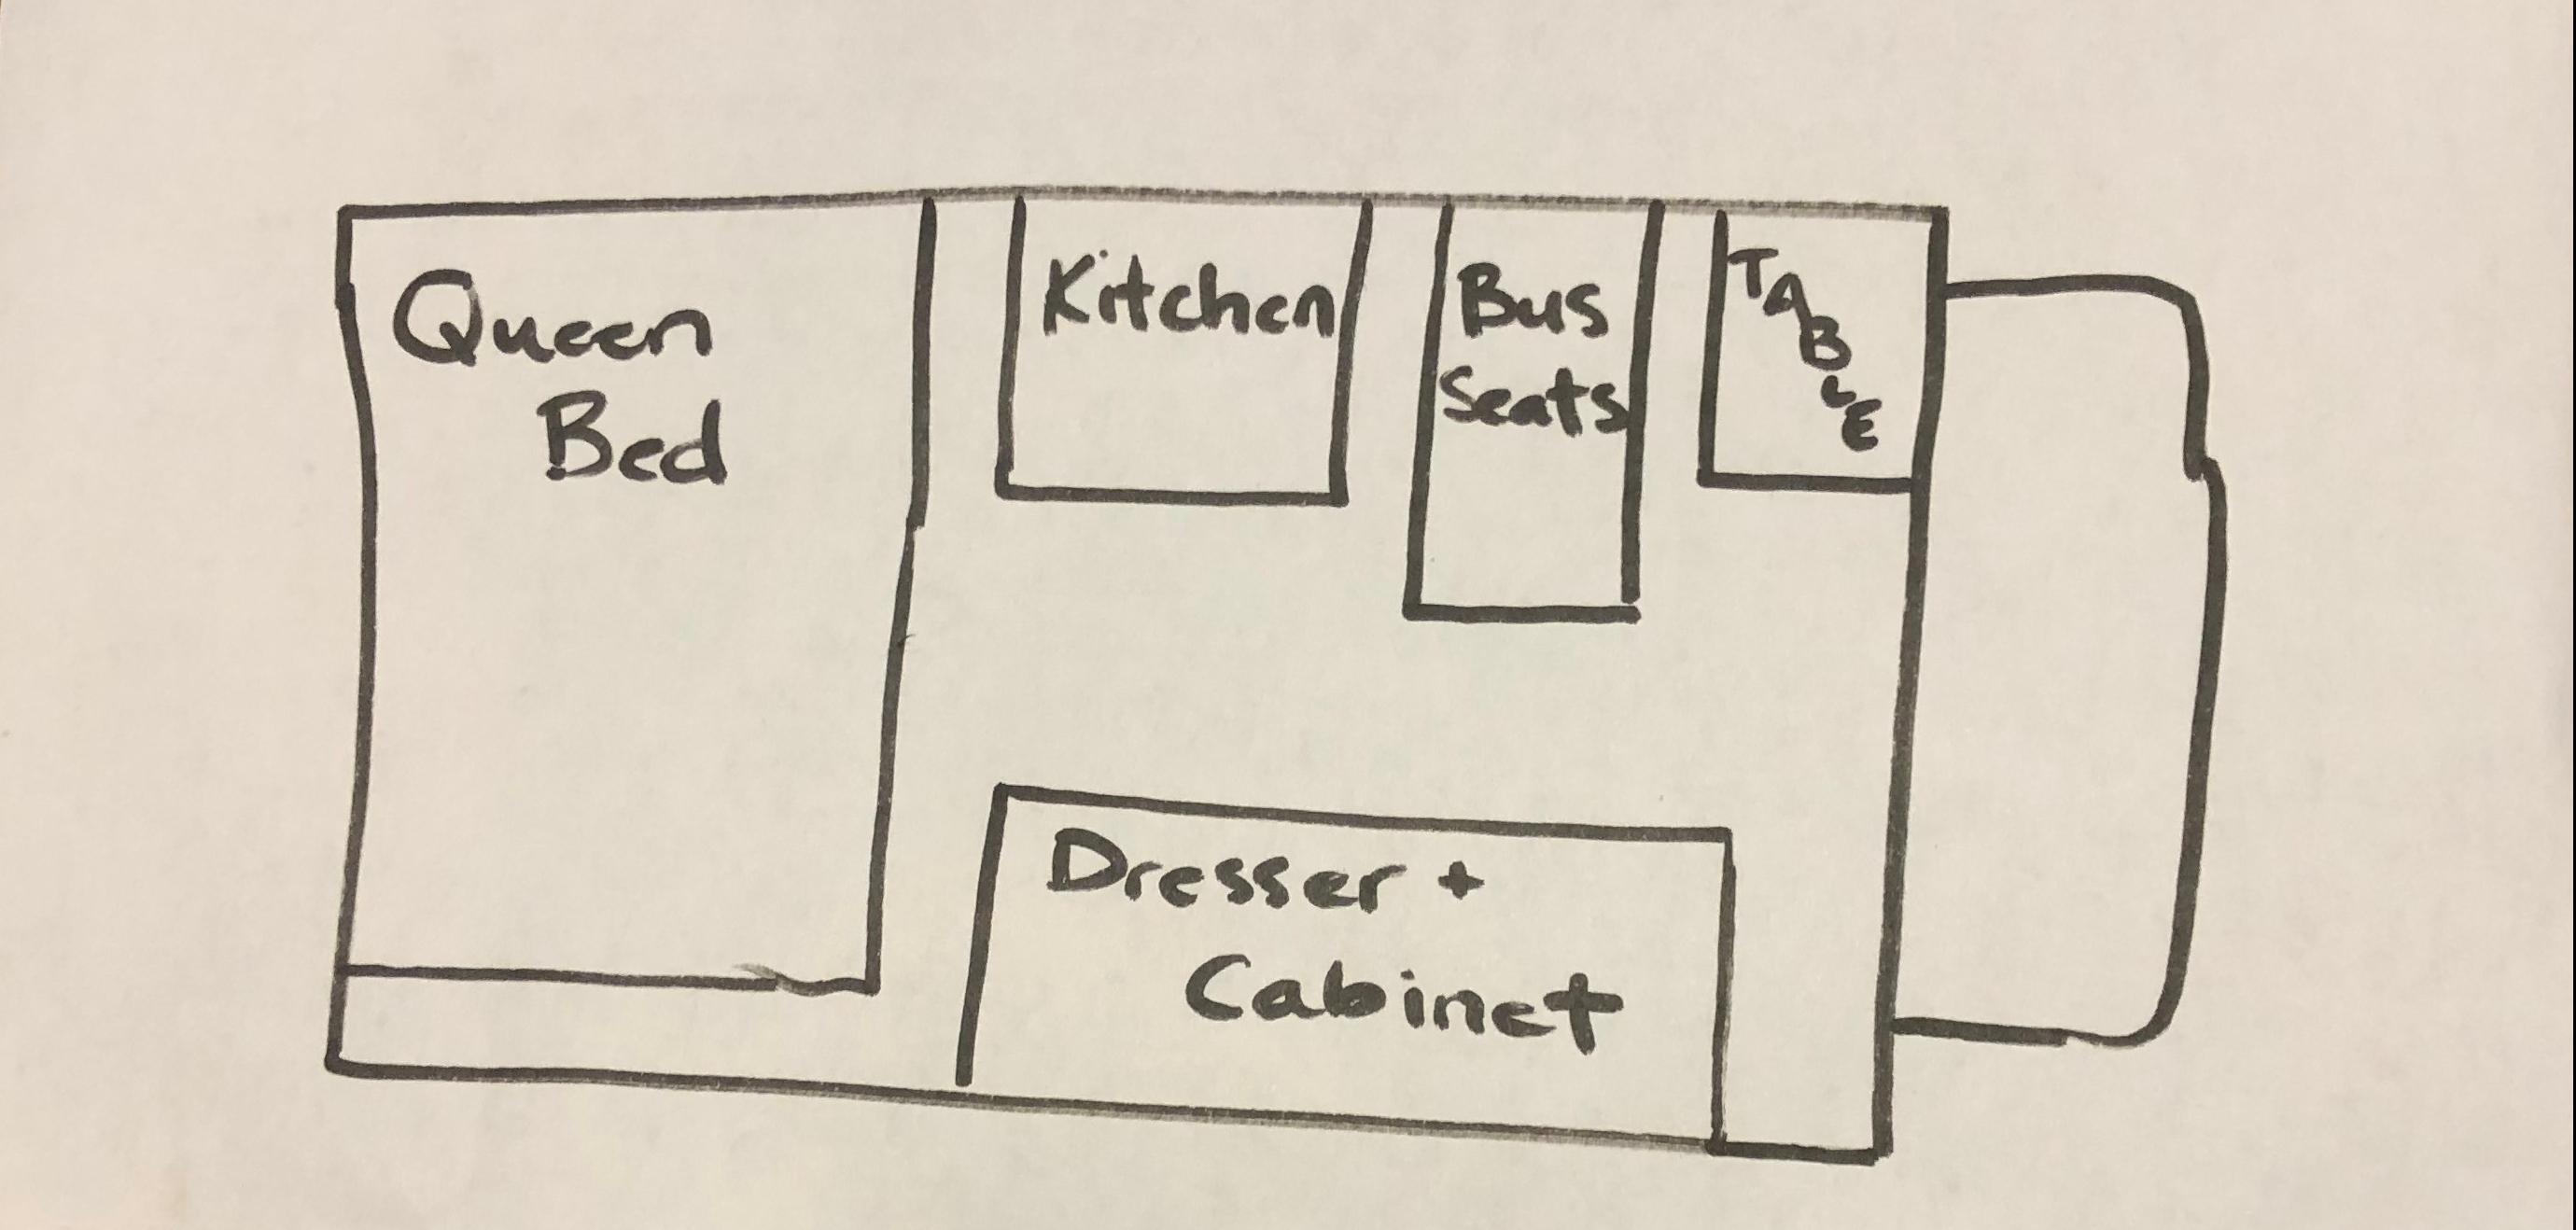
This was arguably the most difficult aspect of the build, and the most time consuming (when you factor in the mental back and forth). I won’t lie – after finishing the floor, I had days where I questioned if I would be able to complete the build – I felt lost, and thoughts of whether or not this project was a mistake fluttered around in my head. But, I pushed through, and repeatedly taped out my ideas with blue painters tape several times, and rearranged furniture multiple times before settling on the final layout detailed below.
Step 7: Kitchen and Plumbing
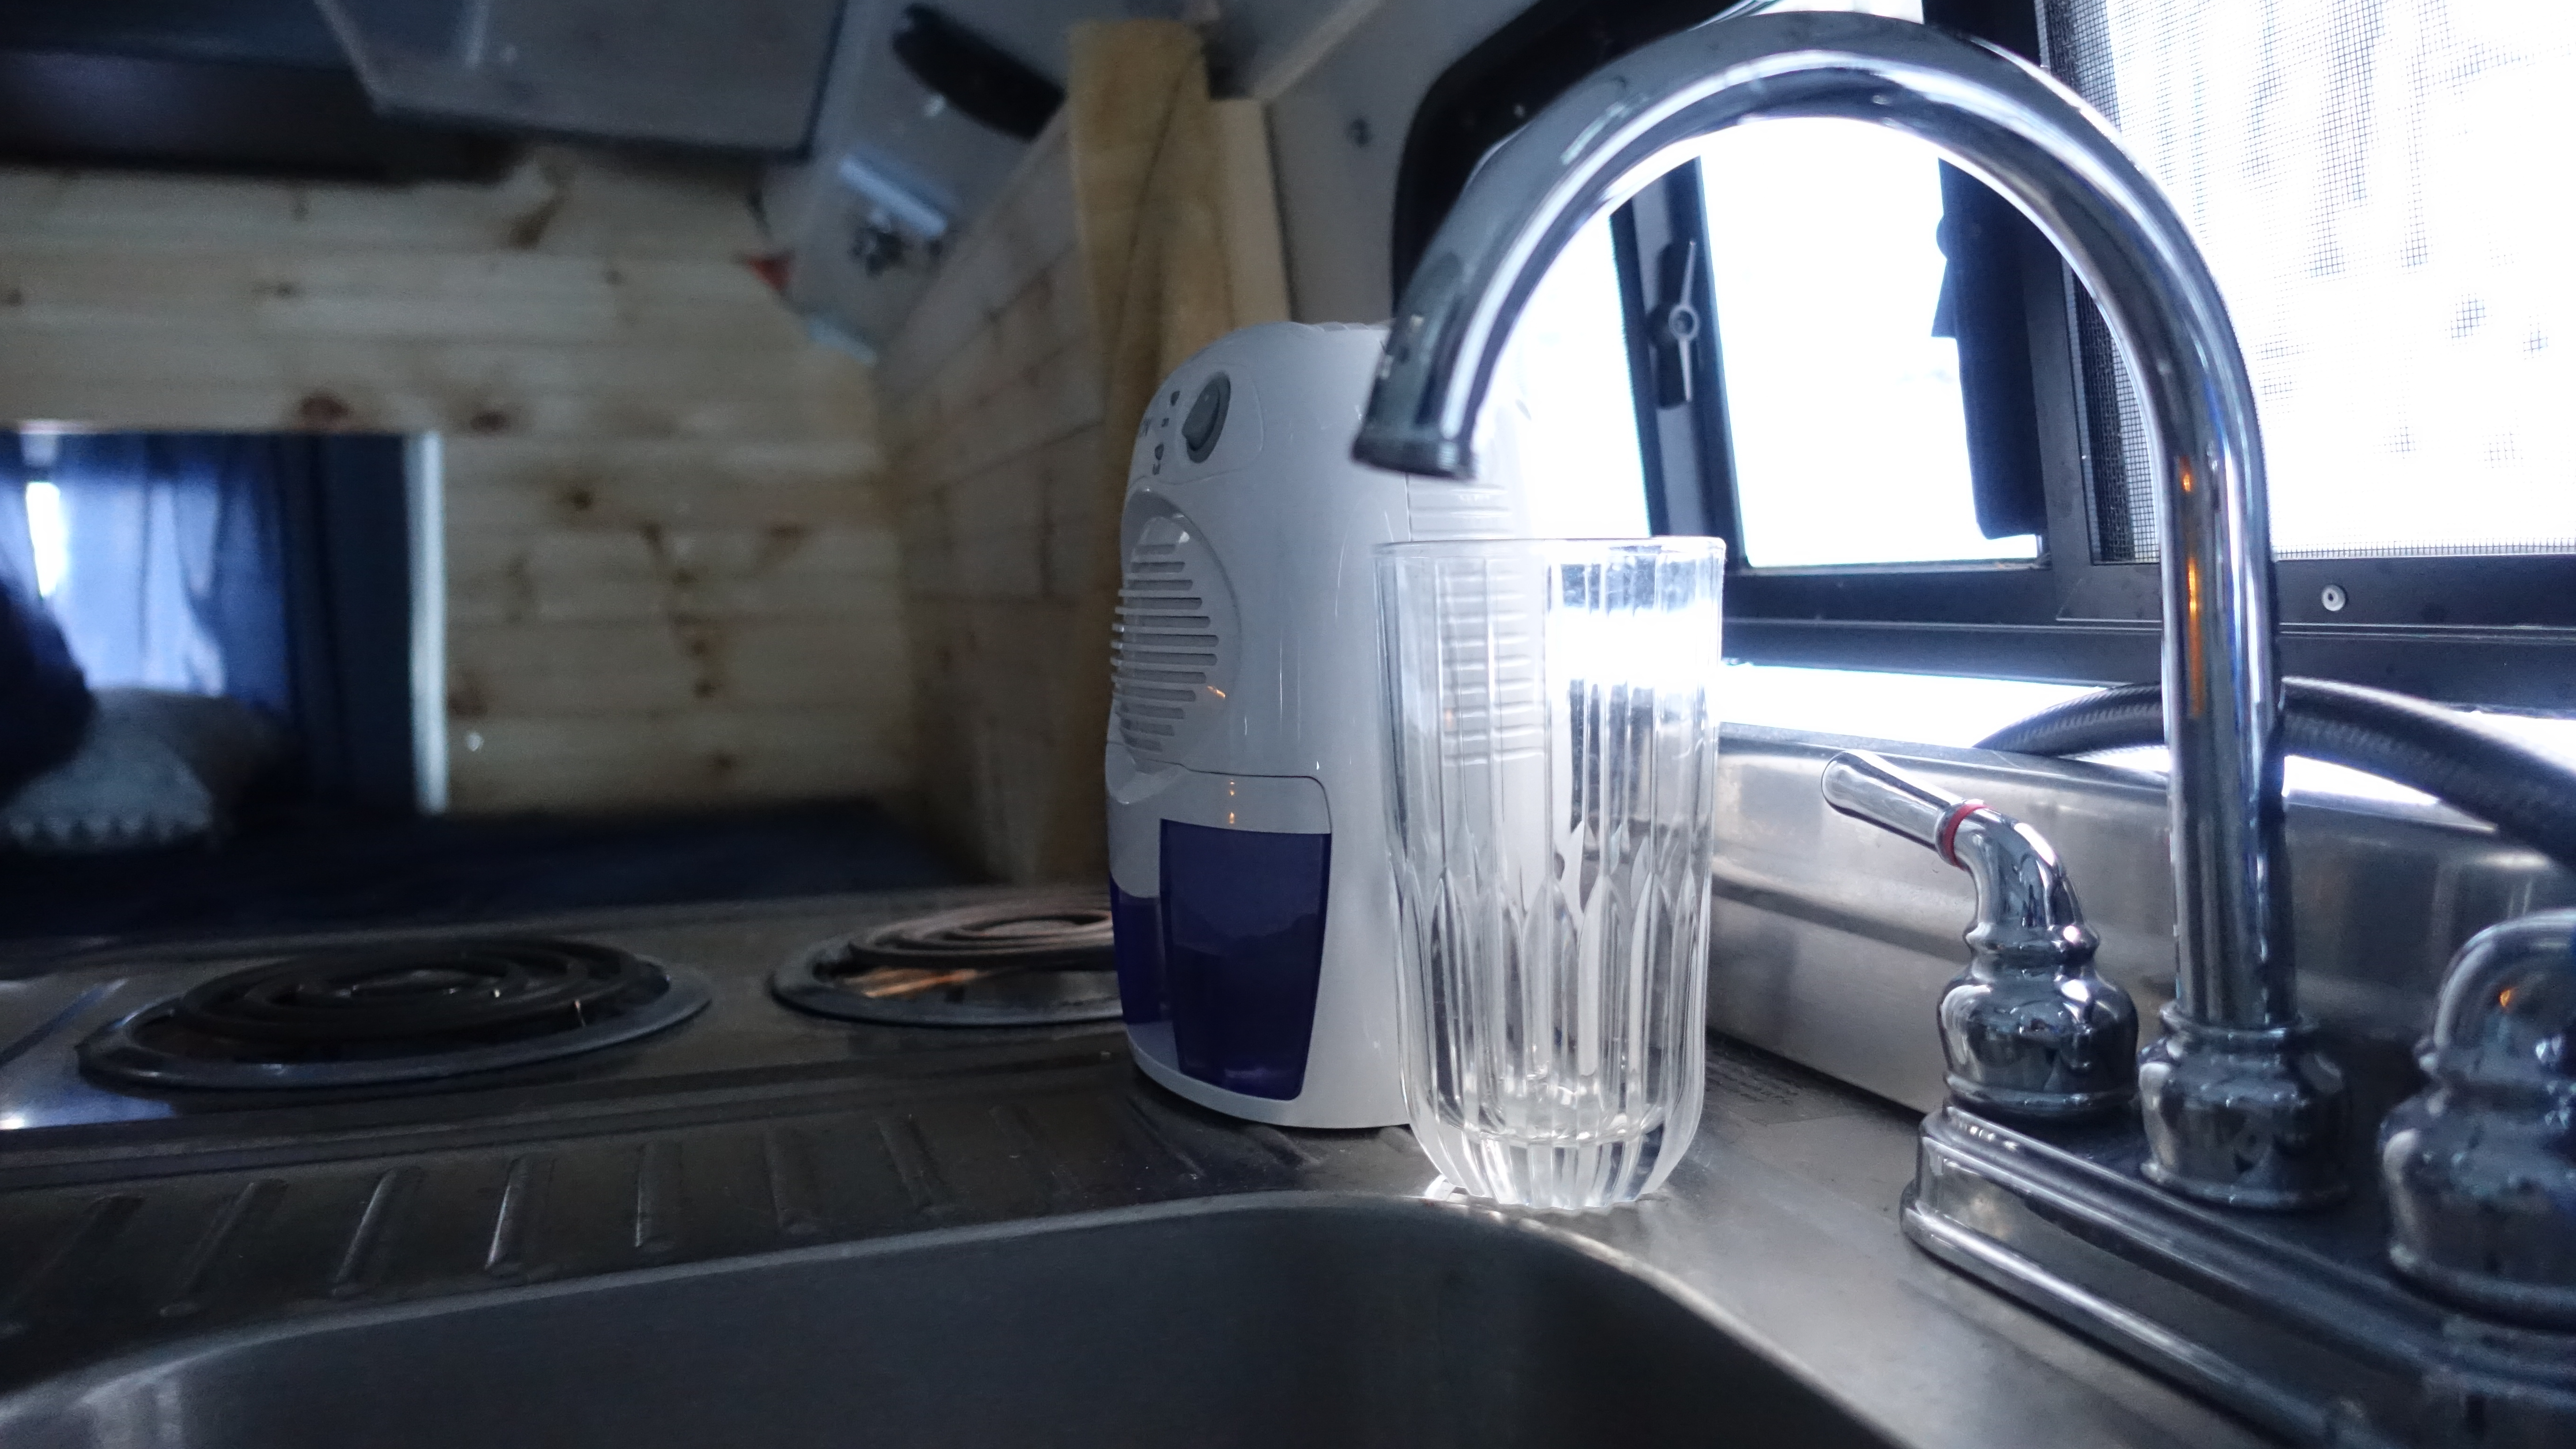
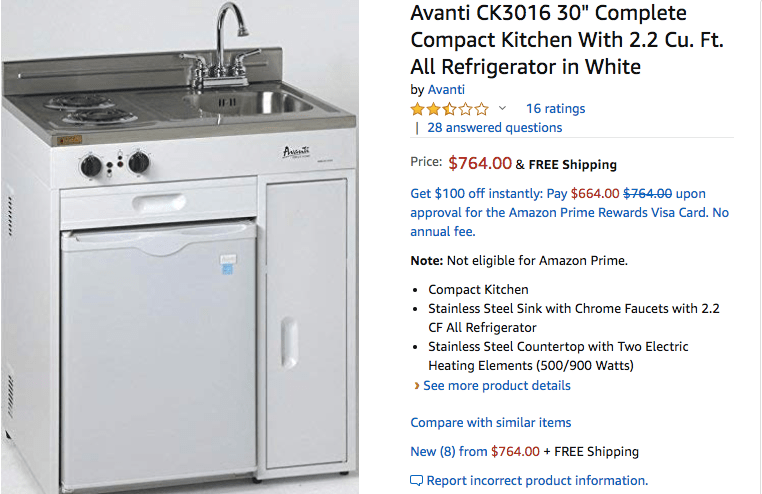
Granted, I did buy the kitchen unit, an all-in-one sink, mini-fridge and stovetop combination that was quite a steal on Craigslist. I wasn’t sure how exactly I was going to use it when I first bought it, but it seemed like too good of a deal to pass up – and its served its function quite well in the build so far. The unit required some additional hardware that slightly added to the cost, but overall, I still thought that it came in under what it would have been if I had tried to put together a similar unit from scratch.

When the stove is needed, it is plugged in (while the space heater is turned off), and then unplugged after use. Most of the time, it doesn’t get all that much use. The mini-fridge is an efficient model, and only uses a small wattage when plugged in during the summertime. For the watersource, I simply ran a hose from the outdoor spigot and attached it to the sink with a few fittings – I closed off the hot water side with a cap, and ran the cold water side to the hose with a washer machine hose attachment.
| Item | Cost |
| Avanti Complete Compact Kitchen | $350 |
| Washer machine extender hose | $15 |
| Pipe fittings (cap and reduction fitting) | $10 |
| 50 Foot Flexible Garden Hose | $20 |
| 6 Gallon Grey Water Tank | $15 |
| Drain to Grey Water Attachment Hose | $12 |
| Plumbers tape and Putty | $10 |
| Total | $432 |
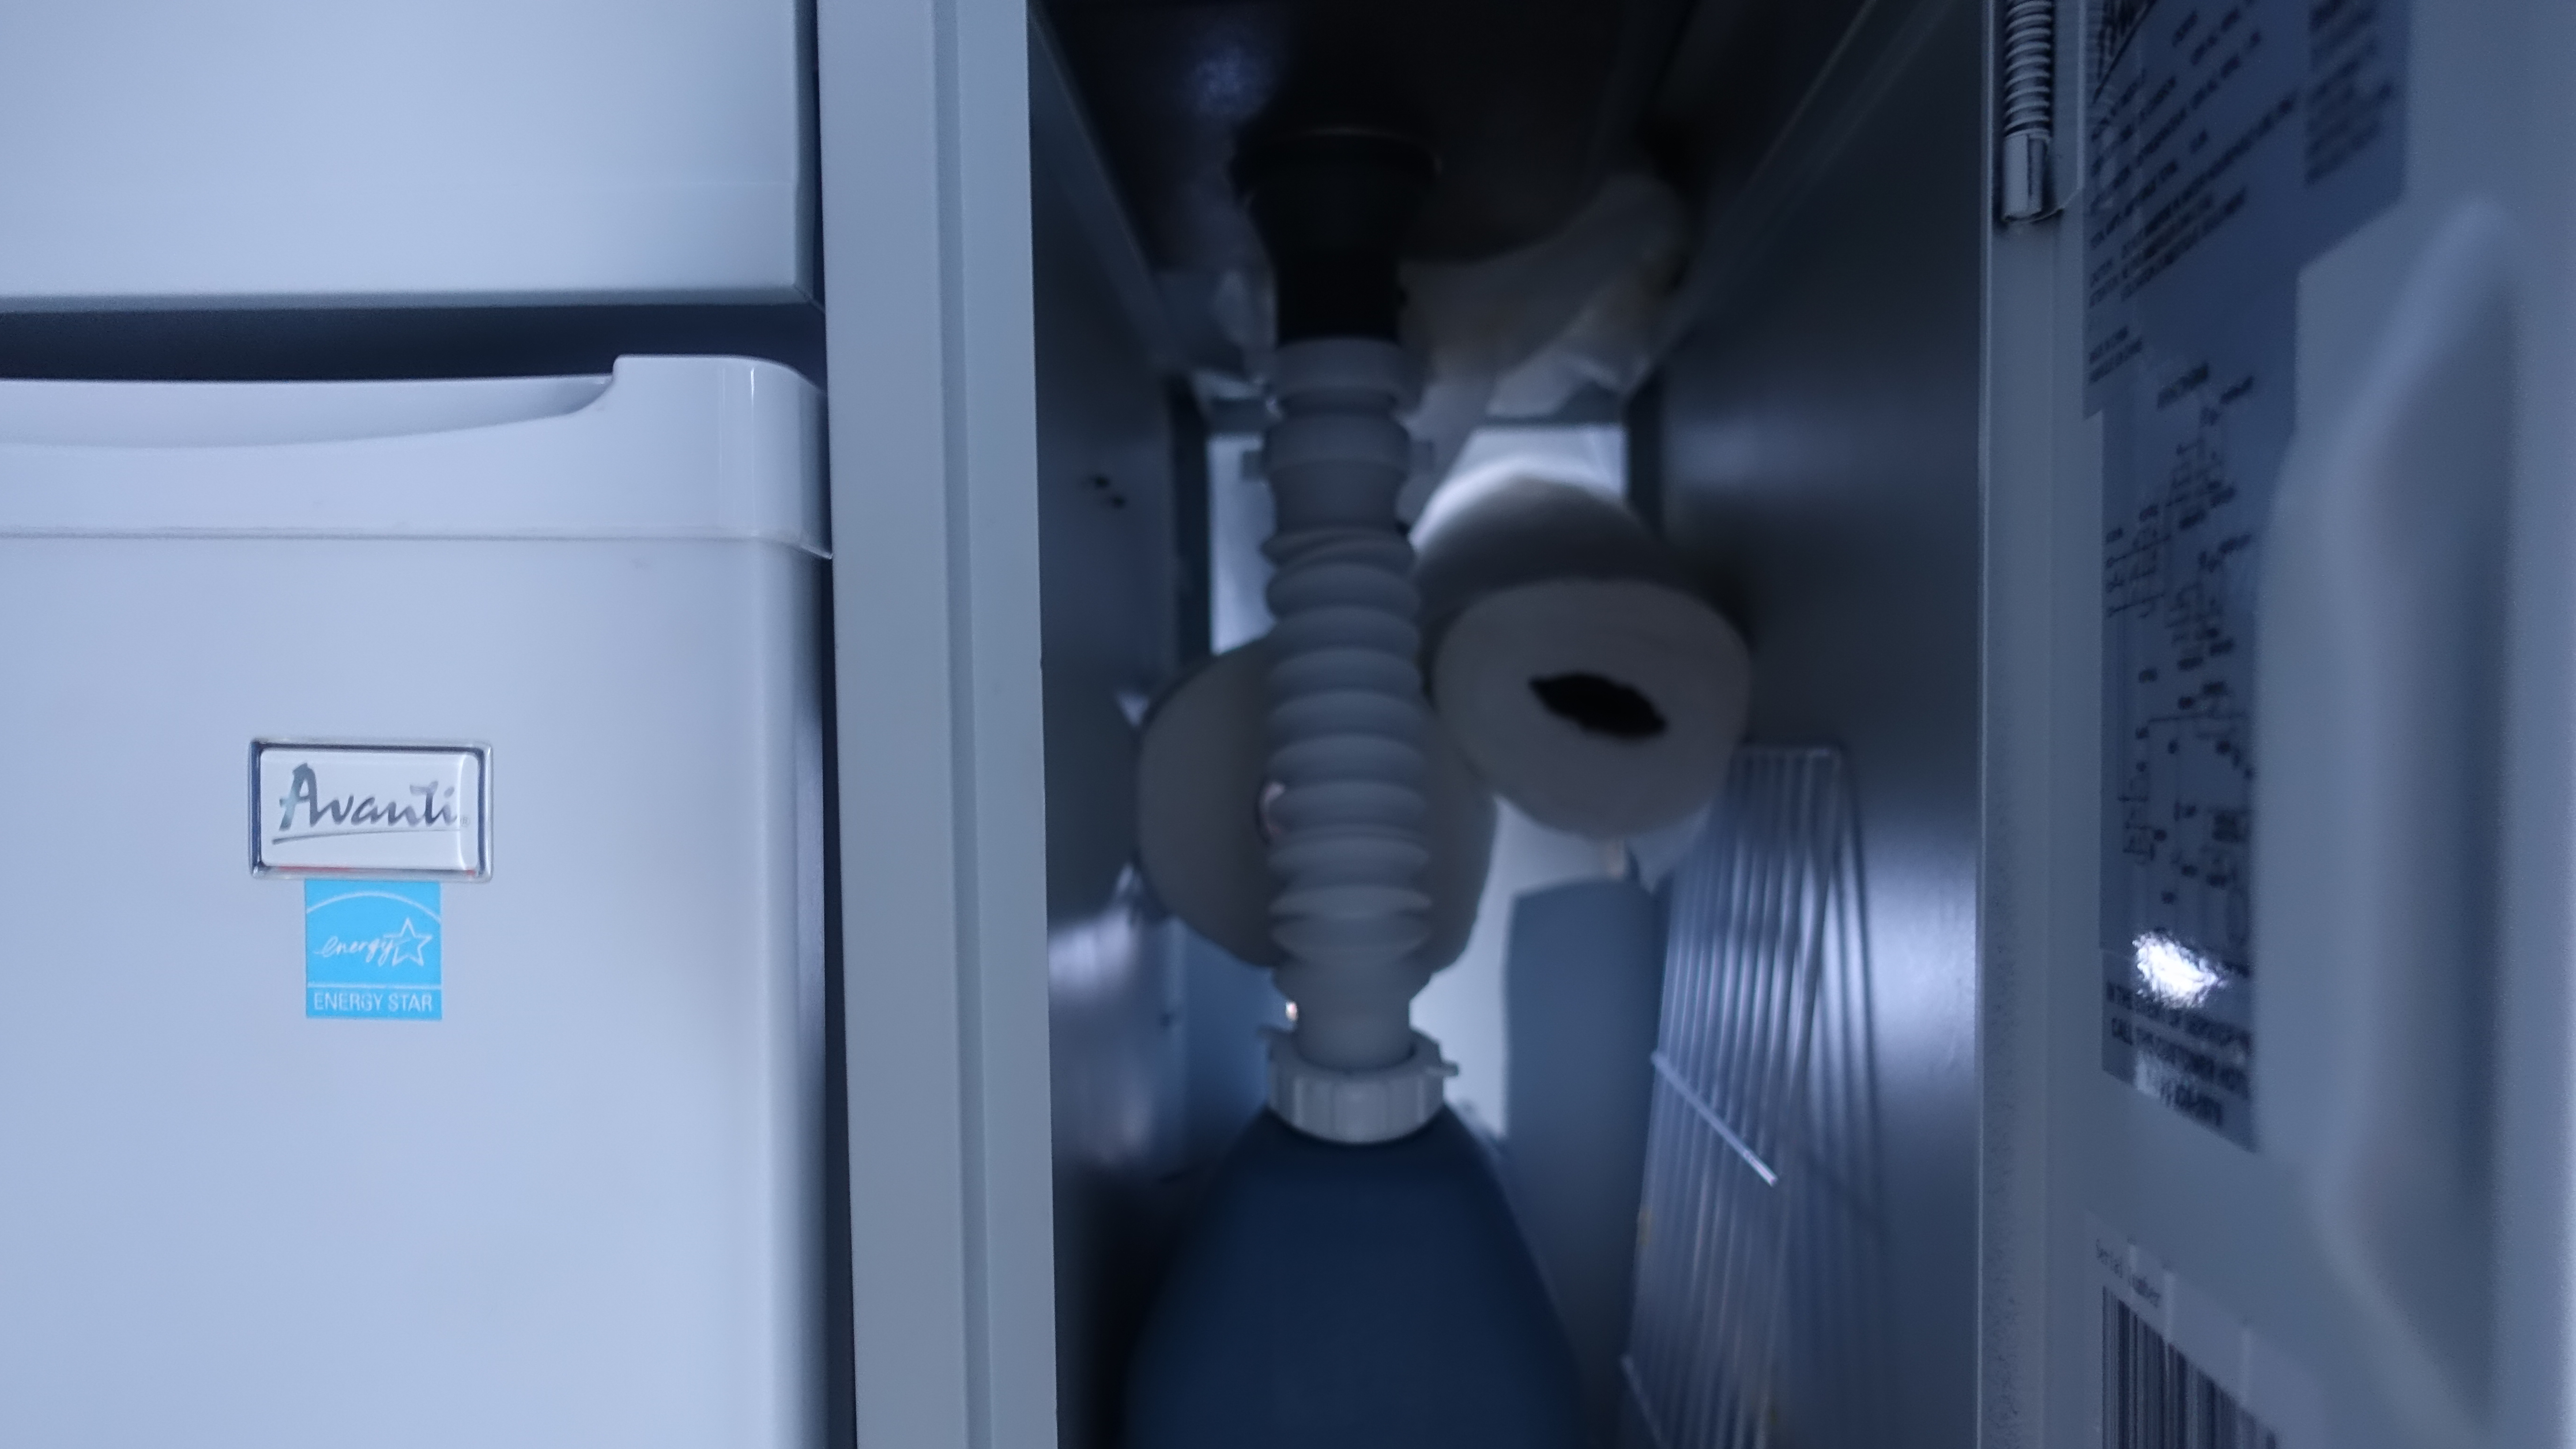
The small cabinet underneath the sink was also perfect for a 6-gallon catch tank for the grey water, with a flexible hose connecting the sink drain to the tank. In most cases, this lasts for several weeks before needing to be dumped out, and has stayed leak free during use. However, when initially turning on, it does require a little bit of attention while any air bubbles in the hose escape through the faucet. Since the van would be staying mostly stationary with access to a hose, I chose to forgo a fresh water tank and pump system.
Step 8: Building the Bed
For the bedroom, I decided to make it take up most of the rear end of the bus. Luckily, the bed frame that the previous owner had built was still mostly usable, so I was able to re-use a lot of the wood in the new build. Putting the bed in the back corner maximizes the open living space at the front of the bus, and also utilized the barn style doors (where the wheelchair lift used to operate) at the foot of the bed. I later intend to add bug netting here, so that the doors can be left open for an open air experience, without having to deal with bugs.
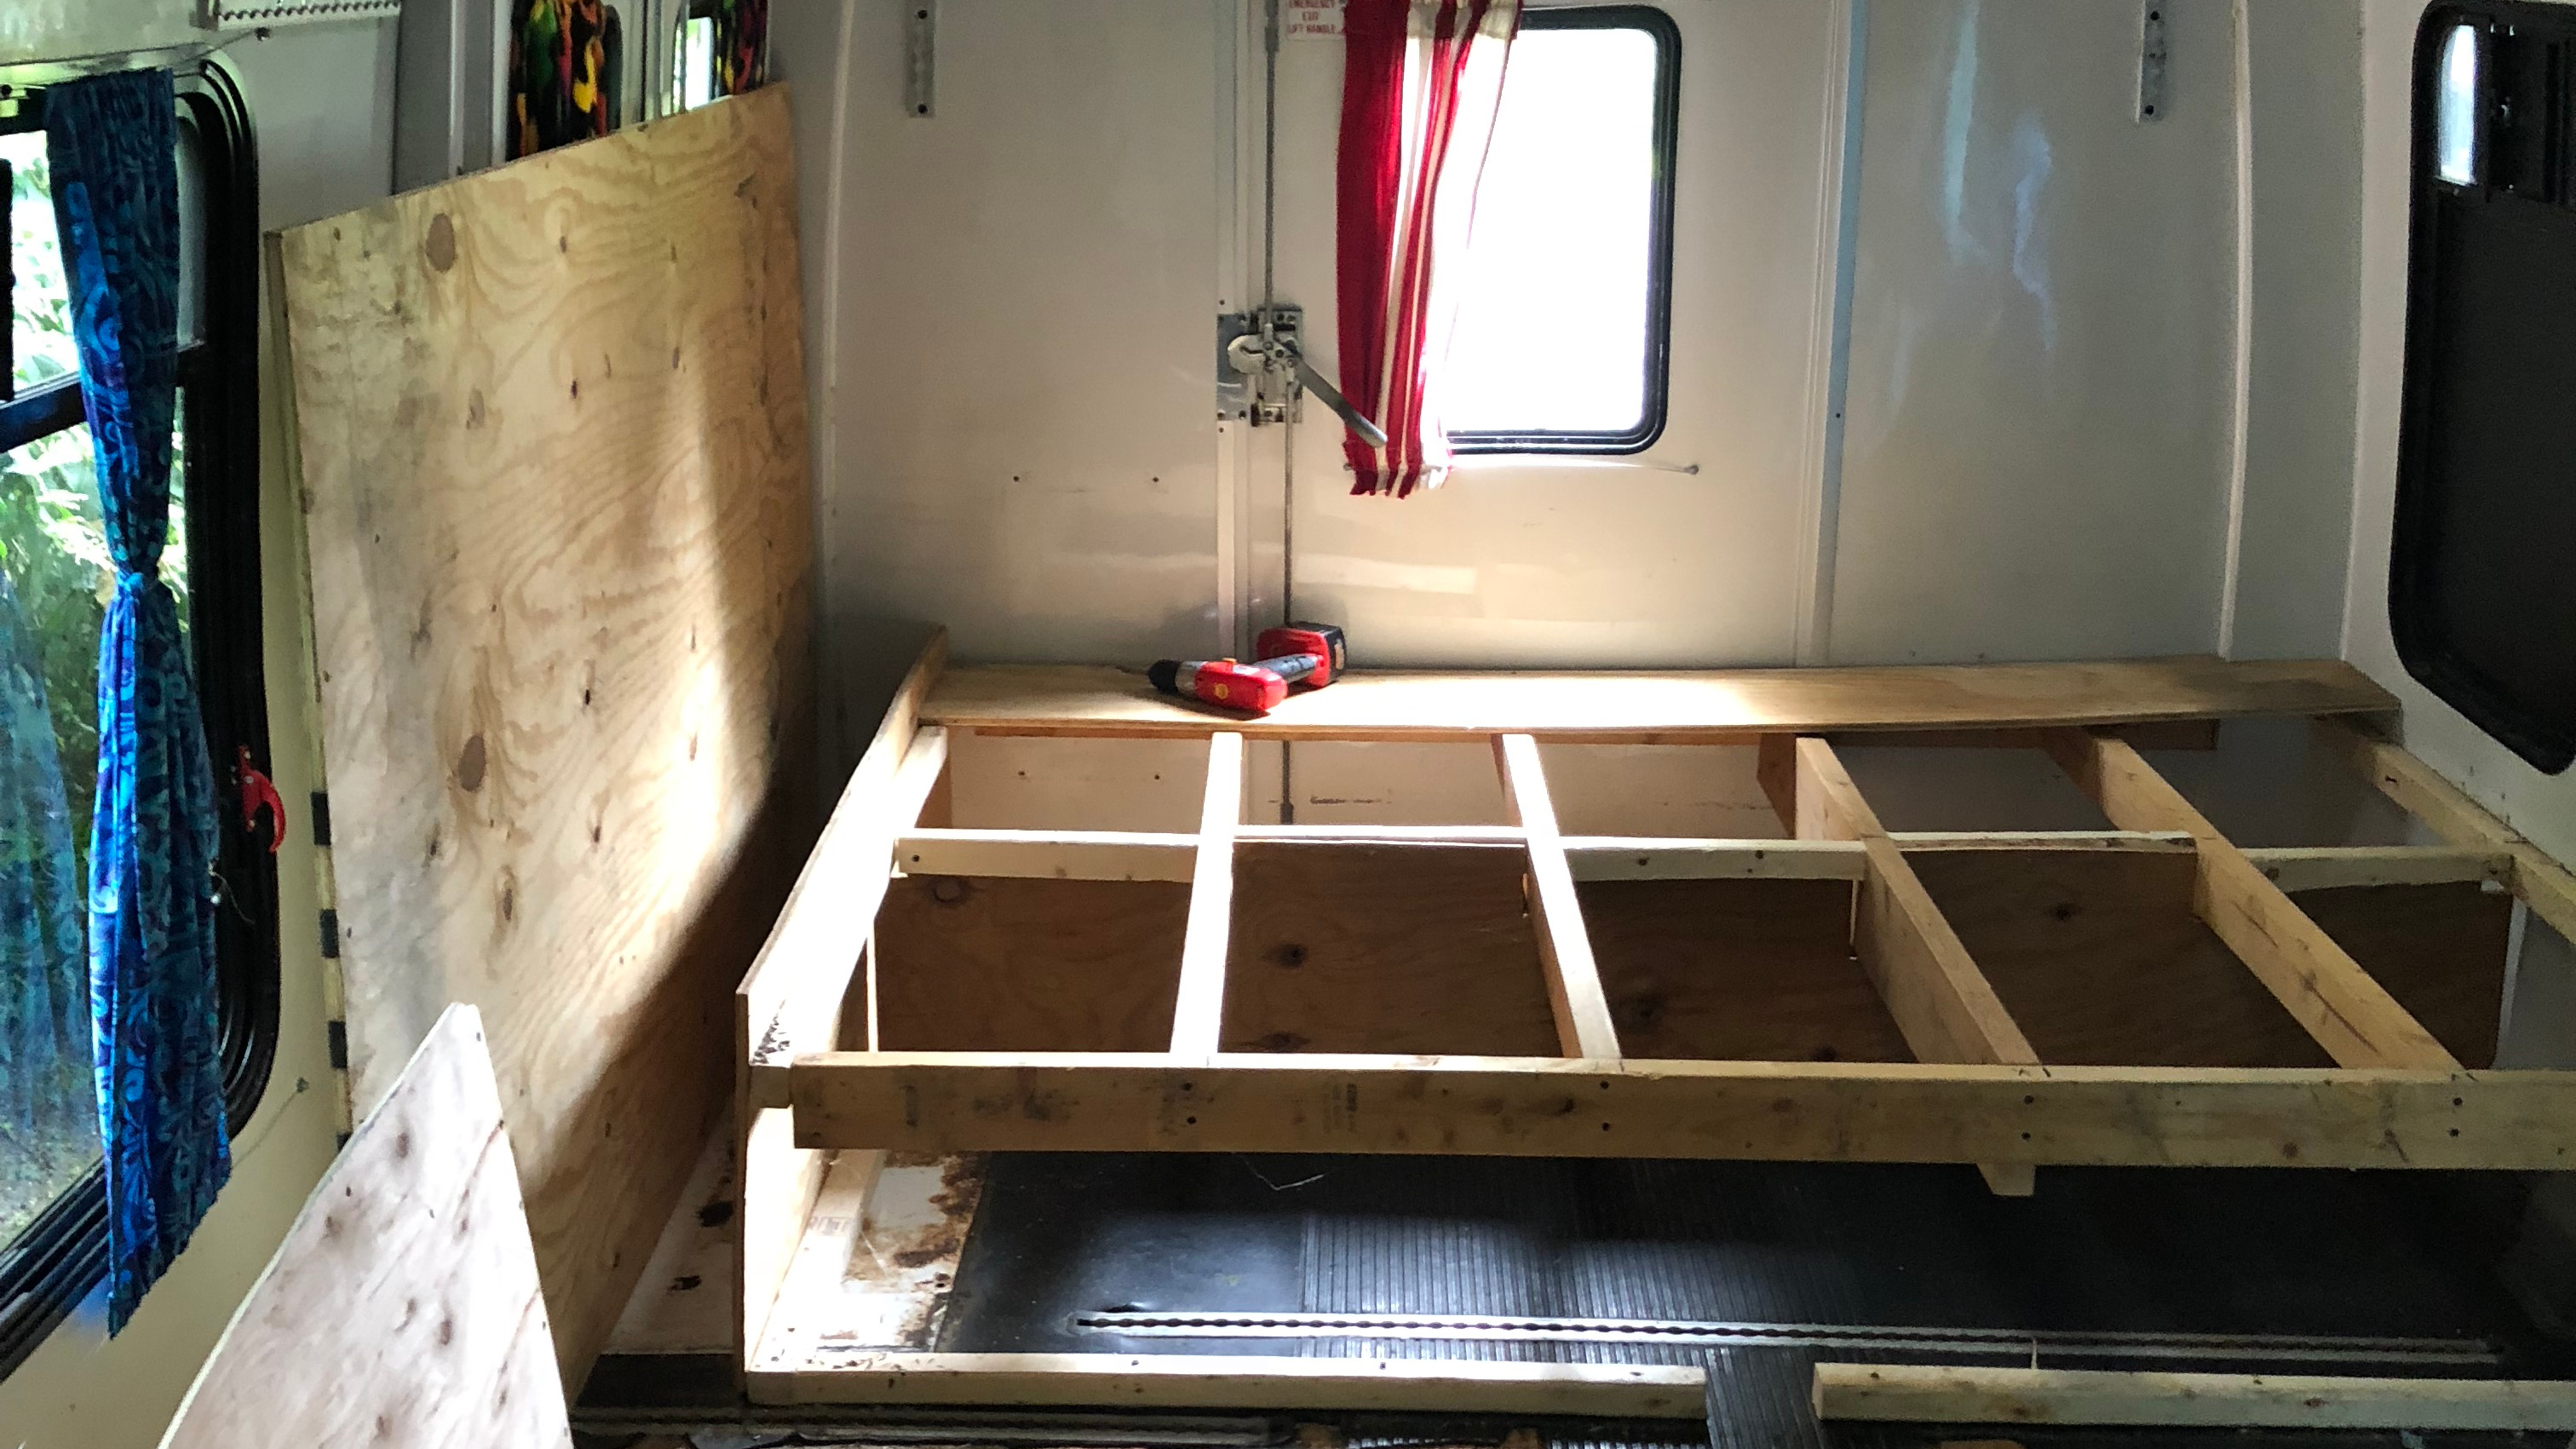
The previous owner had used the wall studs to bear most of the beds’ weight, but this setup made me slightly nervous, and so I decided to modify the setup so that the weight is on the legs of the bed. The bus’s shell and rear area is pretty well reinforced (it used to support the wheelchair lift assembly), but I didn’t want to take any chances. I used the top portion of the bed frame shown above, and attached 8 supporting legs (2 2×4’s per leg). Once the legs were attached, I moved the frame back into the bus, and then re-connected the cross beams to the bus’s studs (as shown below). This aspect proved a bit difficult for my carpentry skills, as many of my cuts were far from perfect. However – its worked just fine for its purpose so far.
| Item | Cost |
| Bed Frame | $0 (recycled) |
| Bed Legs | $35 |
| Wood Screws | $6 |
| 1/2″ Plywood Bed Covering | $40 |
| Spa Sensations 10″ Queen Memory Foam Mattress | $200 |
| Waterproof Mattress Cover | $20 |
| Total | $301 |

On top of the bed frame, I attached 1/2″ plywood to support the mattress that would eventually be there. Before securing though, I tested the frame by sitting on several different spots to listen for creaks or feel wiggling of the beams – but luckily, it felt pretty solid. Eventually, I would like to add sliding drawers or some type of organized storage system underneath the bed, but thats a minor improvement for the future. Eventually, I also plan to add a small divider wall between the bed and the kitchen unit to break up the space a little more.

I went back and forth on choosing a mattress for a bit, and didn’t want to spend more than $200, or get something ridiculously uncomfortable. Without trying anything out, I went with the Zinus Spa Sensations 10″ Memory Foam Mattress, which came to just under $200 with tax and shipping. So far, its been comfortable, supportive and cool enough in the warm months.
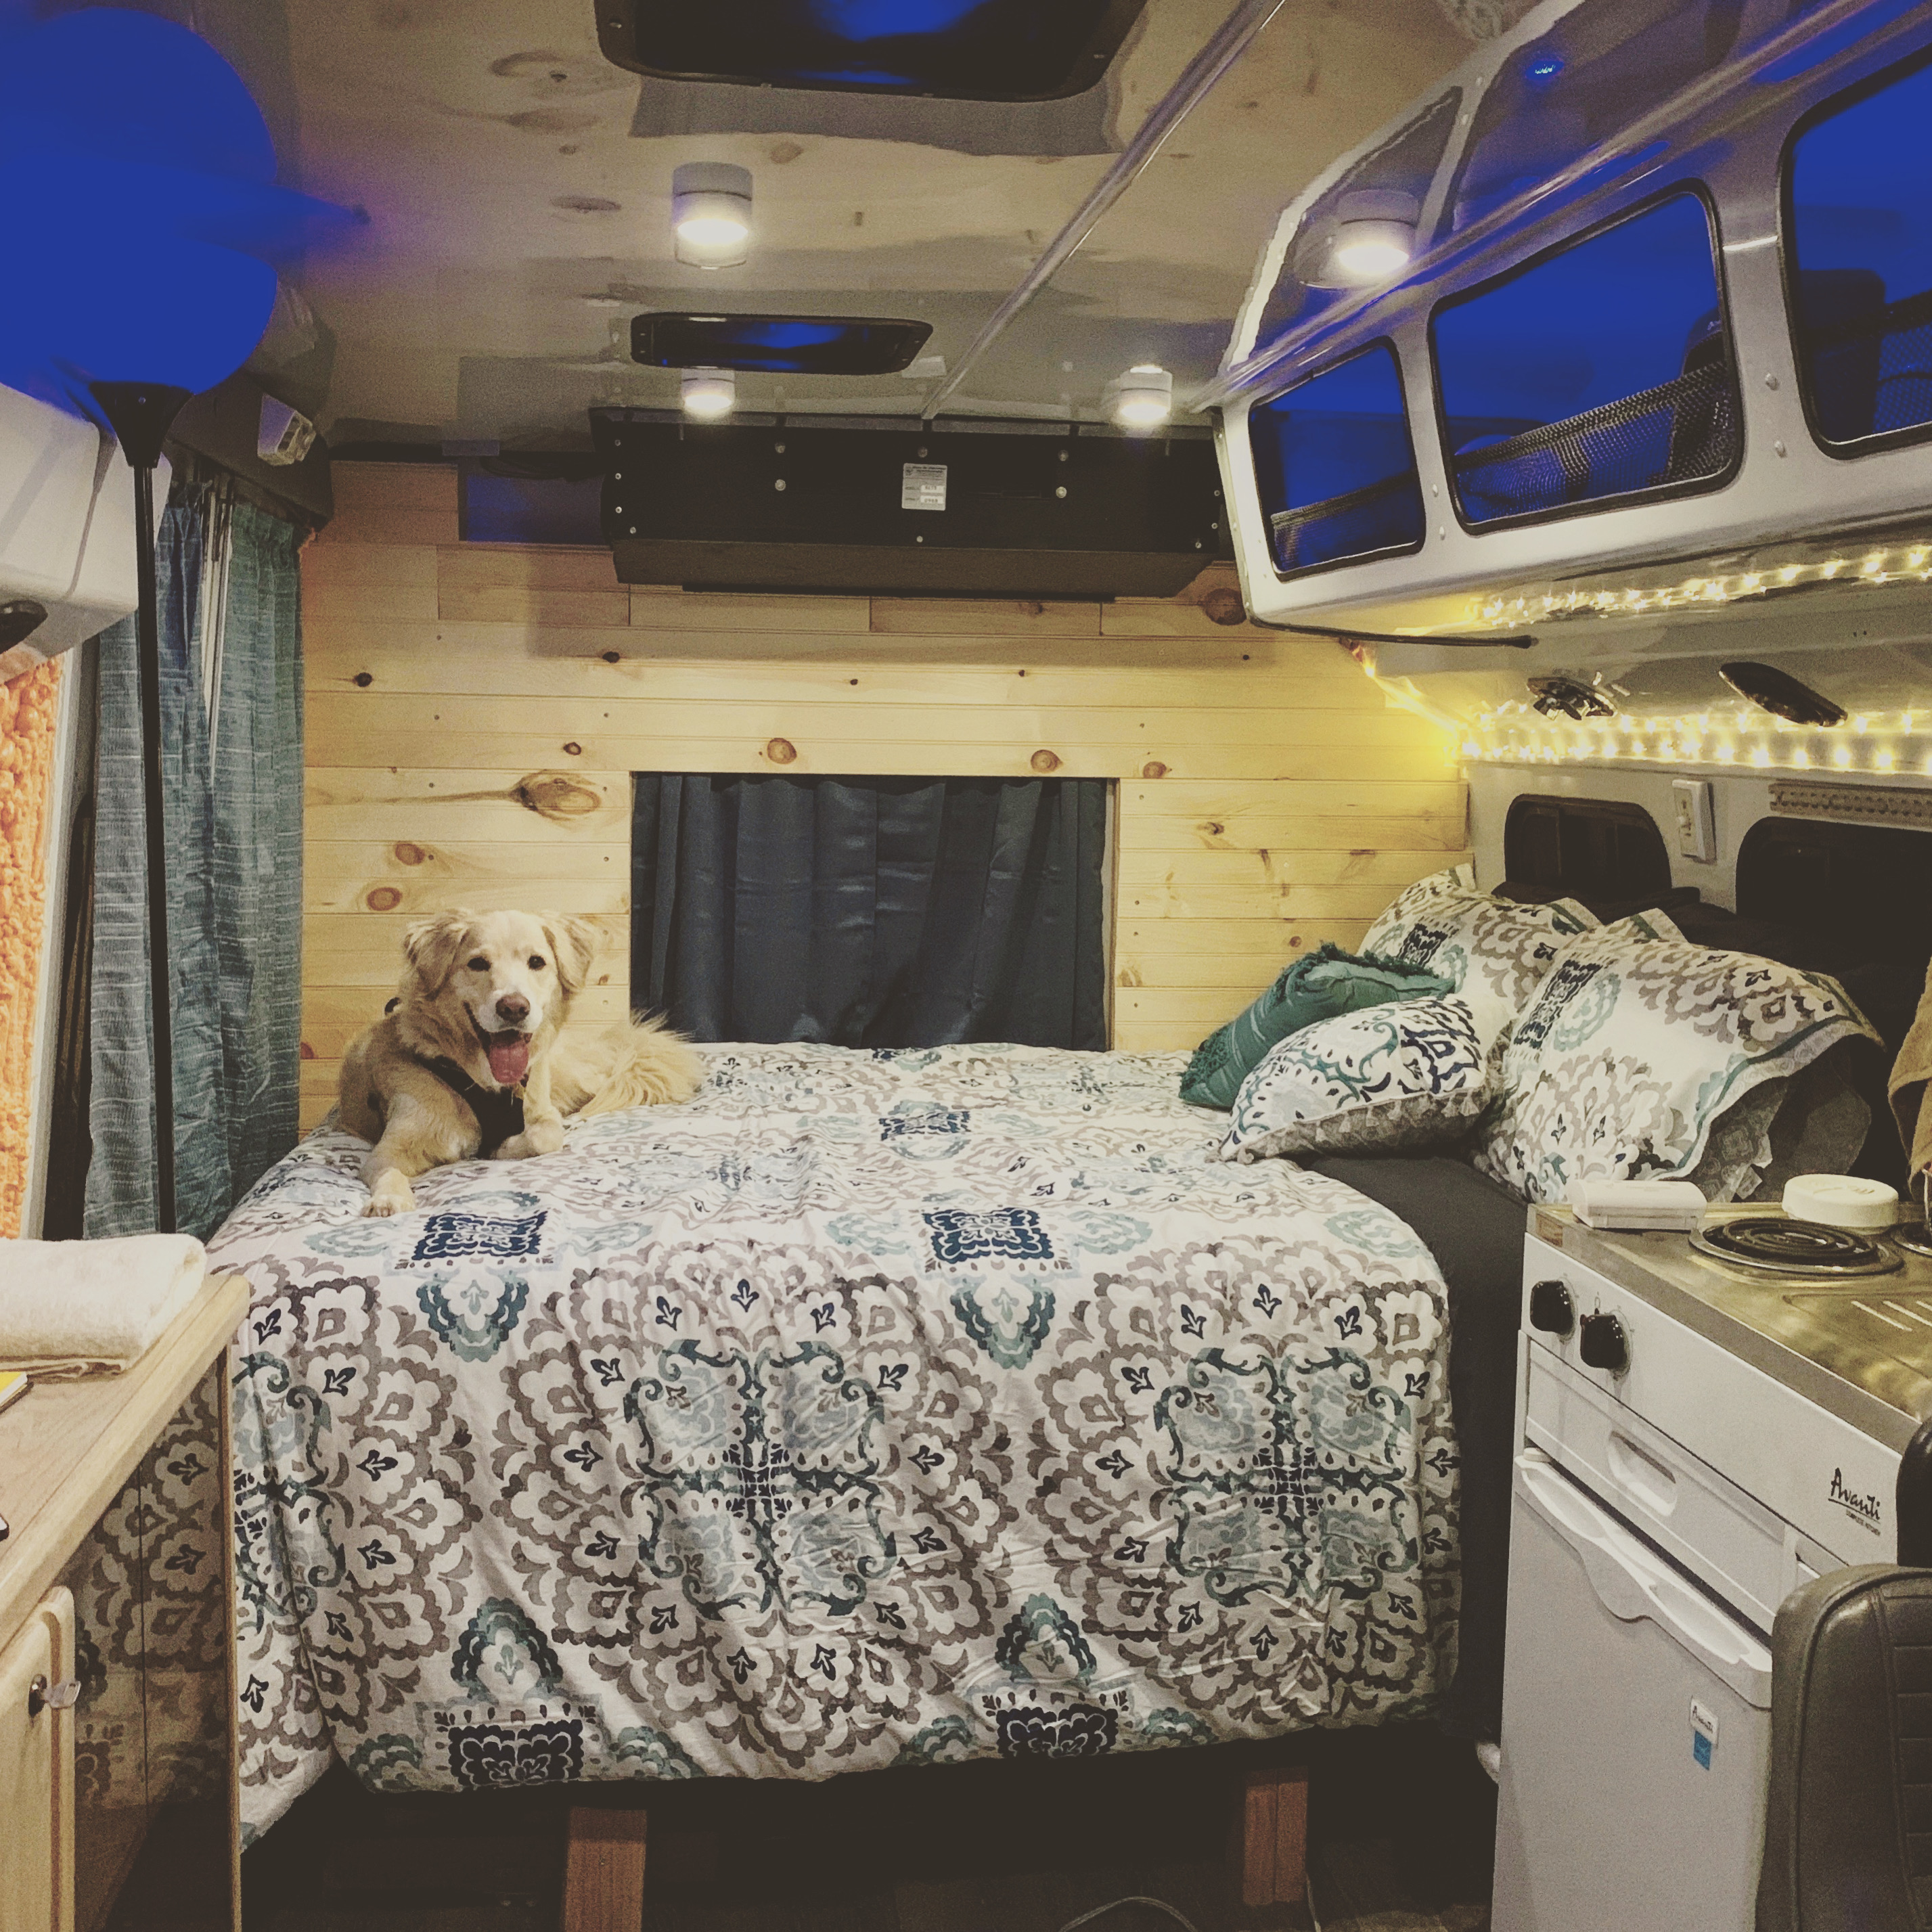
Step 9: Rear Wall and Headboard
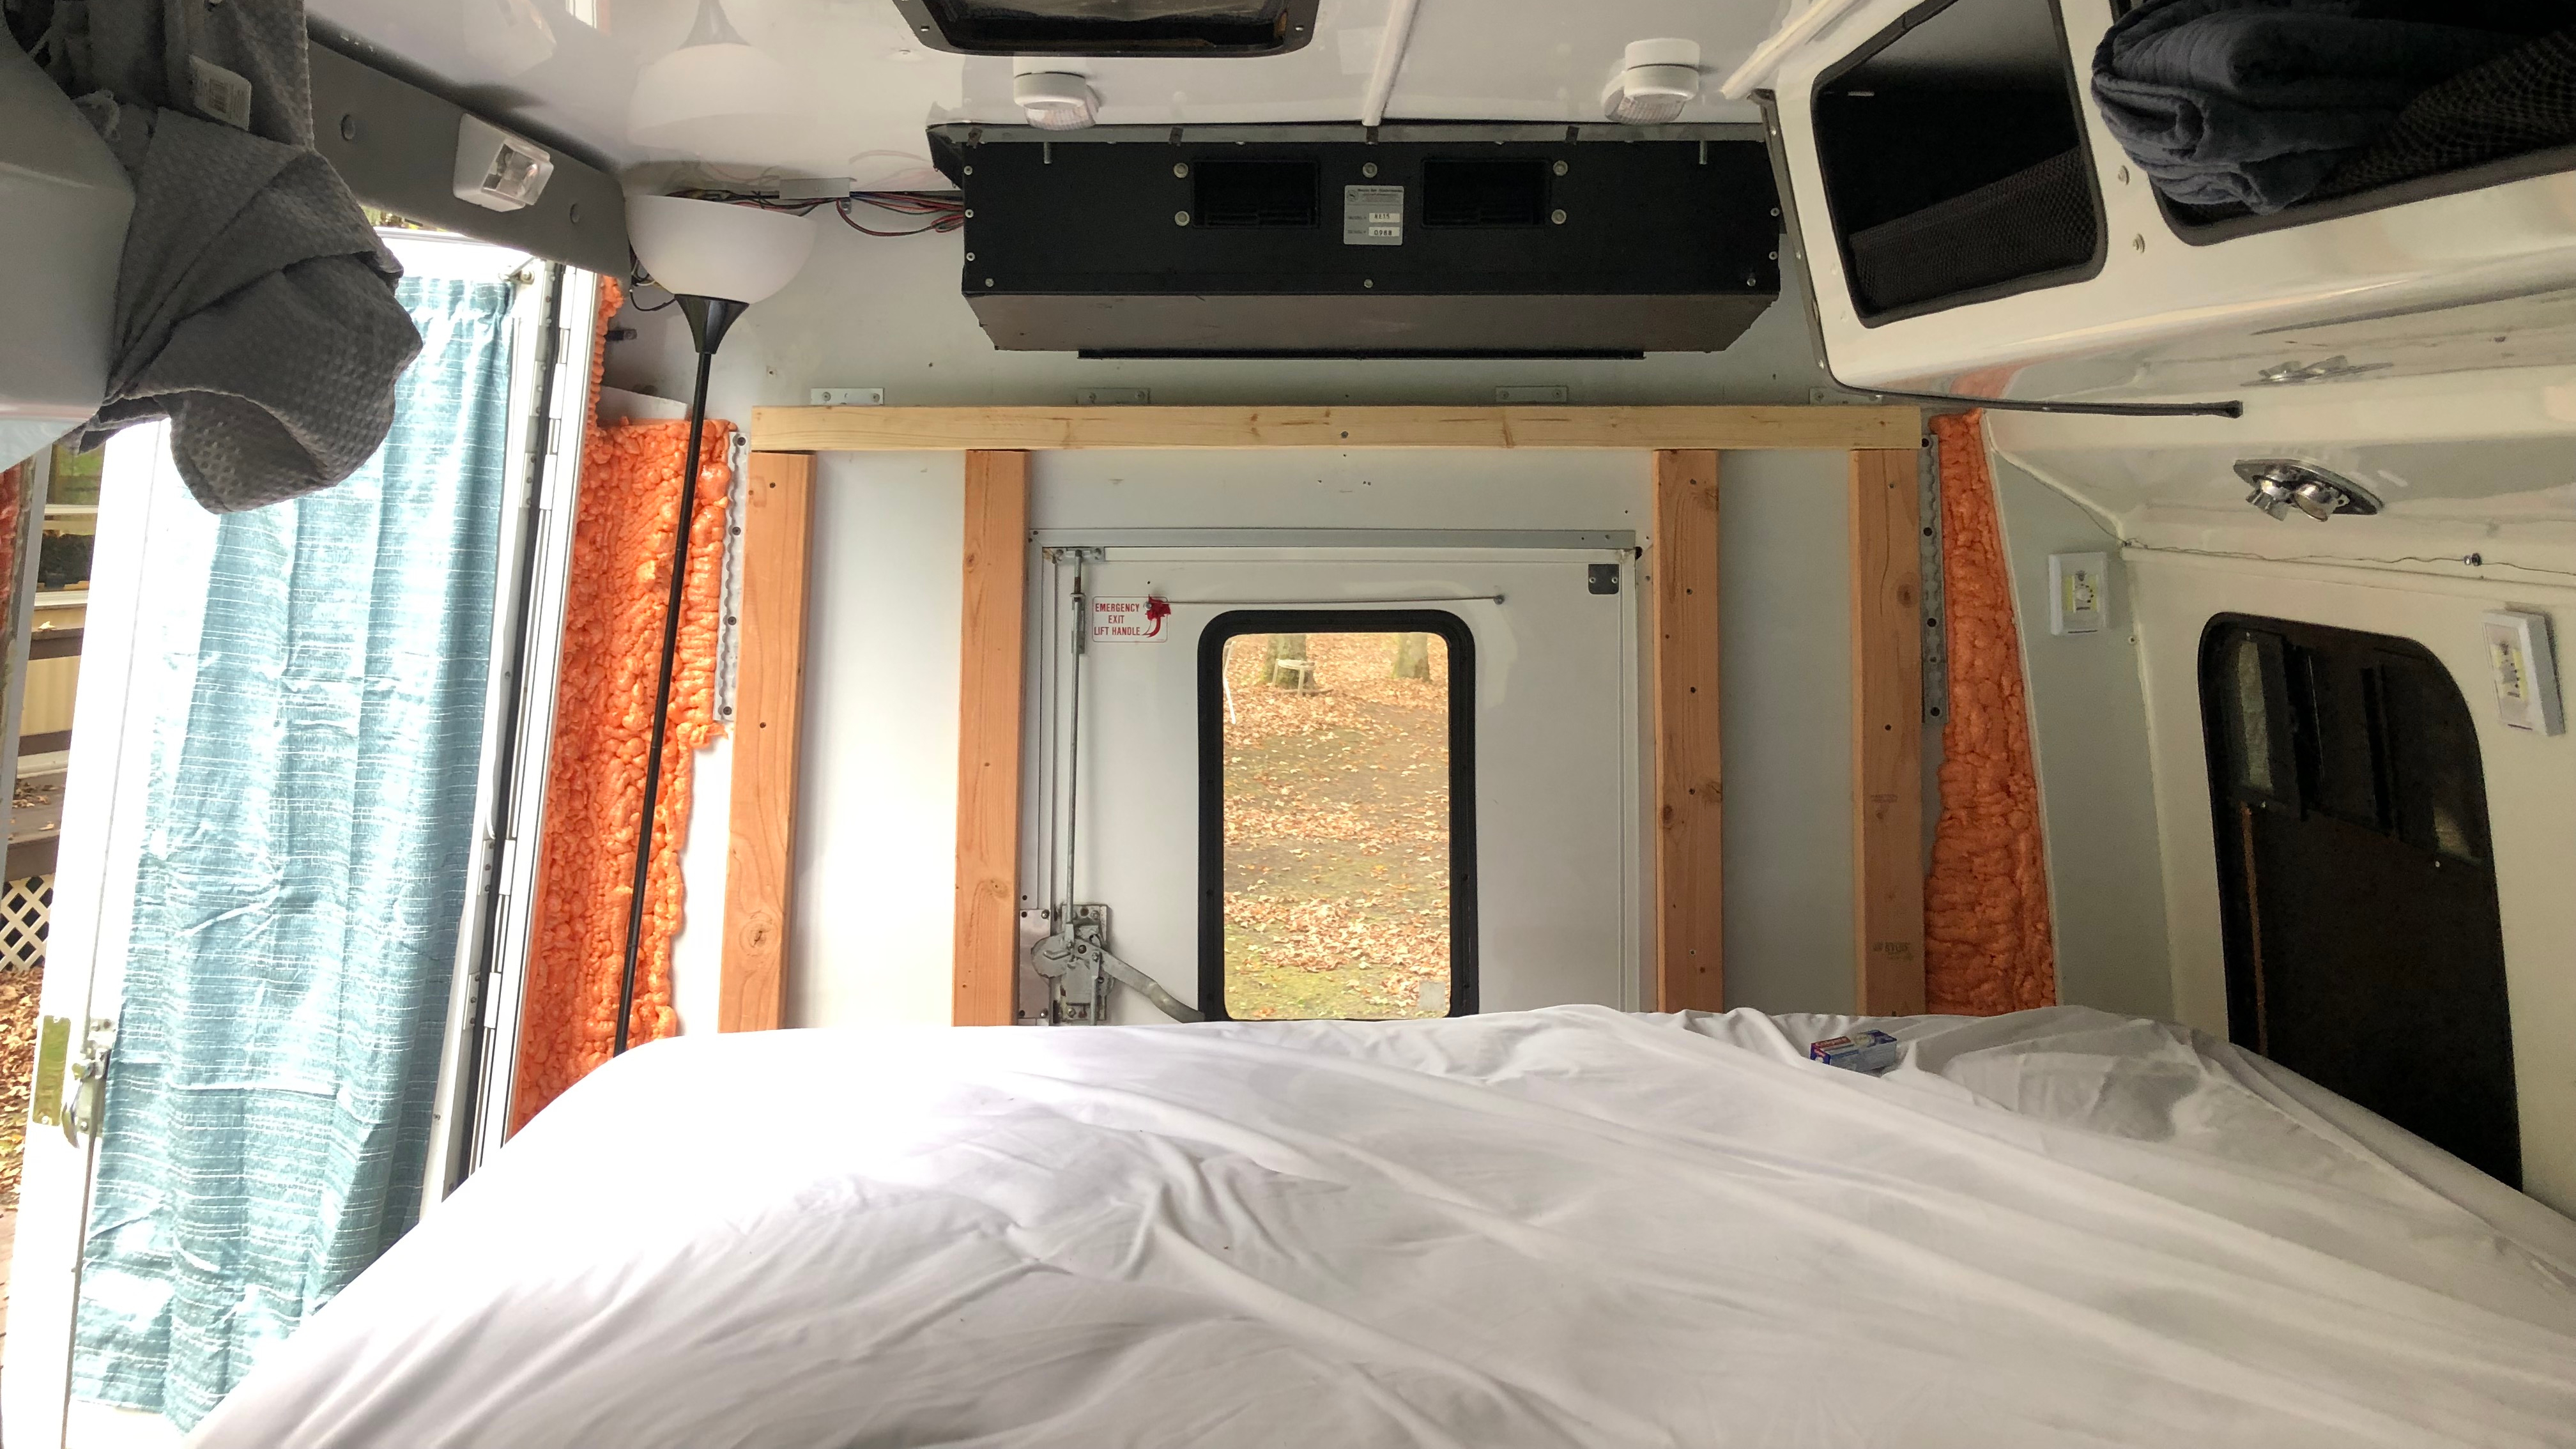
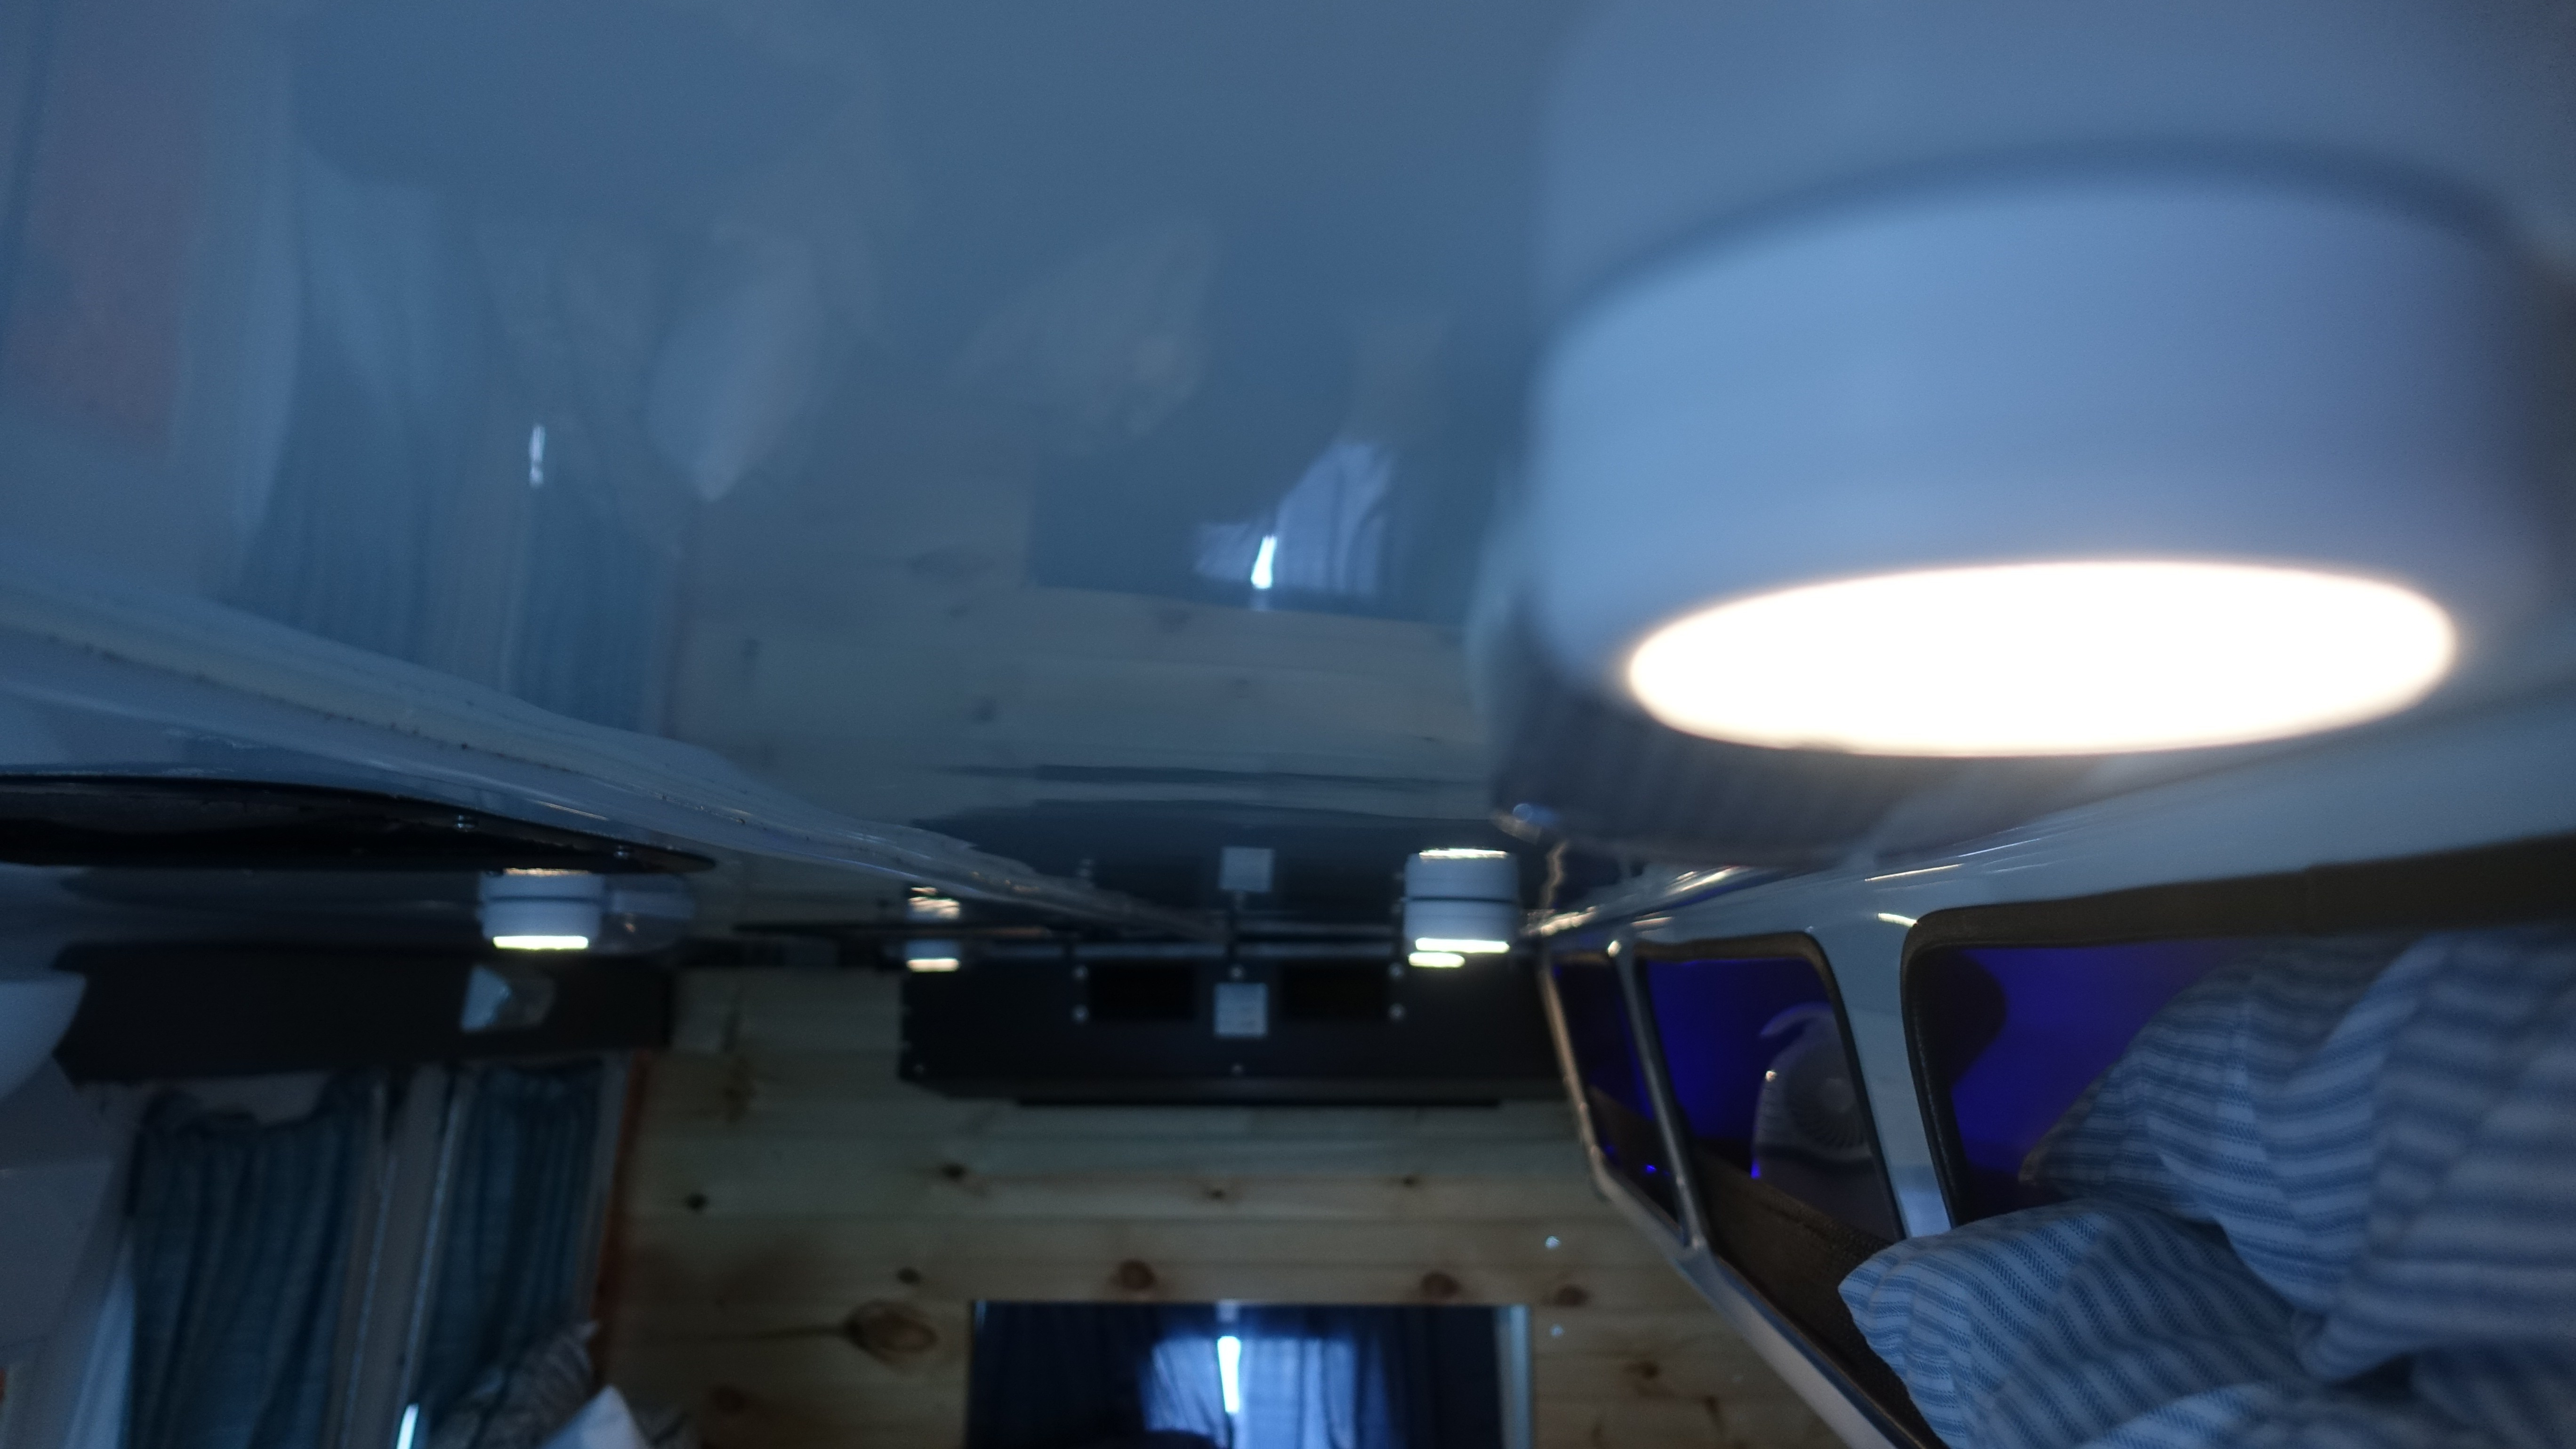
After getting the bed situated, I decided to go with a pine ship-lap as the finish for the back wall and the headboard area. I liked the clean simple feeling, as well as the aesthetic of how the pieces fit together. After locating the studs on the back wall, I attached 2×4’s running top to bottom, insulated with great stuff in the empty spaces between the studs, and then attached the ship-lap wood (pictured below). Also, its worth noting here that I decided not to remove the non-working A/C unit in the rear of the bus (black box near the ceiling). It would have added to the budget to have a technician drain the lines and remove it safely, so I chose to leave it in place.
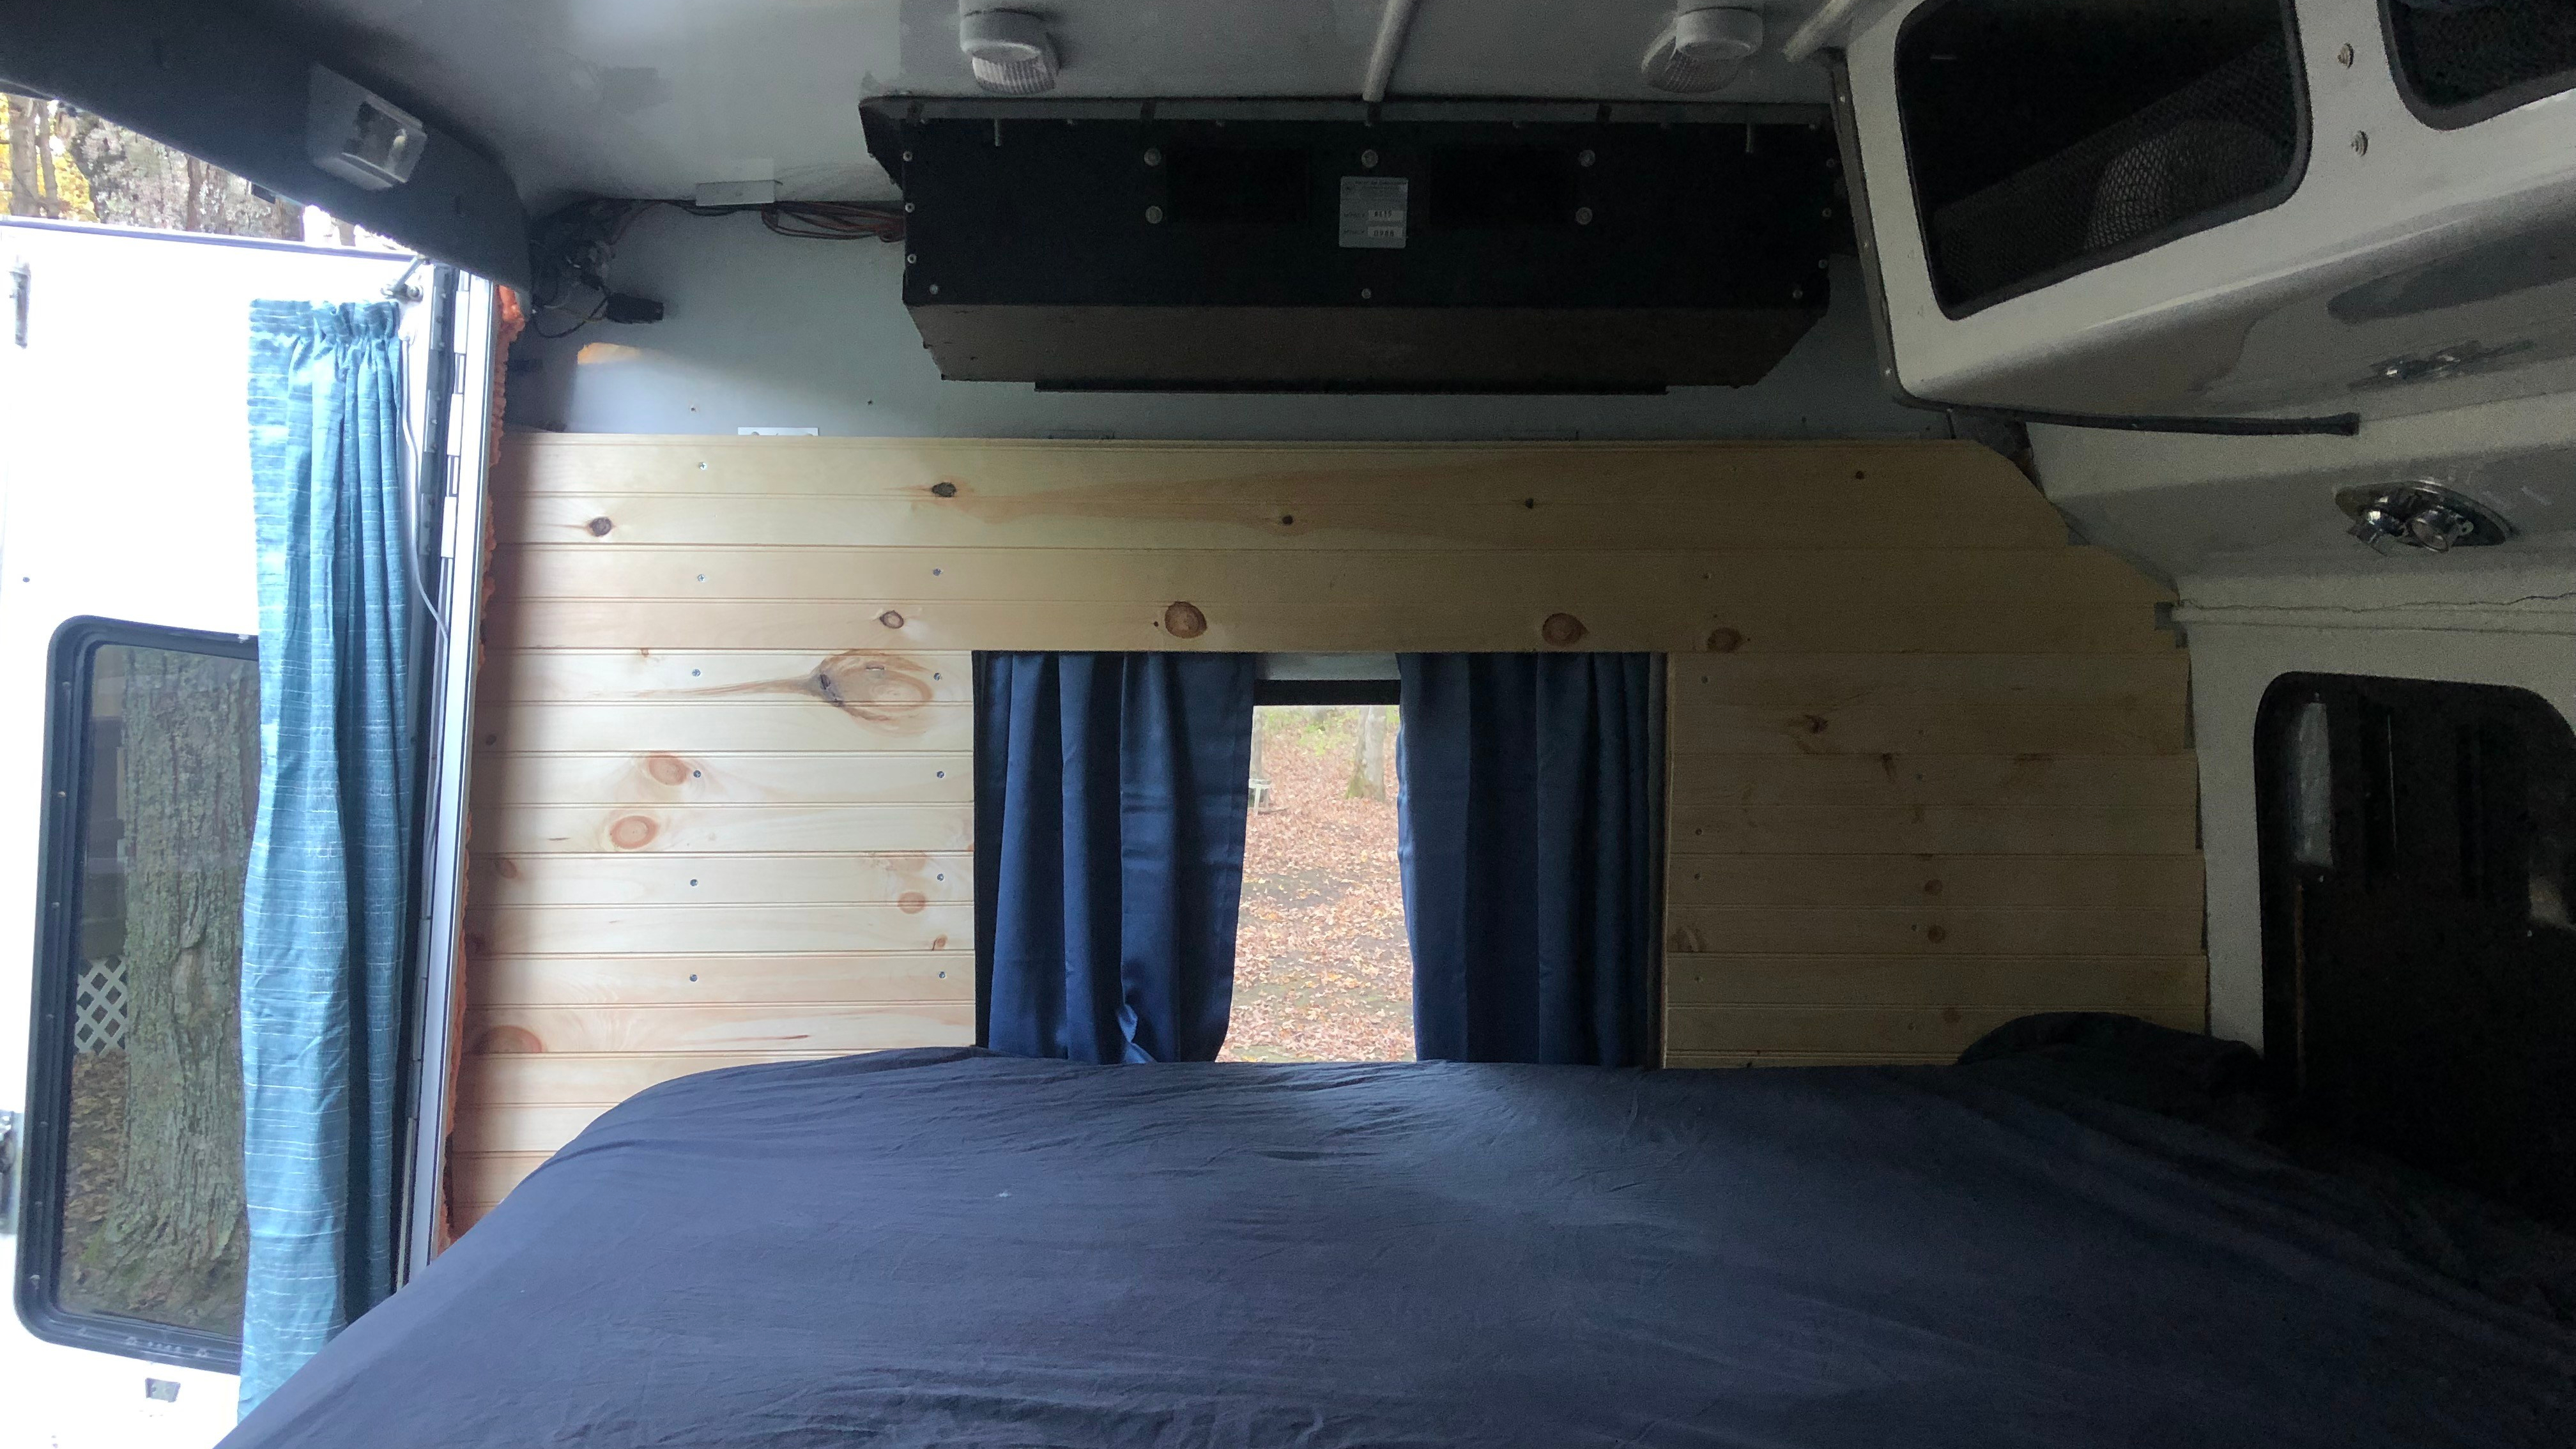
I repeated the same process for the headboard area, but with a different type of insulation. Since the headboard area was against two windows (that would be covered up), I went with 1-inch foam insulation board (with foil backing) between the window spaces and headboard, and filled in any gaps with some Great Stuff. If I were to do it again, I would probably switch to this insulation method for the rear wall as well, as it does have a slightly higher insulation rating (known as R-Value).
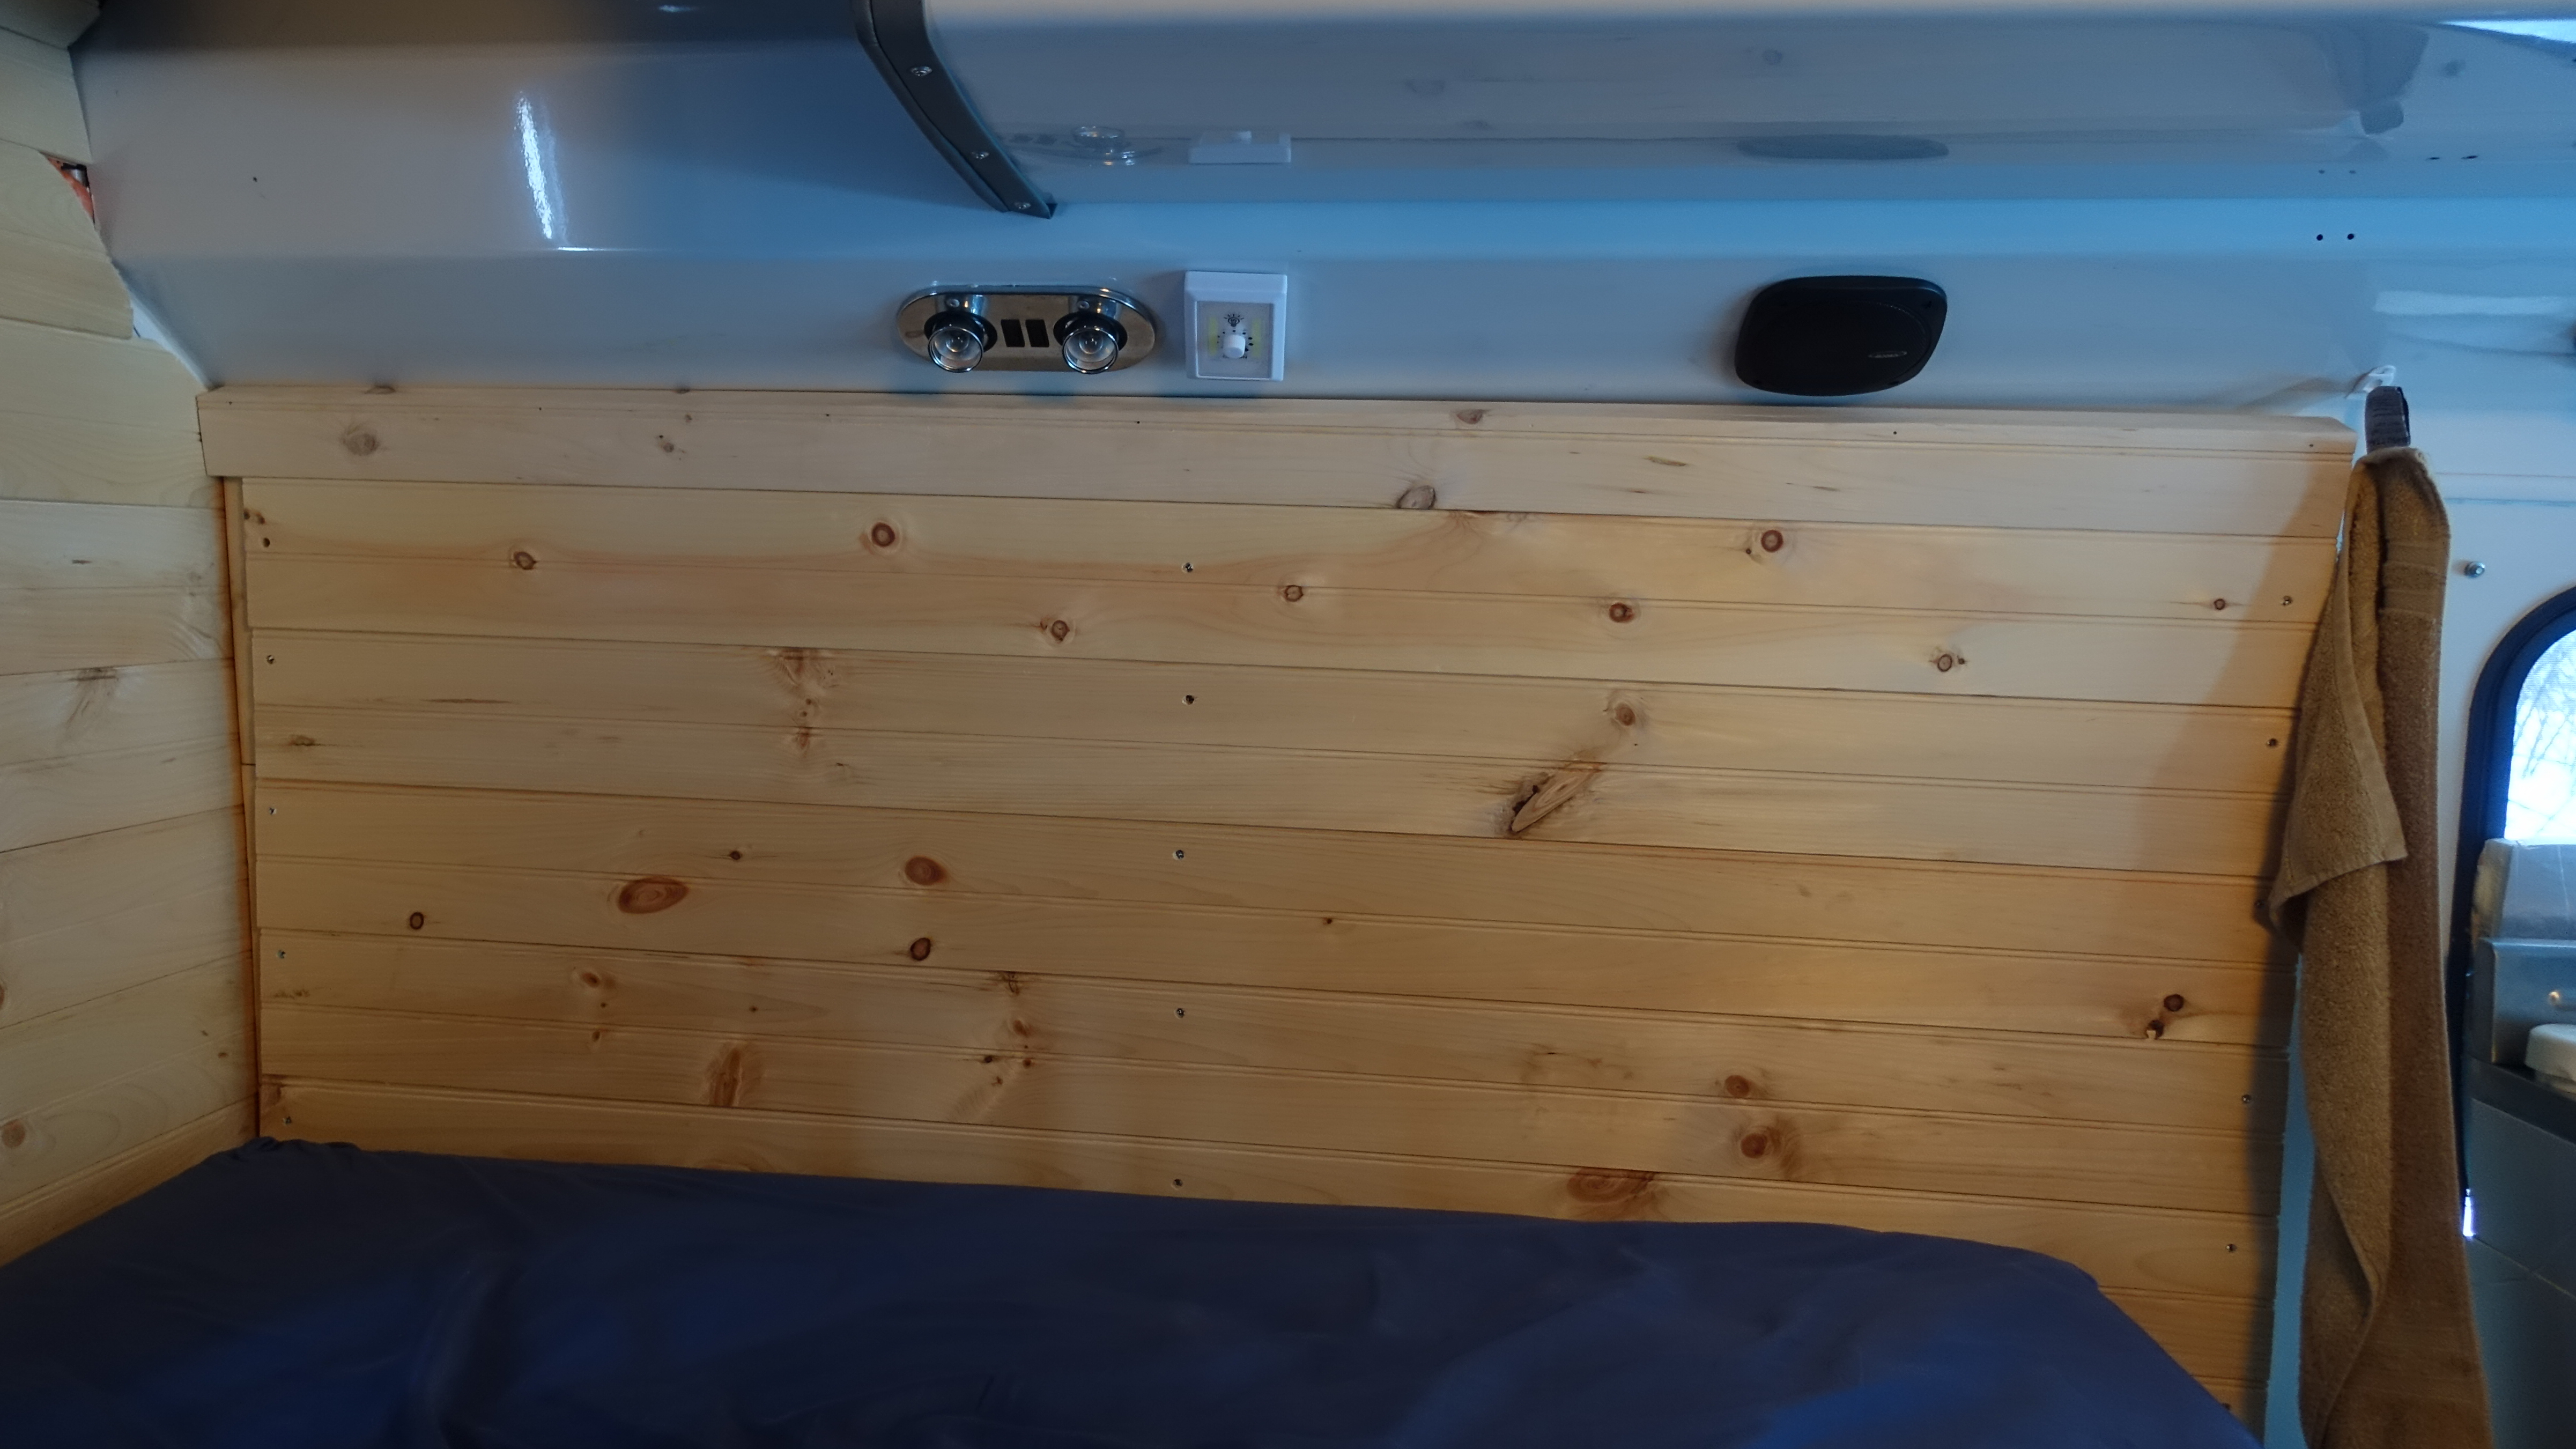
Over the rear window, I attached a simple curtain, by securing a section of rope between two Command Hooks, and threaded the curtains onto that. Since I left a small gap in the wall below the window, I was able to hide this part to give a nice clean look on a budget.
| Item | Cost |
| 2×4 Studs (4 peices) | $15 |
| 8 inch pine shiplap, unfinished (10 peices) | $75 |
| Wood Screws | $6 |
| Great Stuff Foam Insulation (3 cans) | $20 |
| 1 inch, 4×8 Insulated Foam Board | $10 |
| Rear Window Curtains + Attachments | $15 |
| Total | $141 |
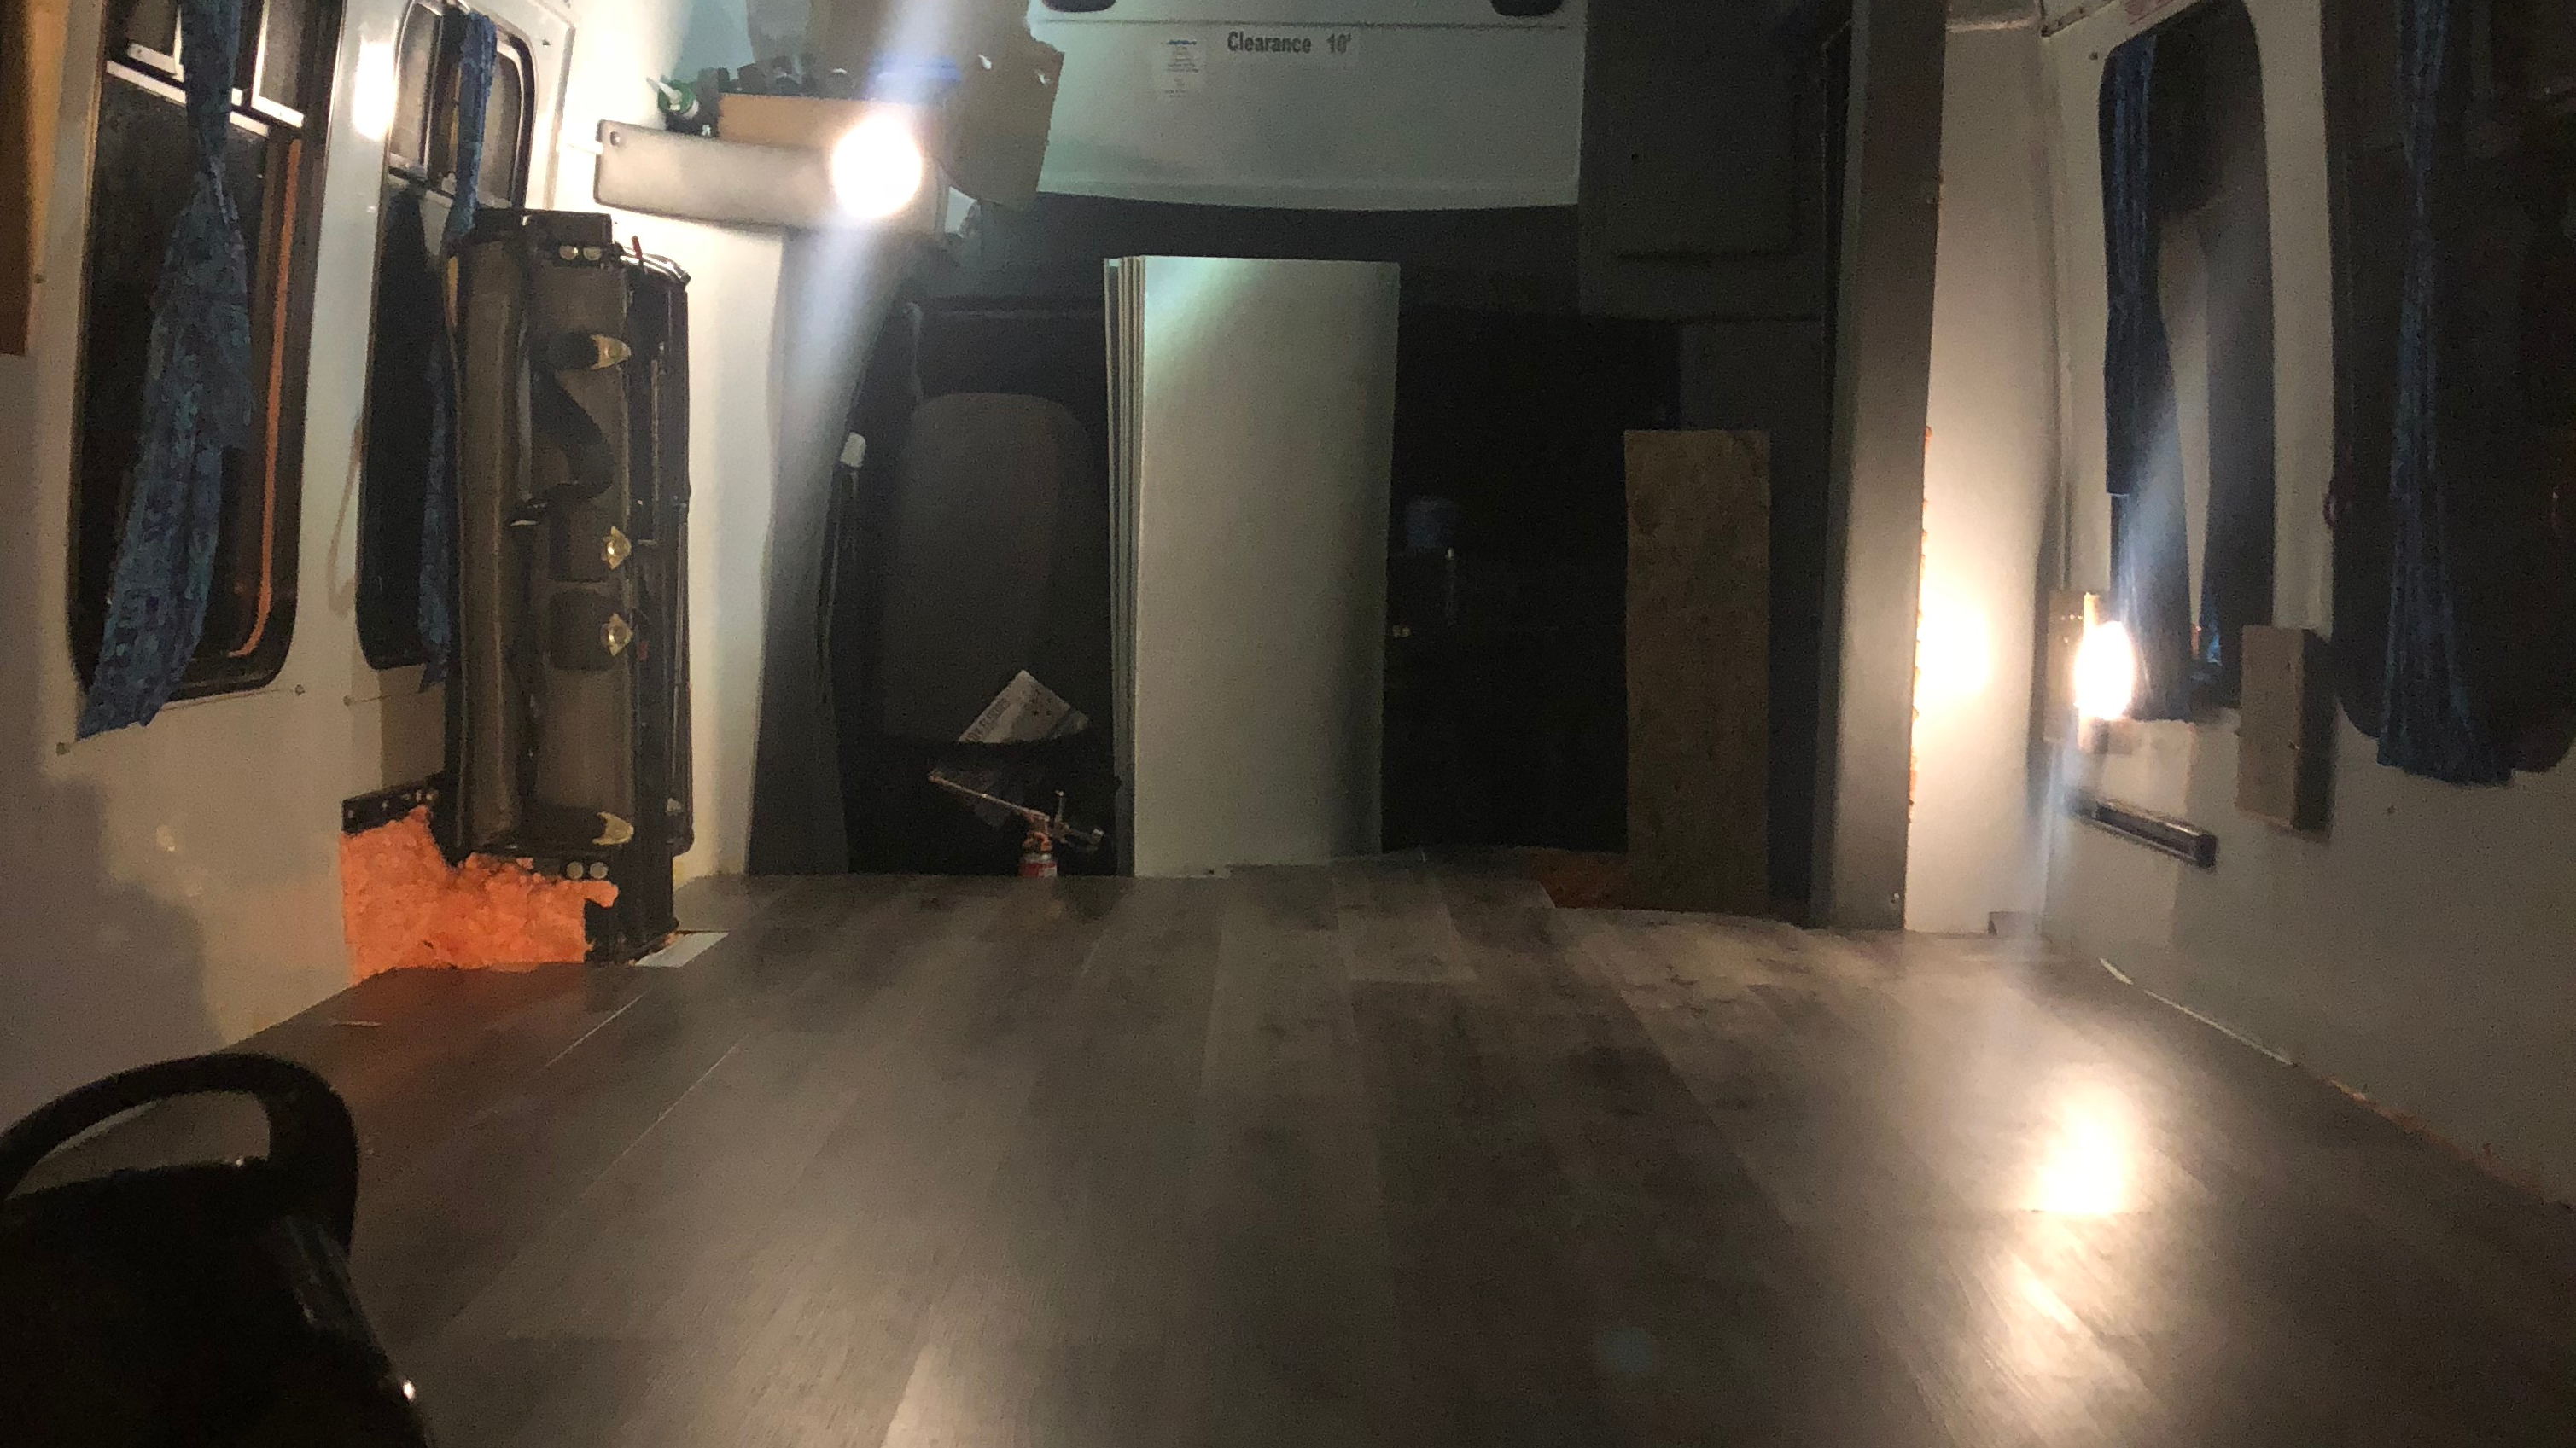
Step 10: Living Area
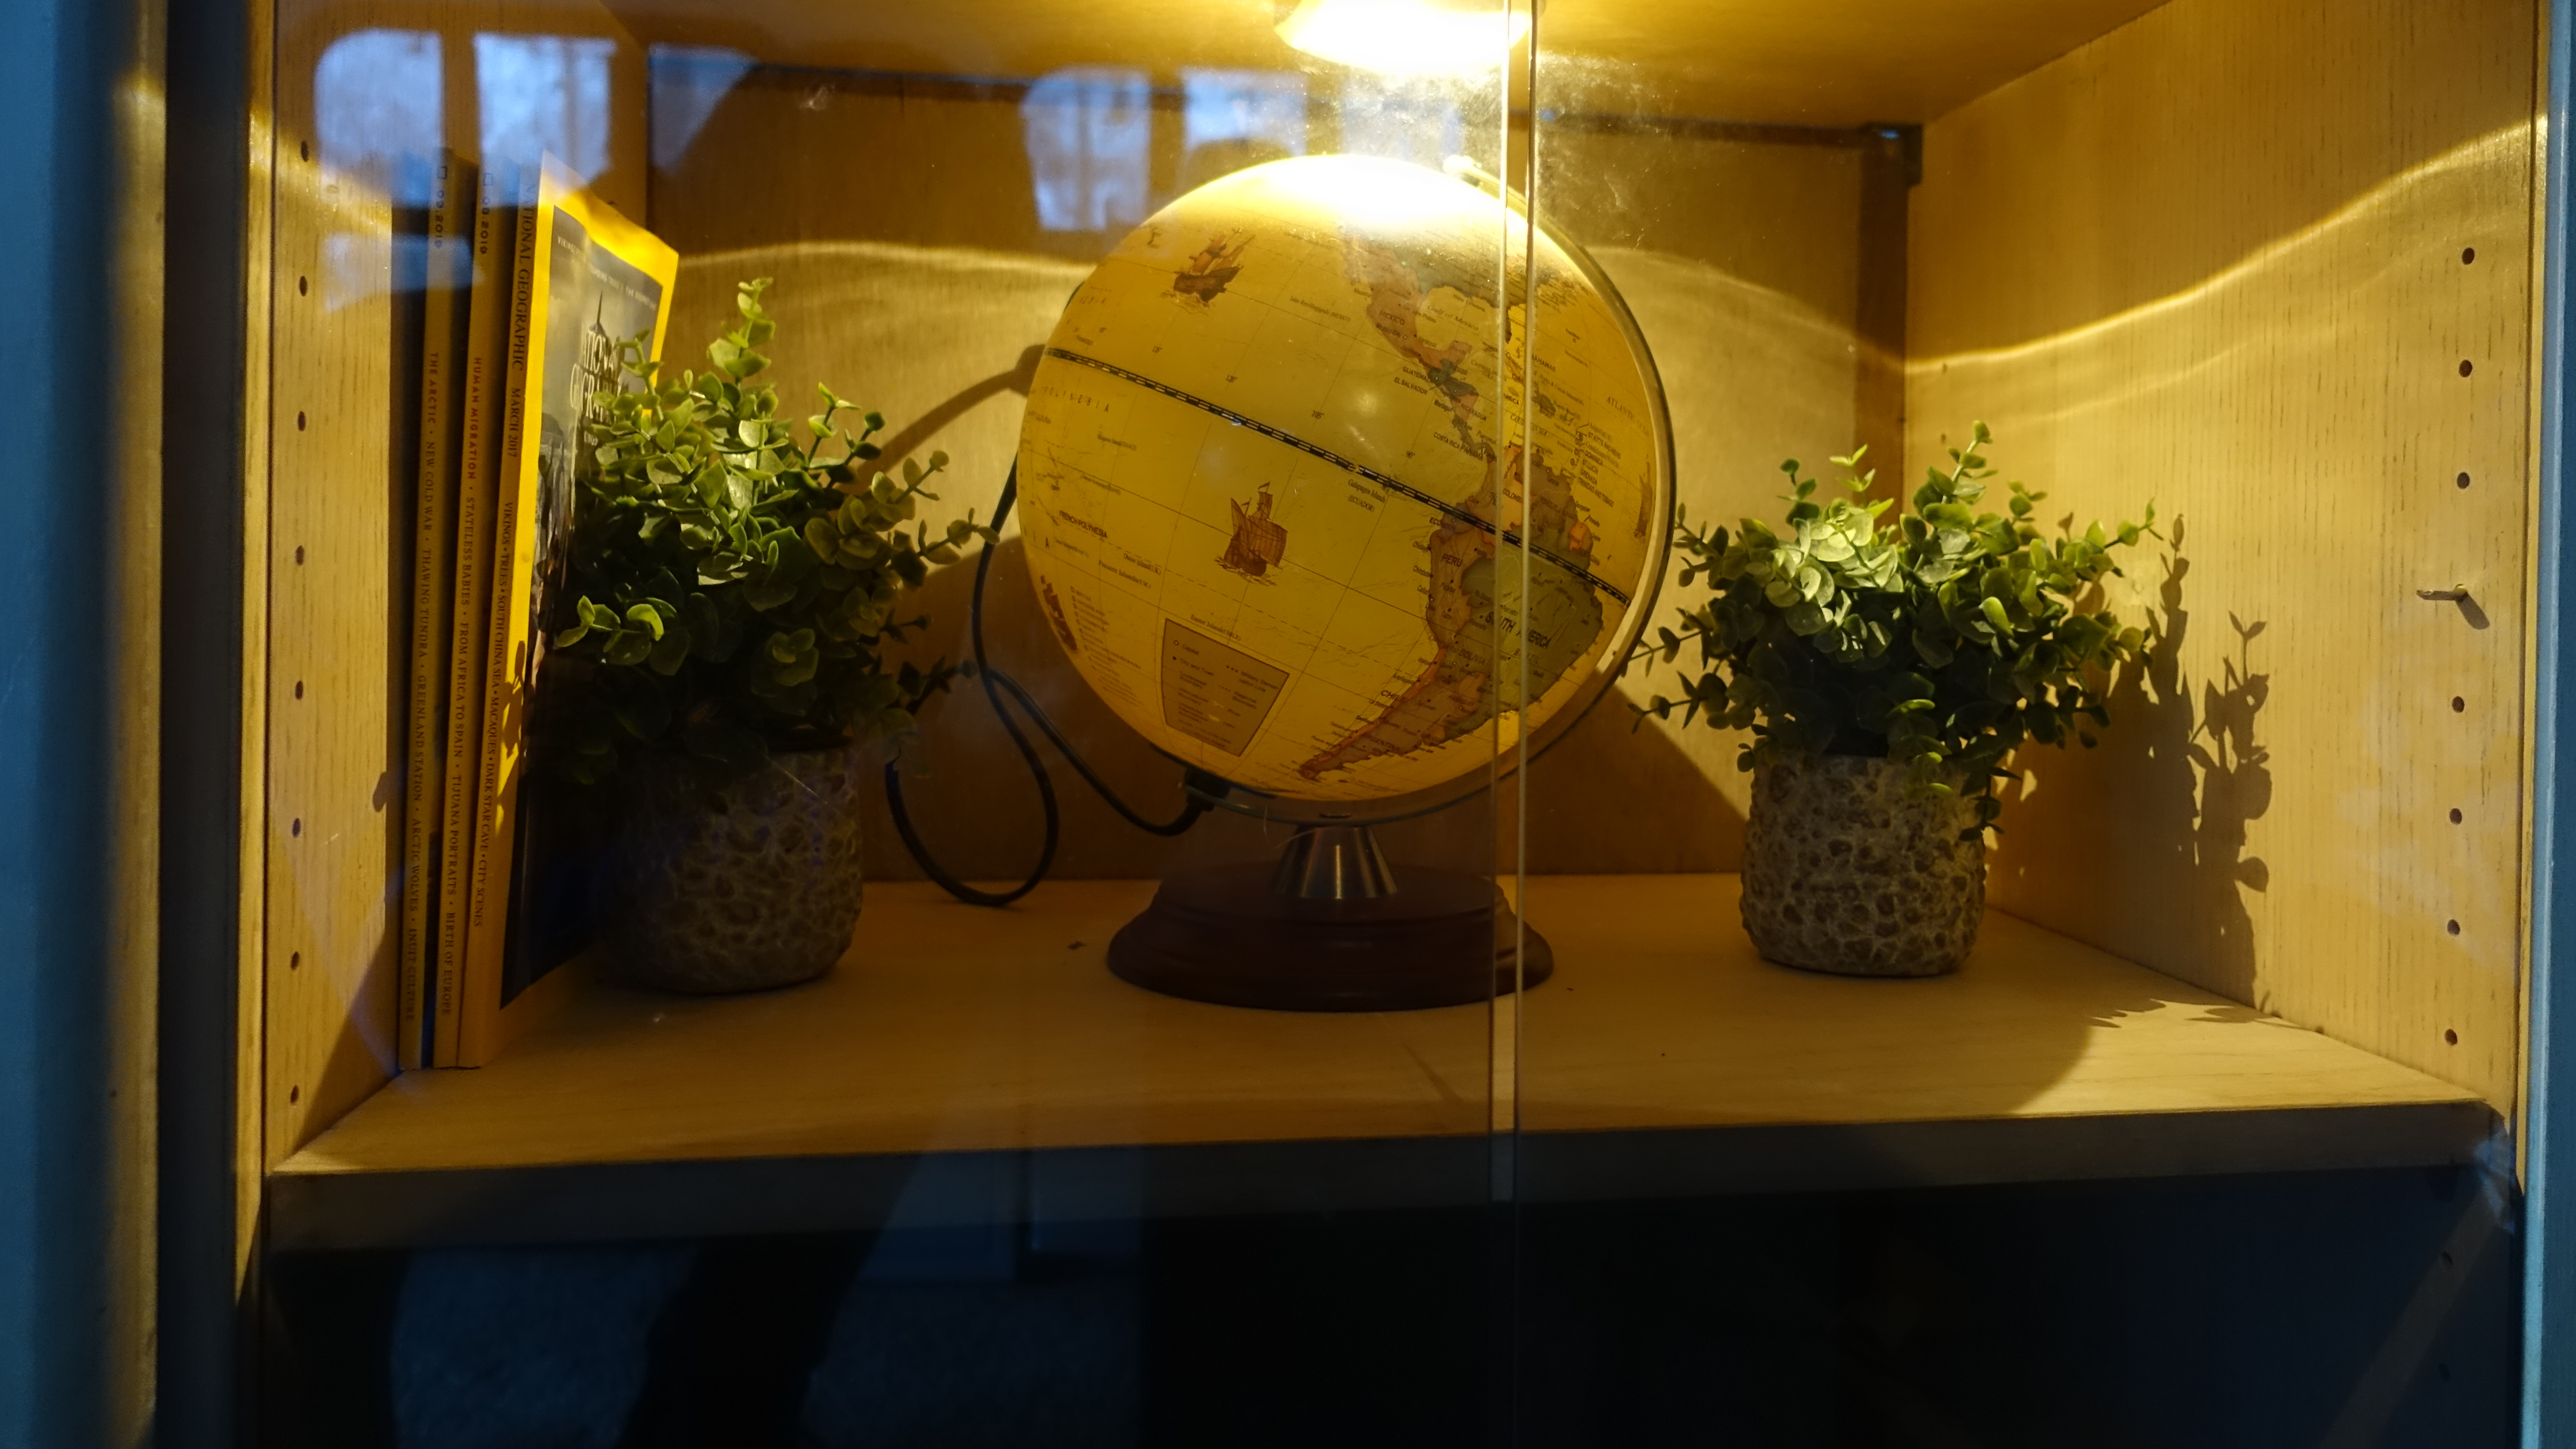
After the bedroom was completed, the rest of the layout was pretty easy to finish up and get into place. Luckily, I was able to come across a second-hand cabinet and entertainment center that fit perfectly along the right side of the bus (opposite of the kitchen), and added a nice vibe with the glass front cabinets on one end. Since the bus is staying stationary and the unit is pretty stable on its own, I have not attached it to the sides of the bus (giving me the option to update/make my own cabinets later on). While I’m not sure of the original cost of this unit, its likely you could find one on your local craigslist for $100 or less.

| Item | Cost |
| Cabinet Entertainment Center | $100 (estimate) |
| Folding Table | $15 |
| 3X5 Carpet | $15 |
| Total | $130 |
In front of the van’s folding bench seat, I added a small folding table, that when not in use, can fit in the gap behind the driver seat. A lot of people when going for a simple build will make sure that everything is attached securely for when the vehicle is in motion – but if you are going with a budget build that will mainly be stationary, its okay to have some moveable furniture pieces. Aside from that, a 3X5 section of carpet in the middle (for stepping out of bed when its cold), and that wraps up the living space.
Step 11: Lighting
Even though the bus came with two different sets of overhead lighting, I chose to go with a separate system. It would have been a fairly complicated electrical project to trace the wires and switch them to a separate power system, and to be honest I wasn’t comfortable with my electrician skills to try and attempt.
Instead, I went with a standing lamp, connected to the surge protector between the end of the cabinets and the foot of the bed. For the most part though, the overhead, battery-powered, remote-controlled LED puck lights provide the better lighting and get more use. They quickly and easily attached to the ceiling, and required 3 AAA batteries each – which haven’t burned out after 3 months of somewhat regular use. They’re also dimmable, which gives a pretty nice range of adjustment, and the remote means everything can be turned off from the bed

| Item | Cost |
| Standing Lamp | $15 |
| White Overhead LEDS | $30 |
| Color Changing LEDS | $30 |
| Incandescent Accent Lights | $20 |
| AAA Batteries | $30 |
| Total | $125 |
Finally, I added some accent lighting (also remote control and battery powered) underneath the bed and within the glass cabinet. Perfect for just that little bit of lighting if you’re watching a movie or need to get up and out of bed for some reason in the middle of the night. Last, the kid in me saw some more remote controlled LED lights at Home Depot, which happened to be color changing (red, blue or green), so those were added as well. A little bit of remote overload (there’s three remotes overall), but I think its a fun touch.
Finishing Touches
After getting the lighting setup, there were just a few more finishing touches to improve the liveability just a bit. I added curtain over the rear barn door windows (once again, using the command hook+rope method), as well as a roll up curtain over the side windows by the cabinets. For those, I attached the corners and middle directly into the van walls with small screws, and then added 3 command hook + rope loops to secure the curtain when its rolled up to add some natural light in.
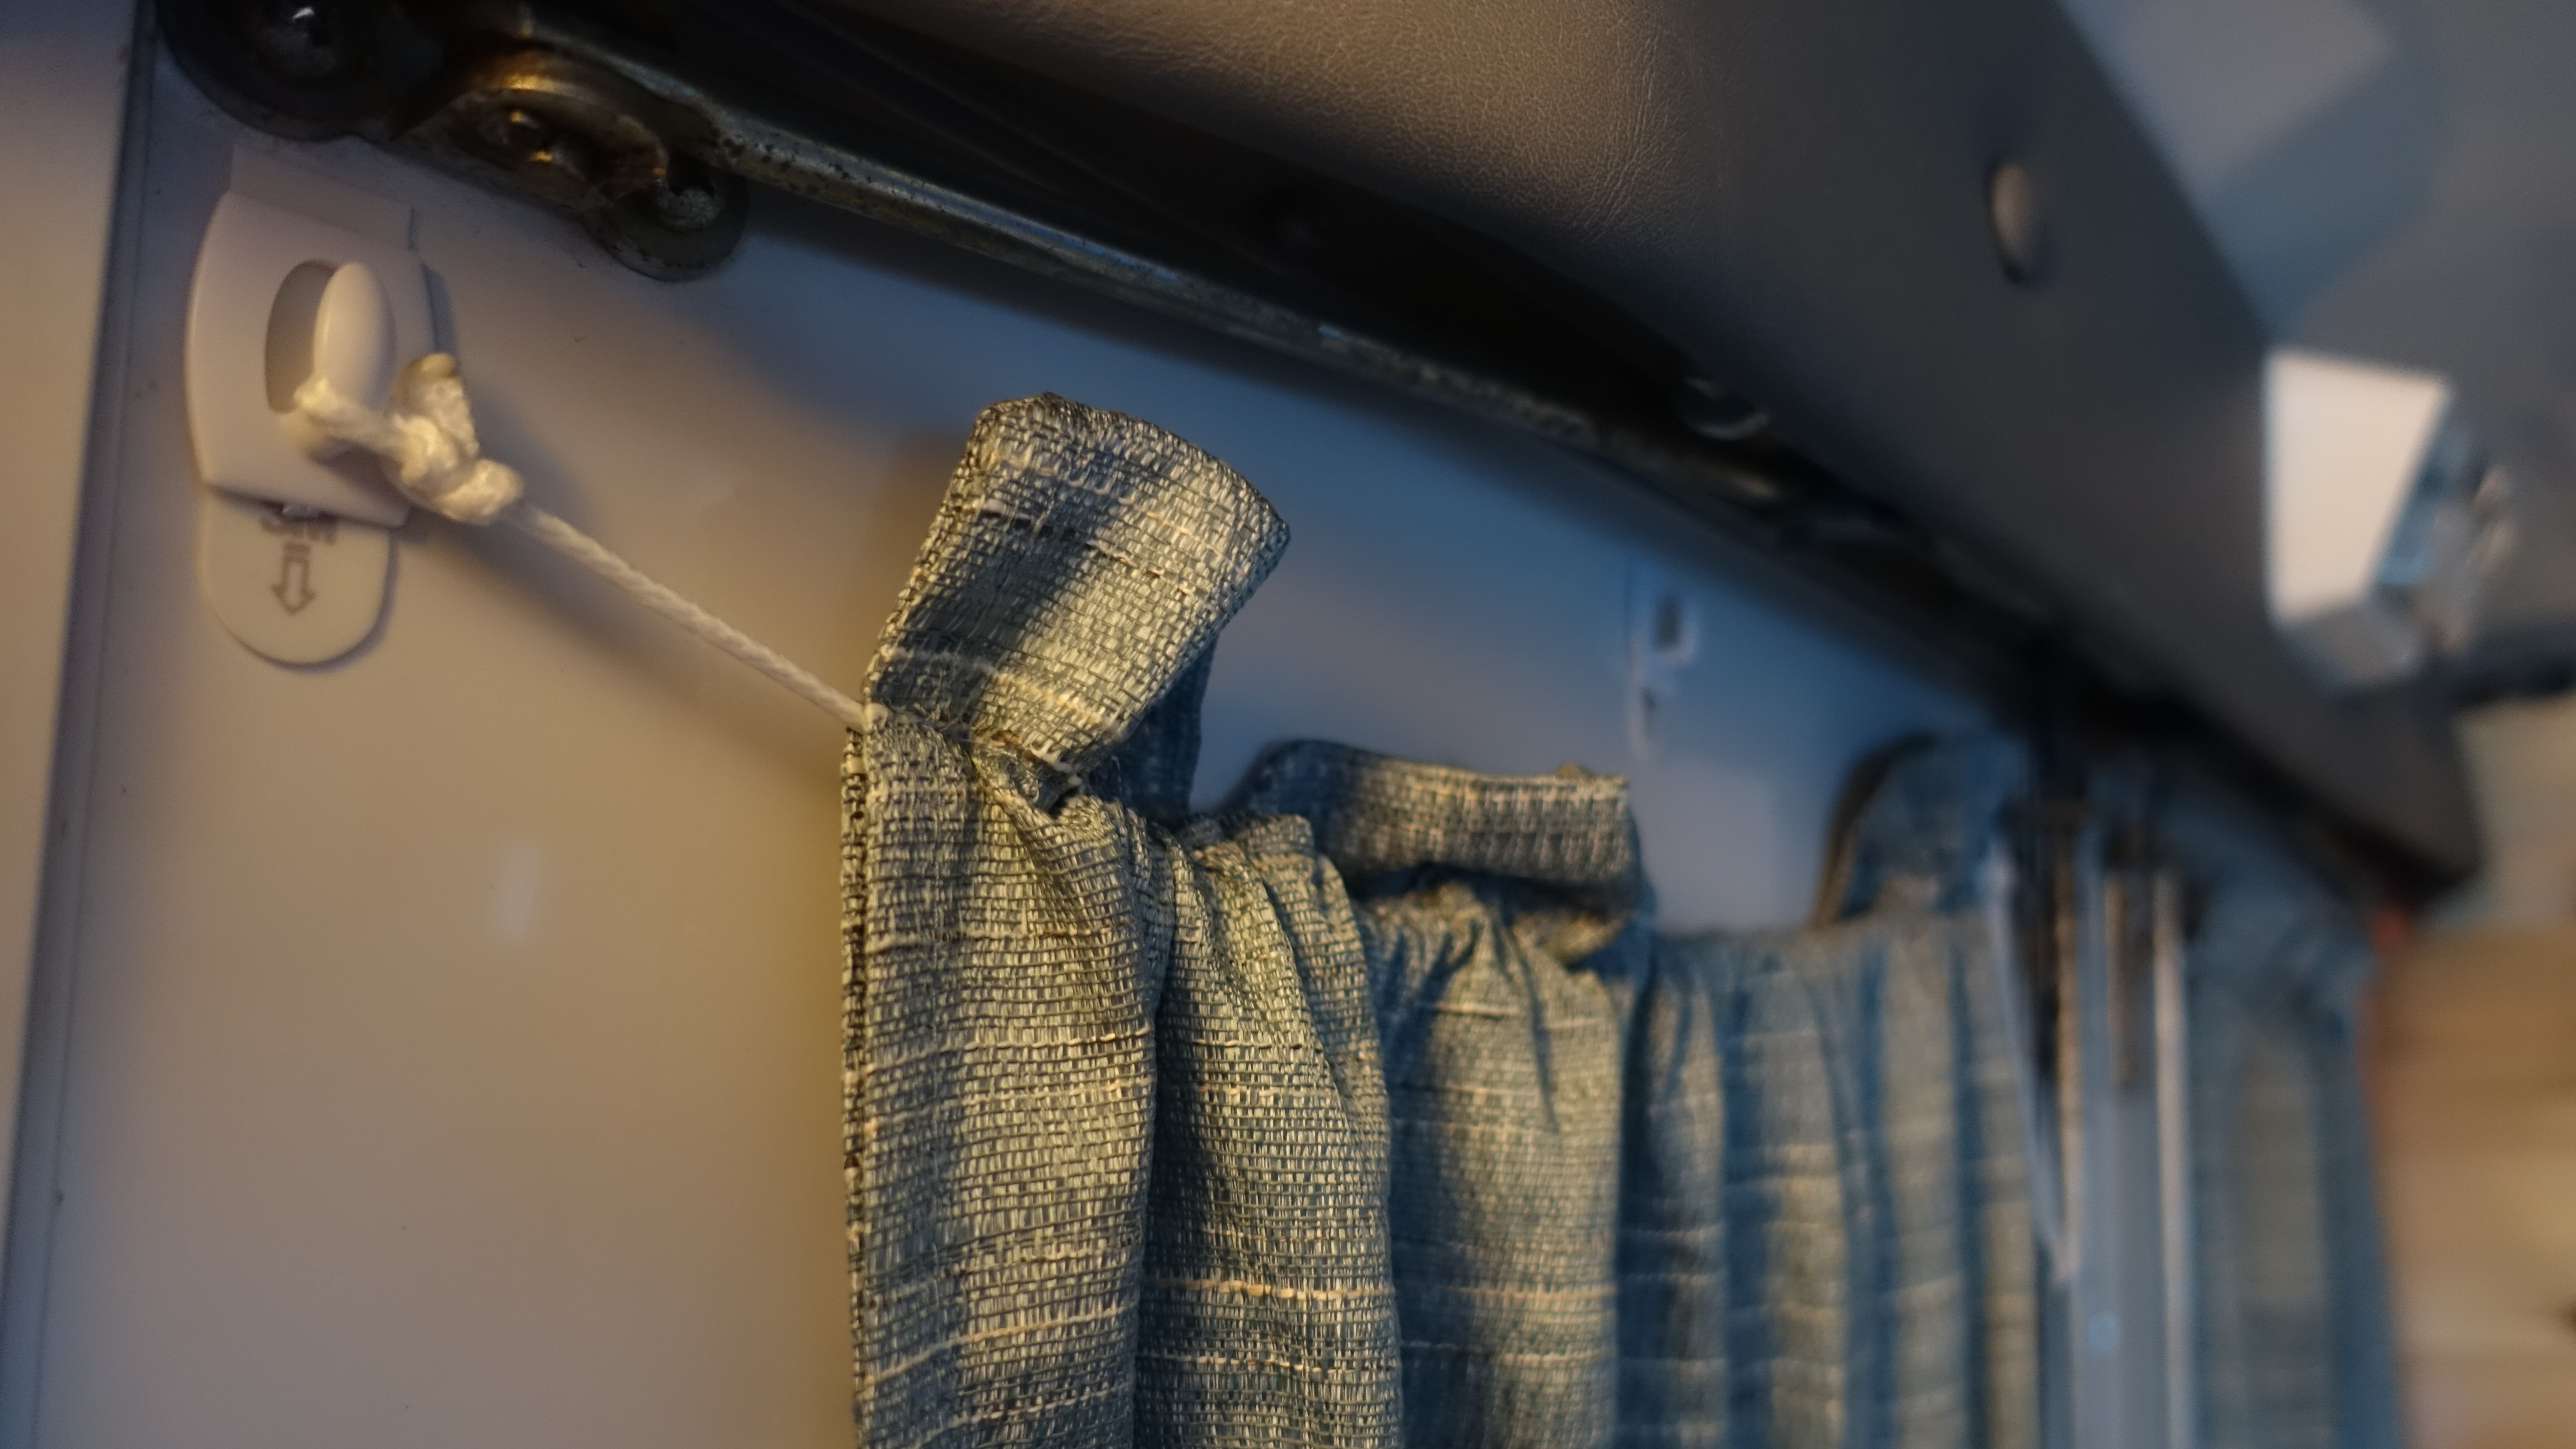
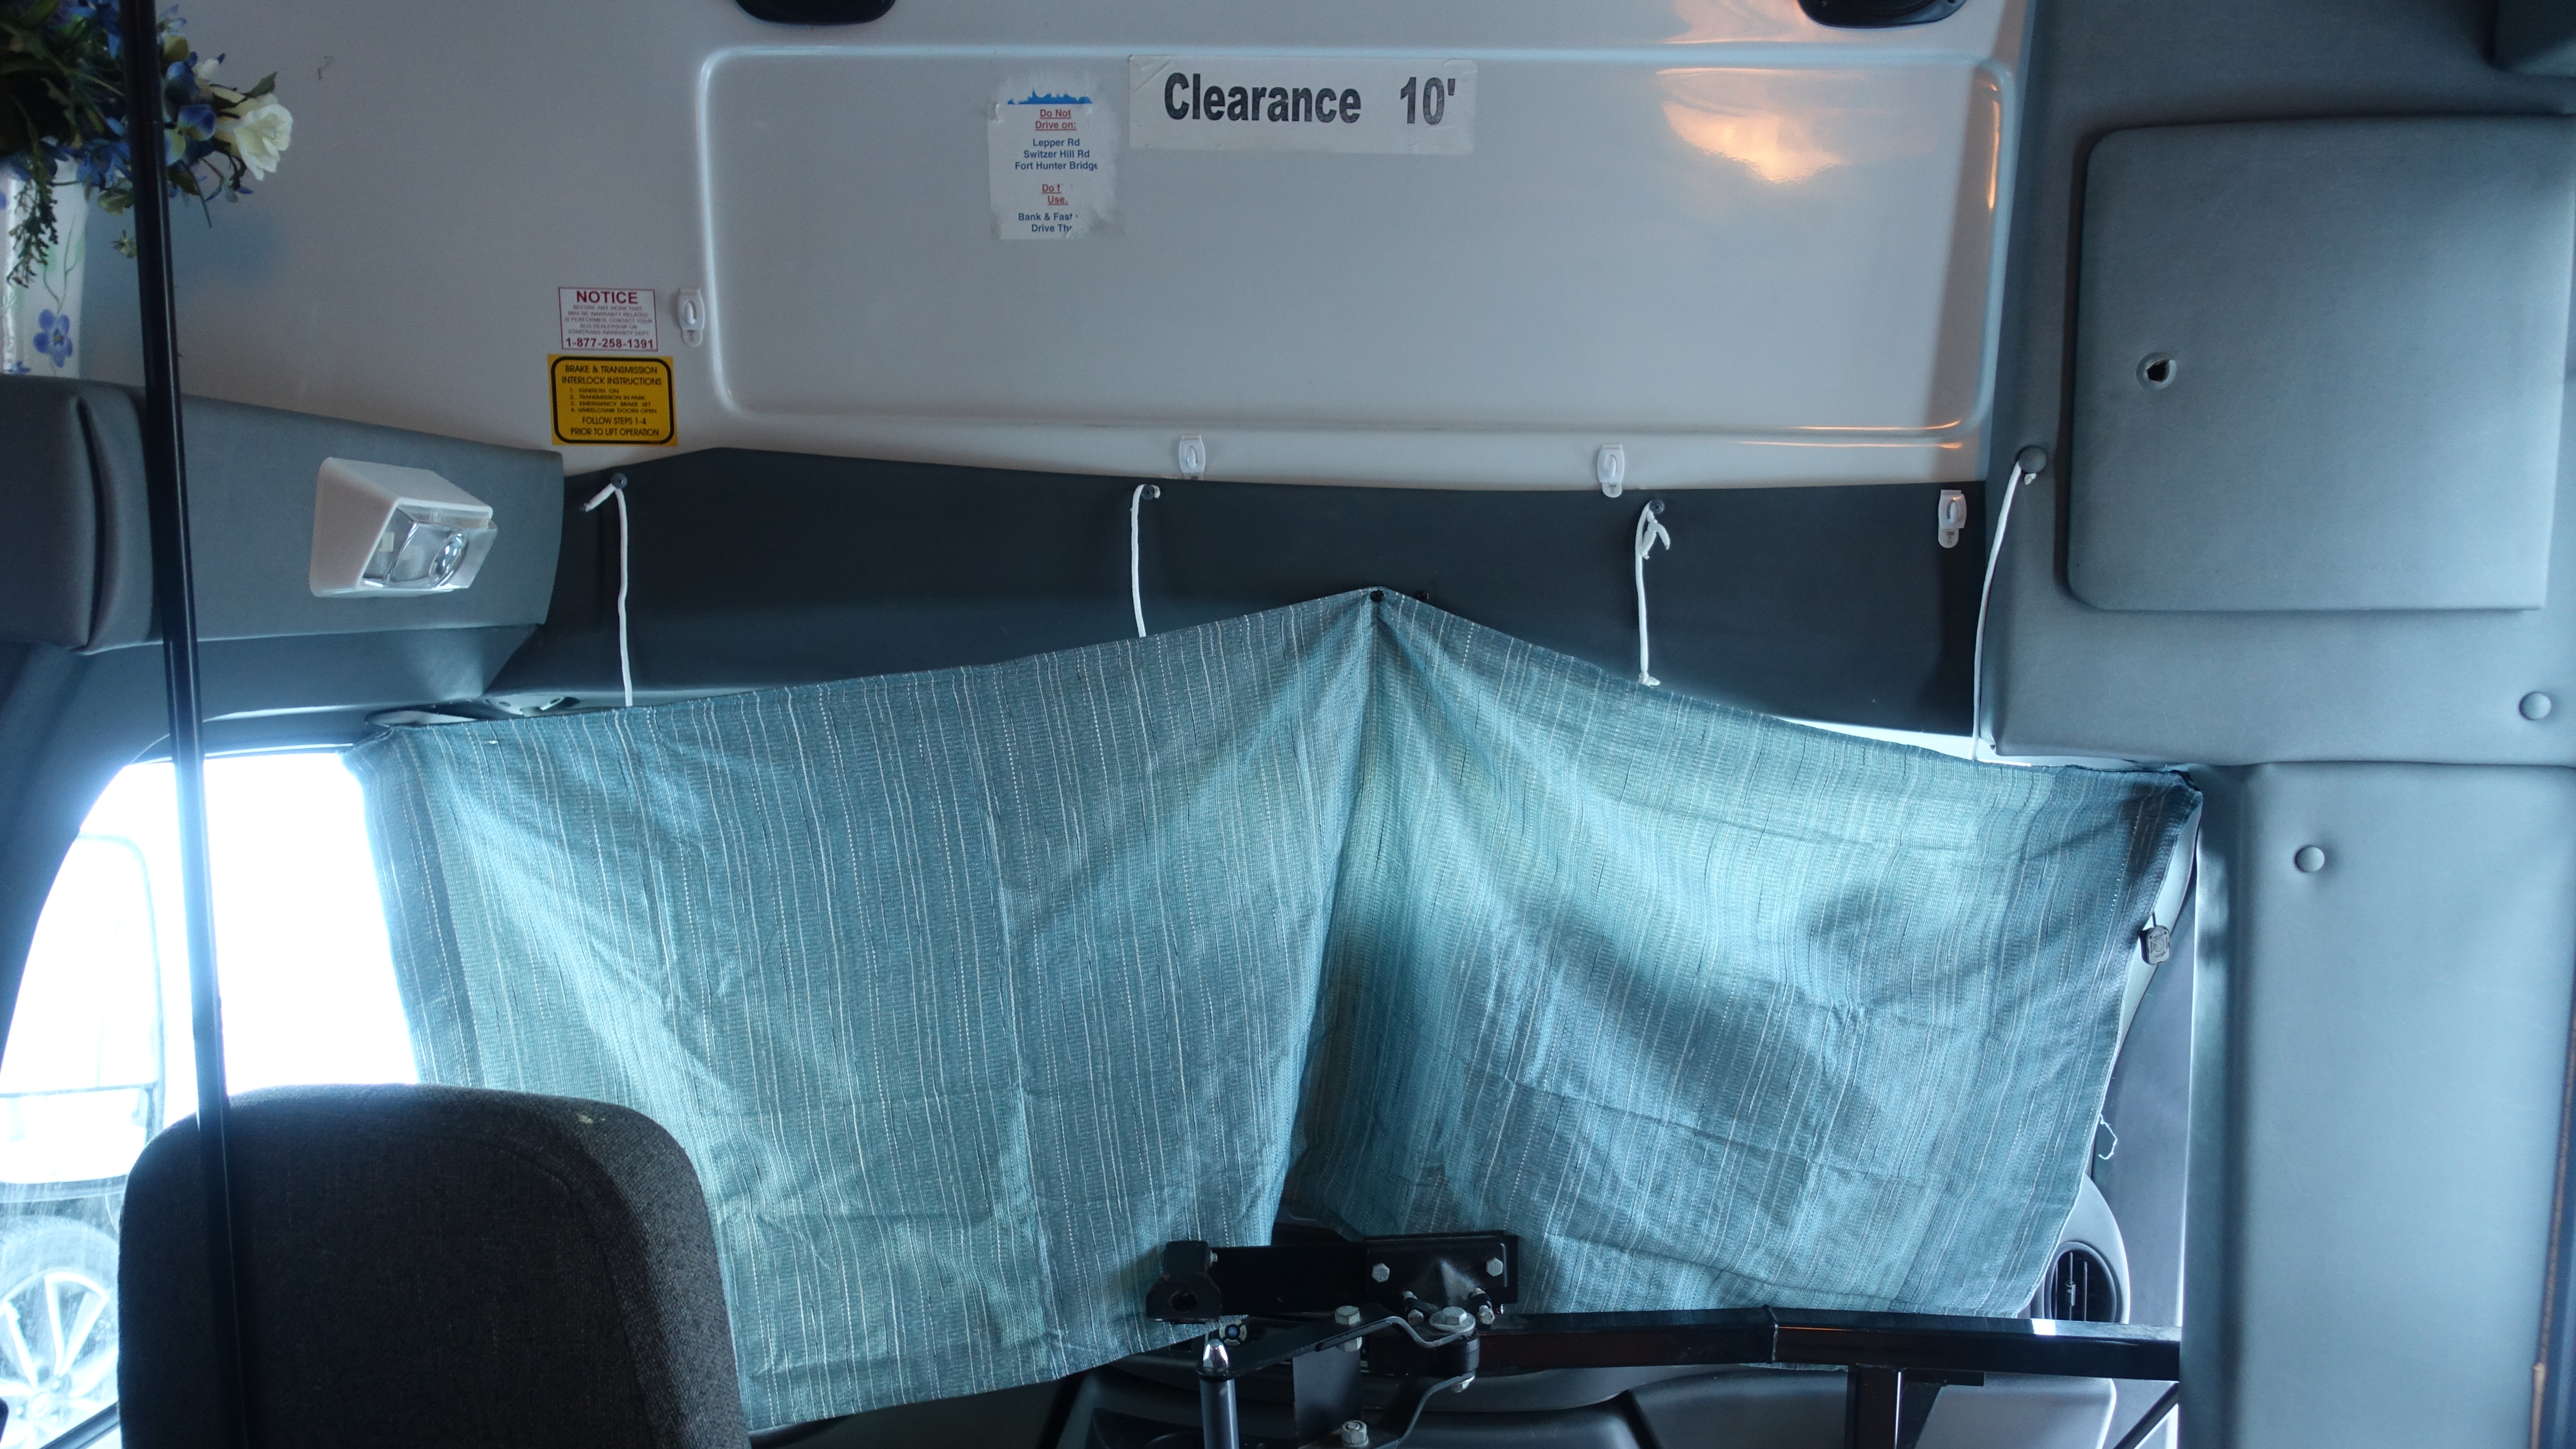
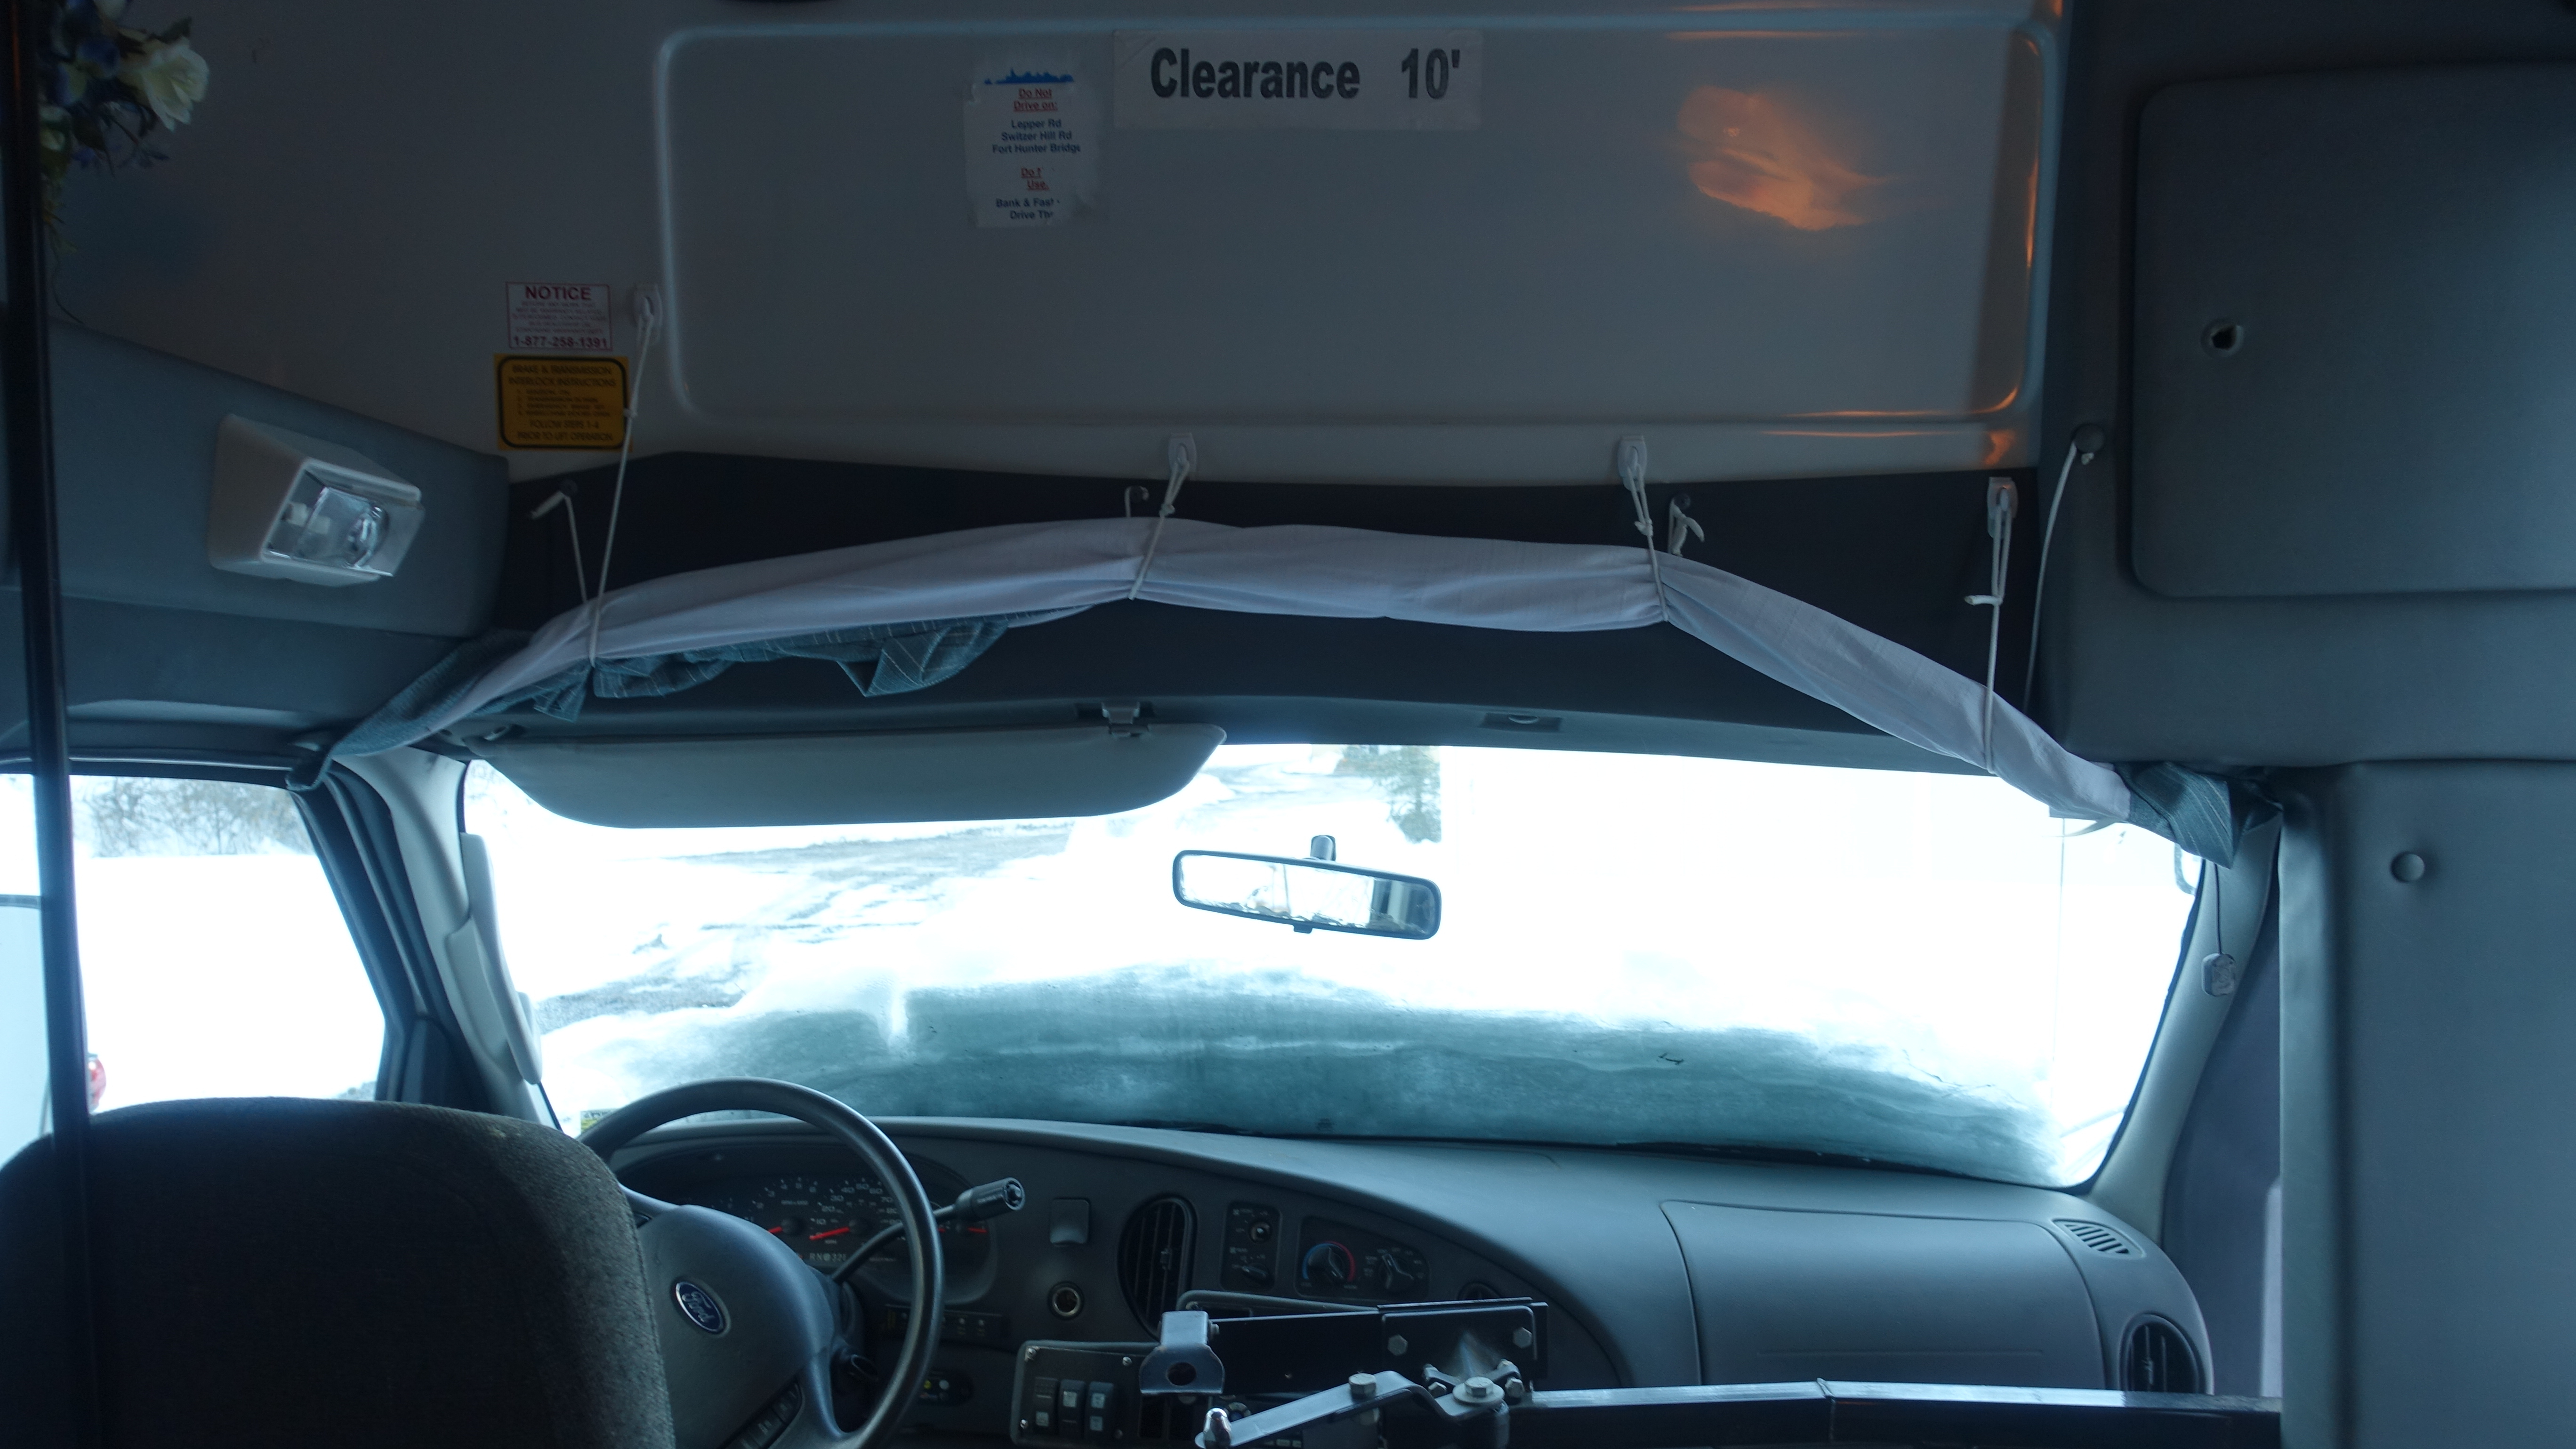
Across the front cab area of the bus, I added a similar drop down curtain that blocks out most light coming through the windshield as well as some privacy as well. Its a pretty simple and inelegant setup, but once again, it gets the job done on a tiny budget. One additional curtain was added over the bus doors, which can be pulled across (like a shower curtain), using the screw and rope method along the inside frame of the door.
Finally, for the summer months, I added a low-wattage dehumidifier to keep things dry, and a thermostat controlled space heater for the colder winter months. Both have done quite well in keeping the interior comfortable during the seasons of upstate New York. I have been pleasantly surprised at how well the space heater keeps the bus warm, despite not adding any additional insulation other than below the floor and behind the rear wall and headboard. Hopefully by next summer I will add the shiplap to the remaining areas to complete the look.
| Item | Cost |
| Rear Door Curtains | $10 |
| Side Window Curtains | $10 |
| Front Window Curtain | $10 |
| Command Hooks and Rope | $15 |
| Bus Door Curtain | $15 |
| Dehumidifier | $35 |
| Duraflame Space Heater | $110 |
| Bedding and Blankets | $40 |
| Assorted decorations | $20 |
| Total | $265 |
Wait – No Bathroom?
If you were skimming this article solely to figure out how the business is done in the van, you may be dissapointed to learn that I chose not to go with a toilet inside the bus, but rather use the one in the house nearby. If you pursue a similar build yourself, you’ll likely be near either a house or a campground with a toilet and shower. If you do want to add this into your build, there are a lot of other resources around the web about portable toilets and compost toilets (which I will likely choose to go with on the next build).
And That’s It!
Well – there you have it! While its by no means perfect, I love how my first build came out and how its functioned so far. I’ve recently started to offer it as an AirBnB to guests needing an overnight after joining on one of my guided hiking trips. Reviews from guests so far have all been quite pleasant, and some have even come back for a second stay.
| Total Costs | |
| Purchase and Delivery | $4,566 |
| Subfloor and Insulation | $367 |
| Wood Flooring | $270 |
| Electric and Safety | $835 |
| Kitchen and Plumbing | $432 |
| Bedroom | $301 |
| Rear Wall and Headboard | $141 |
| Living Area | $130 |
| Lighting | $125 |
| Finishing Touches | $265 |
| Grand Total | $7,432 |
I learned quite a lot throughout the process of building a tiny home on a tiny budget. Resources such as reddit.com/r/vanlife, YouTube videos, various blogs and feedback from friends throughout the build helped me get to the finished product. If you have any questions, feel free to drop a comment, or send me a message at brian@roulette-travel.com.

1 comment